Motorcycle Pants Armor Protection Levels Explained

Choosing the right armor in motorcycle pants isn’t just a gear preference it’s a critical safety decision that can directly impact how well your body absorbs impact during a crash.
As a certified motorcycle safety instructor and gear reviewer who has tested over 200 protective garments from top brands like Dainese, Rev’It, and Klim, I’ve seen firsthand how proper armor can be the difference between minor bruises and serious, life-changing injuries.
Many riders prioritize helmets and jackets but underestimate the importance of leg protection. However, data from the Motorcycle Safety Foundation shows that lower extremity injuries account for nearly 30% of all motorcycle crash injuries.
This makes motorcycle pants with certified armor one of the most important and often overlooked pieces of protective gear.
For everyday riding, motorcycle pants should include at least CE Level 1 armor at the knees and hips. Riders who engage in high-speed, sport, or track riding should strongly consider upgrading to CE Level 2 armor for superior impact absorption.
To ensure real-world protection, armor must comply with recognized safety standards such as EN 1621-1, which specifically governs limb protectors like knees and hips.
In this guide, you’ll learn exactly what CE armor levels mean, how certification standards work, where armor should be placed for maximum protection, and how to choose the best motorcycle pants for your riding style. Whether you’re a beginner or an experienced rider, this breakdown will help you make a confident, safety-first decision backed by proven protection science.
Why It Matters in Moto Pants
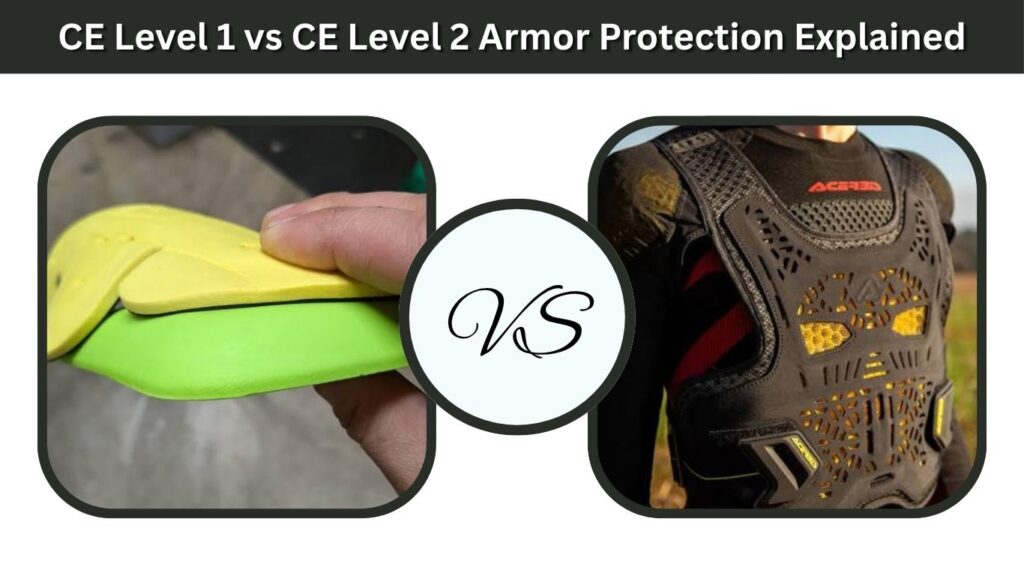
CE armor certification is the European safety standard that defines how well protective inserts absorb and distribute impact energy during a crash.
CE stands for Conformité Européenne, which translates to European Conformity, and it is the most widely recognized armor testing benchmark globally.
Without CE certification, armor inserts in motorcycle pants are essentially decorative foam with no verified protective value. Every serious rider must understand this standard before purchasing any riding pants regardless of price point or brand reputation.
Core reasons CE certification matters:
- Provides independent laboratory verified impact absorption data
- Ensures armor was tested under controlled, repeatable conditions
- Gives consumers a reliable comparison point across different brands
- Required by law in some European countries for riding gear sold as protective
- Certifies specific body zones including knees, hips, and shins separately
CE Level 1 vs CE Level 2 Armor Protection Explained
CE Level 1 and CE Level 2 represent the two tiers of certified armor protection available in motorcycle pants today.
The difference between them is measured in transmitted force, which directly translates to injury severity during real world crashes.
CE Level 1 armor must allow no more than 35 kilonewtons of transmitted force on average during testing, while CE Level 2 armor reduces that threshold to 20 kilonewtons maximum.
This means Level 2 armor absorbs nearly twice the impact energy before that force reaches your body.
| Protection Level | Max Transmitted Force | Best Use Case | Typical Thickness |
|---|---|---|---|
| CE Level 1 | 35 kN average | Commuting, touring, urban riding | 15 to 20mm |
| CE Level 2 | 20 kN maximum | Track days, sport riding, highway | 25 to 35mm |
| No Certification | Unknown | Not recommended for any riding | Varies |
| Racing SAS-TEC or D3O | Below 20 kN | Professional competition | 20 to 30mm |
For most everyday riders, CE Level 1 knee and hip armor provides adequate protection on urban and suburban roads.
Riders exceeding 70 mph regularly, participating in track days, or riding aggressive sport bikes should treat CE Level 2 as the minimum acceptable standard.
Key Armor Placement Zones in Motorcycle Pants
Correct armor placement within motorcycle pants is as critical as the armor certification level itself. Even the best CE Level 2 protector provides zero benefit if it migrates away from the impact zone during a crash.
Motorcycle pants must protect three primary zones: the knees, the hips, and optionally the shins. Each zone has specific anatomical targets that armor must cover precisely to be effective during the sliding and tumbling dynamics of a real motorcycle crash.
The three essential protection zones:
- Knee and patella protection: Armor must center directly over the kneecap and cover the surrounding joint area completely
- Hip and greater trochanter protection: Armor must sit over the hip bone prominence, not drifting toward the thigh or lower back
- Shin protection: Optional but valuable for adventure, off-road, and sport touring riders who face obstacle and debris impacts
How to verify correct armor placement:
- Sit on your motorcycle in full riding position and check that knee armor aligns with your actual kneecap
- Stand normally and confirm hip armor sits over the bony hip prominence not the soft tissue of the upper thigh
- Walk, sit, and crouch while wearing pants to check that armor stays in position through movement
- Look for pants with height-adjustable armor pockets which accommodate different inseam lengths
- Check that armor does not create pressure points that would cause you to shift position while riding
EN 13634 and EN 1621 Armor Standards
The two primary standards governing motorcycle pant armor are EN 1621-1 for limb protectors including knees and shins, and EN 13634 which covers the complete motorcycle footwear and pant system.
Understanding which standard applies to which component helps you read gear labels accurately.
EN 1621-1 is the specific standard for knee and shin protectors in motorcycle pants. It tests impact transmission across multiple strike points and temperature conditions to simulate real crash scenarios. EN 1621-2 applies to back protectors if your pants include one.
What standard labels tell you:
EN 1621-1 Level 1: Certified knee or shin protector meeting basic impact standards
EN 1621-1 Level 2: Certified knee or shin protector meeting advanced impact standards
EN 1621-3: Hip protector standard, newer and increasingly common on quality pants
Year codes after the standard number indicate testing version, with newer years being more stringent
The CE mark alone without the EN number provides no meaningful safety information
External Resource: Read the complete EN 1621 standard overview at FIM’s Safety Technical Guidelines for authoritative technical detail on how motorcycle armor is tested and certified globally.
Hip Armor in Motorcycle Pants: Is It Really Necessary
Hip armor is one of the most overlooked yet critical components in motorcycle riding pants. The hip joint and greater trochanter are among the most commonly fractured areas in motorcycle crashes due to lateral impact during low-side falls.
Hip fractures are catastrophic injuries with long recovery times, high surgical rates, and permanent mobility impacts in severe cases.
Yet many budget and even mid-range motorcycle pants either omit hip armor entirely or include uncertified foam pads that compress to nothing in a real impact.
Hip armor meeting EN 1621-3 Level 1 should be considered mandatory for any rider over age 40 where bone density naturally decreases.
For younger riders, EN 1621-3 Level 1 remains strongly recommended, while Level 2 is ideal for aggressive riding styles.
Signs your pants have inadequate hip protection:
- Hip pockets contain thin foam sheets rather than rigid or semi-rigid armor
- No CE certification label is visible on the hip inserts
- Hip inserts can be easily compressed flat with light hand pressure
- Armor pockets have no adjustment system to position inserts correctly
- Manufacturer describes hip protection as padding rather than armor
What Armor Level Is Right for Your Riding Style
Matching armor protection level to your specific riding style and typical road conditions is the most practical framework for making gear decisions.
A daily urban commuter has different risk exposure than a weekend canyon carver or long-distance tourer.
The speed at which an impact occurs determines how much energy the armor must absorb. Urban riding at 30 to 40 mph creates very different crash dynamics than highway riding at 70 mph or track riding at speeds exceeding 100 mph.
| Riding Style | Minimum Knee Level | Minimum Hip Level | Recommended Standard |
|---|---|---|---|
| Urban Commuting | CE Level 1 | CE Level 1 | EN 1621-1 and EN 1621-3 |
| Touring and Adventure | CE Level 1 | CE Level 1 | EN 1621-1 Level 1 Plus |
| Sport and Supersport | CE Level 2 | CE Level 2 | EN 1621-1 Level 2 |
| Track Days | CE Level 2 | CE Level 2 | Full homologated racing suit |
| Off-Road and Enduro | CE Level 1 Plus Shin | CE Level 1 | EN 1621-1 with shin guards |
| Beginner Riders | CE Level 2 | CE Level 2 | Maximum protection recommended |
Beginner riders are intentionally placed at the highest recommendation because inexperienced riders are statistically more likely to crash during their first two years of riding, and their crash avoidance skills are still developing.
How to Check Armor Certification When Buying Pants
Verifying armor certification before purchase prevents you from paying premium prices for pants that contain uncertified protection inserts. The motorcycle gear market includes many products marketed with safety language that does not reflect actual certified performance.
Certified armor always carries a physical label sewn or attached directly to the protector itself, not just printed in the product catalog or on the hang tag. If you cannot find the certification label on the actual armor insert, treat it as uncertified regardless of what the packaging claims.
Step-by-step certification verification process:
- Remove the armor inserts from the pants before purchasing if possible
- Look for the CE mark and EN 1621 standard number printed or sewn on the insert
- Confirm the level designation shows Level 1 or Level 2 explicitly
- Check the manufacture year on the insert to ensure it meets current standard versions
- Cross-reference the brand and model on the manufacturer’s official website
- Ask the retailer for the Declaration of Conformity document if spending over $200 on pants
- Reject any seller who cannot confirm certification standards for armor included in their products
Top Armor Materials Used in Motorcycle Riding Pants
Modern motorcycle pants use several distinct armor materials, each with different protective characteristics, comfort profiles, and price points. Understanding these materials helps you evaluate gear beyond the CE level label alone.
The most common materials are rigid thermoplastic, viscoelastic foam, rate-dependent foam, and hybrid constructions combining hard shells with soft inner padding. Each material manages impact energy differently and performs differently across temperature ranges.
Leading armor materials and their properties:
- Hard shell thermoplastic with foam backing: Highest impact protection, least comfortable for all-day wear, common in race suits
- Viscoelastic memory foam (D3O style): Flexible during wear, hardens on impact, excellent comfort, used by premium brands
- Rate-dependent polyurethane foam: Lightweight, flexible, widely used in mid-range pants, good CE Level 1 performance
- Hybrid construction: Combines rigid outer shell with soft inner for protection and comfort balance
- Aerated or vented armor: Adds perforation to reduce heat buildup in warm weather riding gear
D3O and similar intelligent polymer materials represent the current high point in armor technology, offering CE Level 2 certification in packages thin enough to wear comfortably under street clothes. These materials are identifiable by their soft, flexible feel at rest that becomes instantly rigid under sudden impact force.
Motorcycle Pant Armor for Women Riders Specific Needs
Women riders face unique challenges with motorcycle pant armor because most protective gear is designed around male body proportions. Hip and knee armor that fits correctly on a male rider will often misalign on female anatomy, reducing protective effectiveness significantly.
The greater hip-to-waist ratio common in female body types means standard armor pocket placement in men’s pants places hip inserts on soft tissue rather than over the greater trochanter bone where protection is needed most. Several brands now offer women-specific motorcycle pants with anatomically repositioned armor pockets.
What women riders should look for specifically:
Pants designed with female anatomical patterns, not simply sized-down men’s cuts
Hip armor pockets positioned higher and wider to align with female hip bone placement
Adjustable knee armor height to accommodate different inseam to knee proportions
Waist cinch systems that allow a fitted waist without sacrificing armor position
Brands offering women-specific fit: Alpinestars Stella line, Rev’It Feminino series, Dainese women’s collection
Motorcycle Pants Armor vs Premium Protection
Price does not always correlate with armor protection level, but it often determines armor quality, retention system design, and how effectively that armor stays in position during a crash. Understanding what your budget buys is essential to making safe choices at every price point.
Pants in the $80 to $150 range typically include CE Level 1 certified knee armor but often omit certified hip protection. Mid-range pants from $150 to $300 usually offer CE Level 1 at both knees and hips. Premium pants above $300 frequently include CE Level 2 as standard equipment.
| Price Range | Typical Knee Protection | Typical Hip Protection | Armor Retention |
|---|---|---|---|
| Under $100 | Uncertified or Level 1 | Usually absent or uncertified | Basic pockets, no adjustment |
| $100 to $200 | CE Level 1 | Sometimes Level 1 | Velcro pockets, limited adjustment |
| $200 to $350 | CE Level 1 to Level 2 | CE Level 1 standard | Adjustable height pockets |
| $350 and Above | CE Level 2 standard | CE Level 2 available | Full adjustment, integrated retention |
The most cost-effective strategy for budget riders is to purchase mid-range pants and immediately replace the included armor with aftermarket CE Level 2 inserts. Replacement knee armor from brands like Knox or SAS-TEC costs $30 to $60 per pair and dramatically upgrades protection in budget pants that have correctly positioned armor pockets.
Upgrading Armor in Existing Motorcycle Pants
Upgrading the armor in your current motorcycle pants is one of the most practical and cost-effective safety improvements available to any rider. Most pants designed by reputable manufacturers include removable and replaceable armor systems specifically to allow this upgrade path.
Before purchasing replacement armor, measure the existing inserts precisely and confirm whether your pants use a universal sizing system or brand-specific inserts. Some manufacturers use proprietary pocket sizes that only accept their own armor range.
Step-by-step armor upgrade process:
- Remove existing armor inserts and measure length, width, and thickness precisely
- Note the CE certification level currently installed and identify the gap you are addressing
- Research compatible aftermarket inserts from Knox Micro-Lock, SAS-TEC, or D3O
- Purchase inserts matching or slightly smaller than your pocket dimensions to ensure proper fit
- Install new armor and confirm it fills the pocket completely without folding or bunching
- Sit on your motorcycle and verify alignment over knee and hip bone landmarks
- Perform the walk, sit, and squat test to confirm armor stays positioned through movement
External Resource: SHARP Helmet Safety Scheme’s guide on motorcycle protective equipment provides authoritative context on how body armor testing connects to real crash injury outcomes.
How Armor Thickness Affects Comfort and Protection
Armor thickness directly influences both impact energy absorption and wearability. Thicker armor absorbs more energy but adds bulk and heat, while thinner armor improves comfort but may reduce protection at the highest impact forces.
Modern materials science has largely addressed this trade-off through intelligent polymers and aerated constructions that deliver CE Level 2 performance in thinner packages than was possible a decade ago.
Understanding thickness-to-protection ratios helps you evaluate whether a premium thin armor is worth its higher cost.
CE Level 1 armor typically ranges from 14 to 22mm in thickness depending on material. CE Level 2 armor using traditional foam construction ranges from 25 to 40mm. Premium rate-dependent polymers like D3O can achieve Level 2 certification at 20 to 25mm, making them significantly more comfortable for full-day wear.
Motorcycle Pants Armor for Hot Weather Riding
Hot weather riding presents a unique armor challenge because heat significantly affects rider behavior. Riders in hot climates frequently remove or wear armor incorrectly to manage thermal discomfort, eliminating protection entirely in exchange for temperature relief.
The solution is selecting pants with vented or perforated armor designed specifically for warm climate riding. Several brands produce mesh motorcycle pants with CE certified armor integrated into fully ventilated designs that maintain protection without the thermal penalty of textile or leather construction.
Hot weather armor strategies:
- Choose pants with perforated or aerated CE certified armor inserts specifically designed for ventilation
- Select mesh pants with integrated armor pockets rather than mesh over-pants worn over unprotected clothing
- Use thin D3O or similar intelligent polymer armor which generates less heat retention than thick foam
- Avoid removing armor because of heat as this eliminates protection during your highest-risk riding moments
- Consider two-piece airbag vest systems worn under mesh pants to add hip and torso protection in extreme heat
- Ride in early morning or evening hours when temperatures permit fuller protection gear
Armor Protection for New and Younger Riders
New riders and younger riders benefit from maximum armor protection because crash probability is statistically highest during the first two years of riding and among riders under 25.
The learning curve of motorcycle operation creates frequent low-speed drops, unexpected slides, and balance errors that benefit directly from well-positioned armor.
Parents purchasing riding gear for teenage riders should insist on CE Level 2 at both knees and hips regardless of how slow or restricted the riding environment appears. Even parking lot drops at low speeds can cause patella fractures without adequate knee protection.
Recommendations for new rider armor selection:
- Minimum CE Level 2 knees and hips from the very first ride
- Choose pants with adjustable armor positions to accommodate growth in teenage riders
- Prioritize armor that stays in position during falls over maximum flexibility
- Consider full motorcycle suits rather than pants alone for maximum protection during the highest-risk learning period
- Enroll in a Motorcycle Safety Foundation beginner course before first road ride to reduce crash probability systematically
Reading Motorcycle Pants Labels and Safety Tags Correctly
Understanding how to read the safety labels on motorcycle pants and their armor inserts empowers you to make independently verified purchasing decisions. Labels contain specific coded information that reveals exactly what protection you are buying.
The main garment label on motorcycle pants should reference the EN 13595 standard for protective clothing or the AA, A, or B classification under newer standards. These letters indicate the level of overall garment abrasion resistance, which complements but is separate from armor impact protection.
Key label elements and what they mean:
- CE mark: Confirms European safety standard compliance
- EN 1621-1 or EN 1621-3: Identifies which body zone the armor protects
- Level 1 or Level 2: Specifies impact performance tier
- Pictogram of body with highlighted protection zone: Shows which areas of the garment are certified
- Four-character alphanumeric code: Identifies the notified body that performed the certification testing
- Manufacturing year: Confirms currency of certification against most recent standard revision
When to Replace Motorcycle Pant Armor Inserts
Armor inserts do not last forever even without a crash. Material degradation, UV exposure, compression fatigue, and age all reduce protective performance over time. Knowing when to replace inserts maintains your protection level without requiring full pants replacement.
Foam-based armor should be replaced every 3 to 5 years regardless of visual appearance because cellular foam compresses and loses recovery ability gradually. D3O and polymer armors last somewhat longer but should be inspected annually for cracking, delamination, or stiffness changes.
Replace armor inserts immediately when:
- Any insert has been involved in a significant impact during a crash
- Foam shows permanent compression, cracking, or crumbling at edges
- The insert no longer fills its pocket fully, indicating it has compressed and shrunk
- Material feels substantially harder or softer than when new, indicating chemical degradation
- Certification label is no longer readable or has detached from the insert
- Manufacturer recommends replacement based on time or mileage guidelines in their documentation
Conclusion
Motorcycle pant armor protection is not a feature to compromise on at any price point or riding level.
CE Level 1 armor at knees and hips represents the absolute minimum for any road riding, while CE Level 2 should be the target for anyone riding above urban speeds or still developing their riding skills.
The combination of correct certification level, precise anatomical placement, quality materials, and regular replacement creates a protection system that genuinely reduces injury severity when crashes occur.
Invest in verified CE certified armor, check it fits correctly on your body before every season, and replace it on schedule regardless of how new it looks.
Your legs carry you through every ride and deserve protection equal to what you give your head.

- Top 10 Best Helmet For A Running Back 2026 - September 16, 2026
- Best Bug Remover For Car Wash 2026 - September 16, 2026
- Best Bug And Bird Poop Remover For Cars 2026 - September 15, 2026