How to Fix a Bike Chain That Slipped Off: Step-by-Step Guide

A slipped bike chain is one of the most common problems cyclists face. It can happen during gear shifting, riding on rough roads, or when the chain is worn or loose.
The good news is that fixing a slipped chain is usually simple and can be done in a few minutes, even without professional tools.
Whether you ride a mountain bike, road bike, or a multi-speed Shimano system, learning how to put the chain back correctly will save time and prevent damage. This guide explains step-by-step methods to fix a slipped bike chain, check for underlying issues, and prevent future problems.
Proper maintenance, smooth gear shifting, and regular inspection will keep your bike running efficiently and reduce the chances of chain slips during rides.
2. Why Does a Bike Chain Slip Off?
A slipping bike chain can be frustrating and unsafe. This problem usually happens when parts of the drivetrain are worn, misaligned, or used incorrectly. Knowing the main causes helps prevent repeat issues and protects your gears.
Common causes of a slipping chain
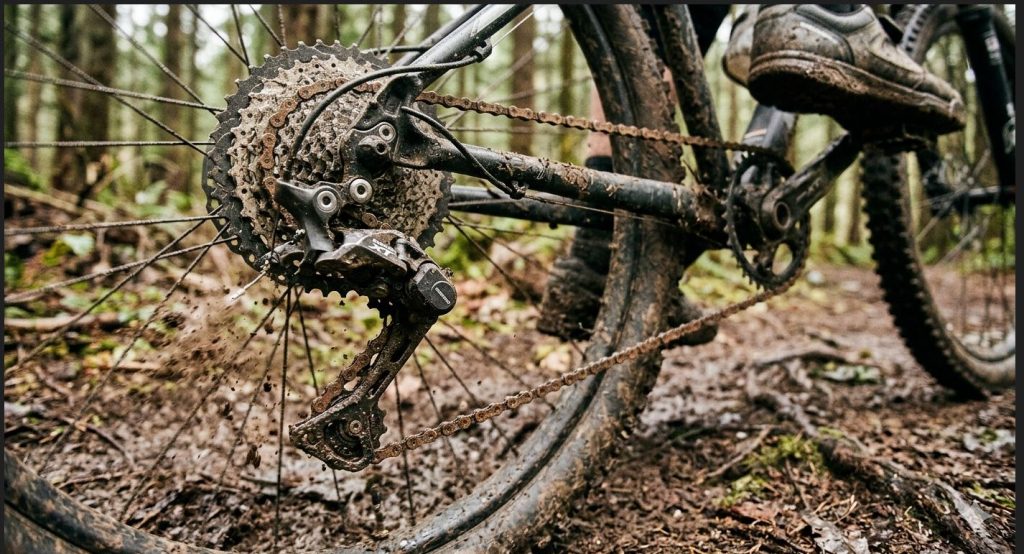
- Worn Chain: Over time, metal links stretch and lose proper fit with the sprockets. This causes the chain to skip or fall off.
- Poor Gear Shifting: Shifting under heavy load or changing gears too fast can push the chain off the cassette or chainring.
- Rough Terrain: Riding on uneven surfaces or hitting bumps can cause sudden chain movement.
- Misaligned Derailleur: A bent or poorly adjusted derailleur does not guide the chain correctly.
- Dirty or Dry Chain: Lack of lubrication increases friction and reduces smooth movement.
According to Shimano, regular inspection and maintenance reduce slipping and improve gear performance.
Table: Causes and Quick Fixes
| Cause | Signs | Quick Fix |
|---|---|---|
| Worn chain | Skipping, noise | Replace chain |
| Poor shifting | Chain drops during gear change | Shift smoothly |
| Rough terrain | Sudden chain movement | Reduce speed |
| Misaligned derailleur | Chain rubs or falls | Adjust alignment |
| Dirty chain | Grinding sound | Clean and lubricate |
3. How to Put the Chain Back on a Bike With Gears
Multi-speed bikes use a derailleur system to move the chain across gears. When the chain falls off, the process to fix it is simple with a calm and careful approach.
Step-by-step process
- Shift to the Smallest Gear: Move the gear shifter to the smallest rear cog. This reduces tension.
- Lift the Rear Wheel: Either use a bike stand or turn the bike upside down.
- Guide the Chain: Place the chain back onto the smallest front chainring and rear cog.
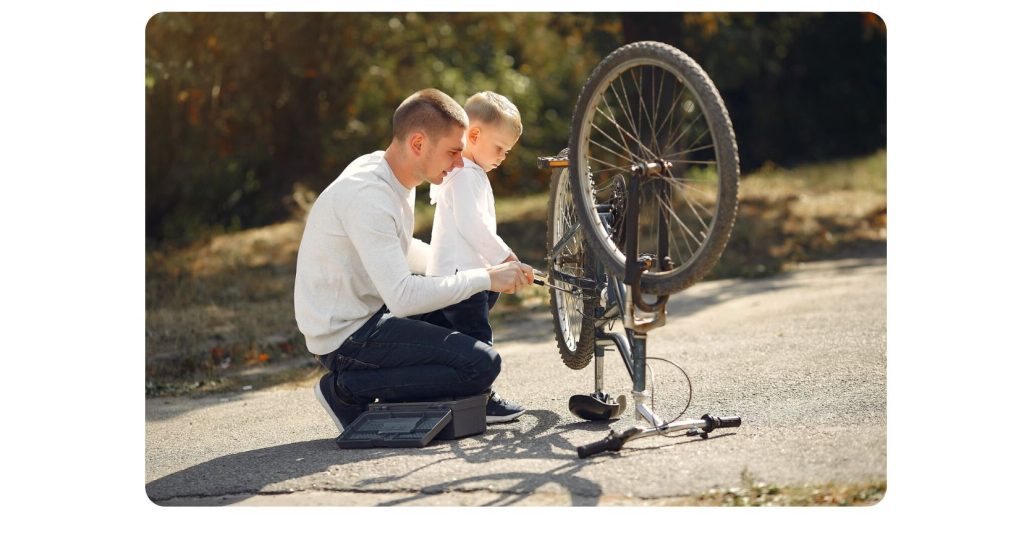
- Pull the Rear Derailleur: Gently pull the derailleur backward to create slack.
- Rotate the Pedals Slowly: Turn pedals forward so the chain settles into the gears.
- Check Alignment: Make sure the chain moves smoothly across gears.
Tips
- Avoid forcing the chain.
- Keep hands away from moving parts.
- Test gear shifting before riding.
This process works for most geared bicycles, including road and mountain bikes.
4. How to Fix a Slipped Shimano Bike Chain
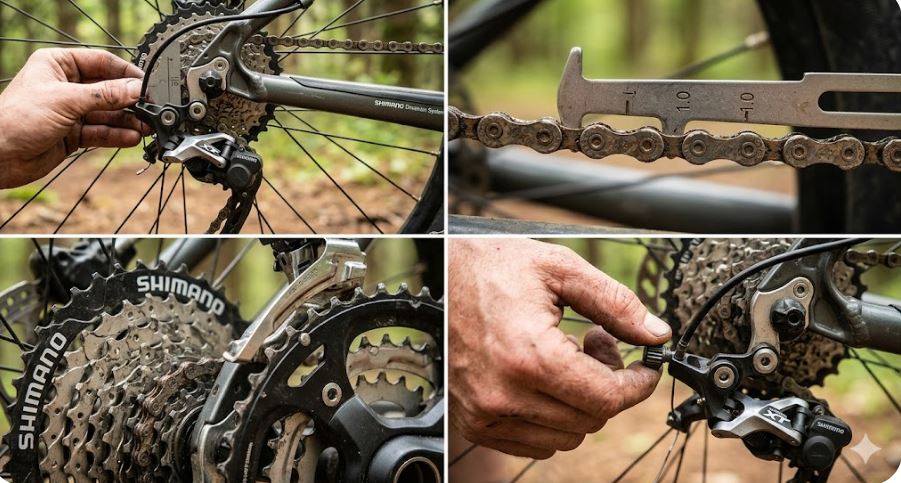
Many bikes use Shimano drivetrain systems. When the chain slips, the problem often relates to alignment, wear, or adjustment.
Inspection checklist
- Check derailleur alignment and hanger position.
- Inspect chain stretch using a measuring tool.
- Examine cassette and chainrings for worn teeth.
- Confirm correct cable tension.
Shimano recommends adjusting limit screws to prevent the chain from moving too far inward or outward.
Fixing steps
- Place the chain on the smallest gear.
- Adjust the high and low limit screws.
- Fine-tune cable tension using the barrel adjuster.
- Clean and lubricate the chain.
- Test shifting under light pedaling.
Regular servicing improves performance and prevents chain drops.
Table: Shimano Chain Problems
| Problem | Solution |
|---|---|
| Chain drops off | Adjust limit screws |
| Slow shifting | Increase cable tension |
| Skipping gears | Replace worn parts |
| Noise during riding | Clean and lubricate |
5. How to Put a Chain Back on a Bike Without Gears
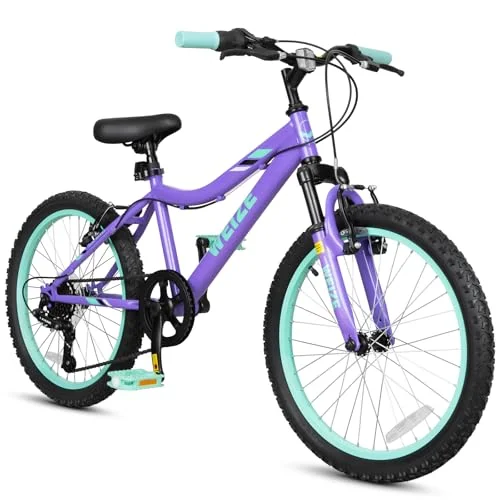
Single-speed bikes, children’s bikes, and some urban models have a simple drivetrain. The repair process is quicker.
Steps
- Turn the bike upside down.
- Place the chain onto the rear sprocket.
- Pull the rear wheel backward to create tension.
- Position the chain on the front chainring.
- Rotate the pedals slowly to align the chain.
- Tighten the rear axle to secure tension.
Key points
- Keep the chain straight.
- Ensure the wheel stays centered.
- Check tension before riding.
Single-speed bikes rely on proper wheel positioning for correct chain tension.
6. How to Fix a Bike Chain That Slipped Off Without Tools
Sometimes a chain slips during a ride when no tools are available. You can still fix it temporarily and continue safely.
Simple roadside methods
- Manual Reinstallation: Place the chain back onto the gears and rotate the pedals.
- Reduce Tension: Shift to the smallest gear to make installation easier.
- Check for Damage: If a link is bent, gently straighten it by hand.
- Ride Carefully: Use light pedaling until you reach home.
Safety tips
- Avoid riding aggressively after a temporary fix.
- Clean and inspect the chain later.
- Replace worn parts soon.
How to Put Back a Chain on a 7-Speed Bike
A 7-speed bike sits in the middle ground between a single-speed and a modern high-speed drivetrain. It has a rear derailleur, a cassette with seven cogs, and a single or double front chainring. The chain is narrower than a single-speed chain but wider than chains used on 9, 10, or 11-speed systems.
Pain point: Riders treat a 7-speed chain reattachment the same as a single-speed fix. They skip the derailleur routing step entirely. The chain sits on the sprocket but bypasses the jockey wheels. It drops again within 100 metres.
The key difference on a 7-speed bike is the derailleur. The chain must pass through both jockey wheels every single time you reattach it. Miss this step and nothing else matters.
Step-by-Step for a 7-Speed Bike
Step 1 Shift to the smallest gears Use the right-hand shifter to move to the smallest rear cog. If you have a front derailleur, shift to the smallest front chainring too. This creates slack and gives you room to work.
Step 2 — Create derailleur slack Push the rear derailleur cage forward with your hand. This releases tension in the lower run of chain. Hold it forward while you position the chain with your other hand.
Step 3 — Route chain through both jockey wheels Feed the chain through the upper jockey wheel first, then the lower jockey wheel. The chain sits in the groove of each wheel. This is the most important step on any geared bike. Get this right and everything else follows naturally.
Step 4 — Seat chain on smallest rear cog Loop several links of chain onto the smallest rear cog while maintaining derailleur slack with your other hand.
Step 5 — Loop onto front chainring Bring the front section of chain onto the smallest front chainring. A few links is enough to start.
Step 6 — Rotate pedals slowly forward Turn the cranks by hand in the forward direction. One full rotation seats the chain completely on both sprockets. Keep it slow rushing causes the chain to pop off the rear cog before it seats.
Step 7 — Test all seven gears Shift through all seven rear gears slowly while turning the pedals by hand. The chain should move cleanly to each cog without hesitation or skipping.
| Step | Action | Why It Matters |
|---|---|---|
| 1 | Shift to smallest gears | Creates slack — essential first step |
| 2 | Push derailleur cage forward | Releases chain tension for easier routing |
| 3 | Route through both jockey wheels | Chain will drop without correct routing |
| 4 | Seat on smallest rear cog | Starting point for chain seating |
| 5 | Loop onto front chainring | Connects both ends of the chain path |
| 6 | Rotate pedals forward slowly | Seats chain fully on both sprockets |
| 7 | Test all seven gears | Confirms correct routing and tension |
Pro tip for 7-speed bikes: The 7-speed chain is compatible with 6 and 8-speed chains in most cases. If your chain snaps on the road and you only have an 8-speed quick link available it will work as a temporary fix. Replace it with a correct 7-speed chain as soon as possible.
How to Fix a Slipped Bike Chain While Riding
Your chain slips mid-ride. You are moving. Your pedals suddenly spin free. Your balance shifts. This is one of the most startling mechanical experiences in cycling and it happens to everyone eventually.
Pain point: Riders panic and grab the brakes hard. A sudden stop on a slipped chain can throw you forward. The correct response is to ease off the pedals immediately and coast to a safe stop. Braking hard while pedalling on a slipped chain is a genuine crash risk.
What to Do the Moment It Happens
- Stop pedalling immediately do not try to force the chain back by pedalling harder
- Coast to a stop apply brakes gently and progressively
- Move to the side of the road get clear of traffic before dismounting
- Do not look down while still moving focus on stopping safely first
Emergency Roadside Fix No Tools Needed
Once stopped safely follow these steps:
On a single-speed or 3-speed internal hub:
- Flip the bike upside down
- Lift the chain and place it back on the rear sprocket
- Loop it onto the front chainring
- Rotate pedals slowly to seat it fully
- Back on the road in under two minutes
On a geared bike (7-speed, 8-speed, derailleur):
- Shift to the smallest gears before touching the chain
- Push derailleur cage forward to create slack
- Re-route chain through both jockey wheels
- Seat on rear cog and front chainring
- Rotate pedals slowly to confirm seating
- Test shift before riding
When a Roadside Fix Is Not Safe
| Situation | Risk Level | Action |
|---|---|---|
| Chain slipped once — no damage | Low | Fix and ride on |
| Chain slipped and has a bent link | Medium | Fix and ride carefully to home or shop |
| Chain slipped and derailleur is bent | High | Do not ride — call for help or walk |
| Chain slipped going downhill at speed | High | Inspect everything before riding again |
| Chain slipped and jammed between frame and sprocket | Medium-High | Clear carefully — check for damage |
Quick tip: If the chain slips repeatedly on the same ride it is telling you something is wrong. A one-off slip is bad luck. Two slips in the same ride is a mechanical issue. Three slips means you walk or call for support.
How to Fix a Bike Chain That Is Stuck or Jammed
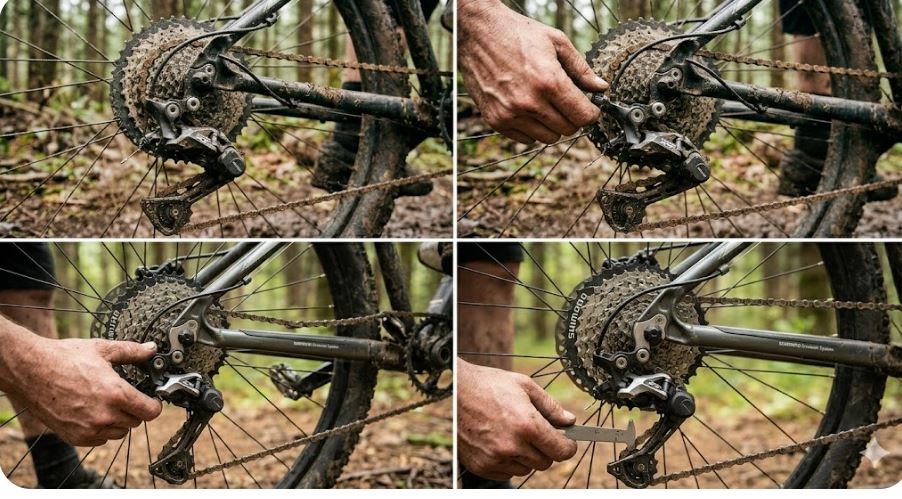
A jammed chain is different from a dropped chain. A dropped chain comes off the sprocket cleanly. A jammed chain gets wedged between the frame and the chainring, between the cassette and the derailleur, or tangled around the axle. It requires a different approach and more patience.
Pain point: Riders yank a jammed chain with force. This bends links, damages the derailleur, and sometimes scores the frame. A jammed chain needs releasing not forcing.
Step 1 Release All Tension First
Before you pull anything, create as much slack as possible:
- Shift to the smallest gears if the derailleur still functions
- Push the rear derailleur cage forward manually
- Turn the cranks slightly backward if the chain is jammed at the front
Never pull a jammed chain while the drivetrain is under tension. Release the tension first. Always.
Step 2 — Identify Where It Is Jammed
| Jam Location | How It Looks | Cause |
|---|---|---|
| Between chainring and frame | Chain wedged on inner side of front ring | Chain dropped inward — too small a gear |
| Between cassette and spokes | Chain partially in spokes | Derailleur limit screw issue |
| Around the bottom bracket | Chain wrapped around axle area | Severe dropped chain with continued pedalling |
| Through derailleur body | Chain bypassed jockey wheel and jammed | Incorrect routing after previous repair |
| Between cog and derailleur | Chain folded between largest cog and derailleur | Limit screw out of adjustment |
Step 3 — Check Derailleur Alignment
A jammed chain at the cassette end usually points to a derailleur alignment issue. The most common cause is a bent derailleur hanger pushing the derailleur too close to the spokes or too far from the cassette.
- Look at the rear derailleur from directly behind the bike
- The derailleur body should sit parallel to the cassette — not angled inward or outward
- If it looks twisted or bent do not force the chain back — the hanger needs straightening first
Step 4 Remove Debris if Present
Mud, sticks, and small stones commonly jam mountain bike chains. Inspect the jockey wheels, derailleur cage, and cassette gaps for debris before reattaching the chain. A small stick lodged between the cassette cogs can jam the chain repeatedly until it is removed.
- Use a thin stick or pen to clear debris from between cassette cogs
- Wipe jockey wheels clean with a rag
- Check the derailleur cage for bent sections that could catch the chain
Step 5 — Work the Chain Free Gently
Once tension is released and alignment is checked, work the chain free with your fingers using a gentle rocking motion. Move it back and forth slightly rather than pulling in one direction. In most cases the chain will come free within 30 seconds.
Signs Your Bike Chain Needs Replacement
Tightening and reattaching only work on a chain that is fundamentally sound. A worn-out chain is a safety risk and a false economy. Knowing when to stop repairing and start replacing saves your cassette, your chainrings, and eventually your knees.
Pain point: Riders replace chains only when they snap. By that point the cassette and chainrings are already damaged by the worn chain. Replace the chain proactively and you protect the whole drivetrain.
The Key Warning Signs
Chain stretch beyond the wear limit: Use a chain wear indicator tool. Insert it at any point along the chain.
| Reading | Chain Condition | Action |
|---|---|---|
| 0.0 to 0.5 | Good condition | Continue riding — check again in 300 miles |
| 0.5 to 0.75 | Moderate wear | Replace soon — before cassette damage begins |
| 0.75 and above | Worn out | Replace immediately |
| Tool drops in freely | Severely worn | Replace chain and cassette together |
Skipping gears under pedalling pressure: If the chain skips on specific gears when you apply hard effort the cassette teeth are worn to match the old stretched chain. A new chain skips on a worn cassette. Replace both together.
Excessive rust:
- Surface rust that wipes off with a cloth — clean and lubricate, continue riding
- Rust that has pitted the metal plates — replace immediately
- Rust inside the links causing stiffness — replace immediately
- Orange-brown rust visible on every link — replace immediately
Stiff or frozen links: Work a stiff link side to side with your fingers. If it loosens it is probably just under-lubricated. If it stays stiff after lubrication and manipulation the internal components are corroded or damaged. A stiff link skips every time it passes through the jockey wheels. Replace the chain.
Repeated loosening after tightening: A chain that keeps going loose on a single-speed after correct axle adjustment is too long or too worn to maintain tension. Measure the chain length against a new chain. If it is more than half an inch longer over 12 inches of chain it is past its service life.
Common Mistakes to Avoid When Fixing a Bike Chain
Most chain repair failures come from a small set of repeated mistakes. Knowing what they are saves you time, money, and roadside frustration.
Pain point: Riders fix the chain correctly but make one small error — wrong gear position, missing a jockey wheel, over-tightening. The chain drops again within minutes and they assume the fix failed when the fix was actually correct but the setup was wrong.
The Most Common Mistakes
Forcing the chain onto the sprocket: Pushing or jamming the chain onto a cog without proper alignment bends links and damages sprocket teeth. The chain should seat with gentle hand pressure and pedal rotation. If it requires force something is misaligned.
Not shifting to the smallest gears first: Attempting to reattach a chain without shifting to the smallest gears first means the derailleur is under full spring tension. The chain is tight and difficult to route. This single step eliminates 80 percent of the difficulty in geared bike chain reattachment.
Missing a jockey wheel: Routing the chain through only one jockey wheel instead of both looks fine at a glance. The chain sits on the sprockets and rotates when you turn the pedals. Then it drops under the first gear change. Always confirm both jockey wheels are engaged before testing.
Ignoring a bent or damaged link: Reattaching a chain that has a bent link in it delays the inevitable. A bent link will cause skipping, chain drop, and potential derailleur damage. Remove and replace the bent link before reattaching. Two minutes now saves a full repair later.
Over-tightening on single-speed bikes: A chain with zero slack feels secure. It is not. An over-tight chain puts excessive load on the bottom bracket bearings, rear hub bearings, and chain itself. Half an inch of play is the correct target — always.
Using the wrong quick link speed: A 9-speed quick link on a 10-speed chain is a safety failure waiting to happen. Always match the quick link to the exact chain speed. When in doubt check the chain model number printed on the outer plate.
| Mistake | Consequence | Prevention |
|---|---|---|
| Forcing chain onto sprocket | Bent links, damaged teeth | Align properly — use pedal rotation to seat |
| Skipping smallest gear shift | Chain too tight to route correctly | Always shift small-small before starting |
| Missing jockey wheel | Chain drops on first gear change | Visually confirm both wheels engaged |
| Reattaching with bent link | Skipping and derailleur damage | Inspect chain before reattaching |
| Over-tightening single-speed | Bearing wear, chain fatigue | Check half-inch slack after tightening |
| Wrong quick link speed | Link failure under load | Always match quick link to chain speed |
Maintenance Tips to Prevent Chain Slipping
The best chain repair is the one you never need. A well-maintained chain on a correctly adjusted drivetrain almost never drops, jams, or breaks. These habits take minutes per week and extend chain life by hundreds of miles.
Pain point: Riders clean and lube their chain only when it starts making noise. By then the damage is already done. The chain is dry, the links are wearing fast, and the cassette has started to follow.
Lubrication
- Apply lubricant to the inner rollers of the chain — not the outer plates
- Wipe off all excess immediately after application — excess lube attracts dirt
- Use dry wax lube in dry conditions — reapply every 60 to 100 miles
- Use wet lube in rain and mud — reapply every 150 to 200 miles
- Never lubricate a dirty chain — the lube locks in grit and accelerates wear
- Clean the chain first with a degreaser and chain cleaning tool, then lubricate
Cleaning
- Clean the chain every 150 to 200 miles in normal conditions
- Clean after every wet or muddy ride without exception
- Use a chain cleaning device with degreaser for the quickest and most thorough result
- Wipe each link with a clean cloth after degreaser treatment
- Allow to dry fully before applying fresh lubricant
Regular Inspection
Check these things every two weeks or every 150 miles whichever comes first:
| Component | What to Check | How Often |
|---|---|---|
| Chain wear | Use chain checker tool | Every 300 miles |
| Chain links | Look for bent, stiff, or cracked links | Every 150 miles |
| Jockey wheels | Check for wear and debris | Monthly |
| Cassette teeth | Look for hook-shaped or pointed teeth | Every 500 miles |
| Chainring teeth | Check for shark-fin shaped wear | Every 1,000 miles |
| Derailleur hanger | Check alignment visually | After any crash or knock |
| Cable tension | Test shifting accuracy | Monthly |
Gear Shifting Habits
Good habits prevent more chain drops than any tool or adjustment:
- Ease off pedalling pressure slightly before shifting gears — let the chain move under reduced load
- Avoid cross-chaining — big front ring with big rear cog, or small front ring with small rear cog
- Shift one gear at a time rather than jumping multiple gears at once under load
- Anticipate hills and shift before the gradient increases — not when you are already struggling
When to See a Professional Bike Mechanic
Most chain issues are home-fixable. Some are not. Knowing the difference saves you from making a small problem significantly worse.
Pain point: Riders attempt to straighten a bent derailleur hanger by hand without an alignment tool. They either make it worse or think it is straight when it is not. A slightly misaligned hanger causes persistent chain issues that no amount of cable adjustment will fix.
Go to a Mechanic When You Have:
A bent derailleur hanger: You can identify a bent hanger visually — the derailleur looks twisted or angled away from the cassette when viewed from behind. Do not attempt to bend it back by hand. A derailleur hanger alignment tool is required for an accurate fix. Most bike shops will straighten or replace a hanger in under 15 minutes for a small fee.
A bent derailleur body: If the derailleur cage itself is bent — not just the hanger — it needs professional assessment. A bent cage affects chain routing through the jockey wheels and cannot be accurately corrected by hand.
A damaged frame dropout: The dropout is the slot in the frame where the rear axle sits. A cracked or bent dropout is a structural frame issue. Do not ride the bike until a mechanic has assessed whether the frame is safe.
Persistent ghost shifting: If the chain jumps gears unprompted and adjusting cable tension and limit screws does not solve it the issue may be inside the shifter mechanism or in the cassette body. Both require specialist tools and knowledge.
Full drivetrain wear: If the chain, cassette, and chainrings all need replacing at the same time a mechanic can do the whole job correctly in one visit. Replacing these components in the wrong sequence causes immediate compatibility issues.
| Situation | DIY Possible? | See a Mechanic |
|---|---|---|
| Chain dropped once — no damage | Yes | Not needed |
| Chain dropped repeatedly | Yes — check hanger first | If hanger is bent |
| Bent derailleur hanger | Only with alignment tool | Recommended |
| Bent derailleur body | No | Yes — immediately |
| Cracked frame dropout | No | Yes — immediately |
| Persistent ghost shifting | Partially | If cable adjustment fails |
| Full drivetrain replacement | Possible but complex | Recommended |
Frequently Asked Questions About Slipped Bike Chains
Why does my bike chain keep slipping off?
The most common causes are a chain that is too long, a worn cassette, a bent derailleur hanger, or incorrect derailleur limit screw adjustment. A chain that slips once is usually bad luck. A chain that slips repeatedly has a mechanical cause that needs diagnosing and fixing rather than just reattaching each time.
Can I fix a slipped chain without tools?
Yes — on most bikes. A dropped chain on a single-speed or geared bike can be reattached by hand in under two minutes. Shift to the smallest gears, push the derailleur cage forward, route the chain through the jockey wheels, and rotate the pedals slowly. No tools needed for a simple drop.
How do I stop my chain from slipping on a 7-speed bike?
Check the rear derailleur limit screws first. The H screw controls how far the derailleur moves toward the smallest cog. The L screw controls movement toward the largest cog. If either is out of adjustment the chain overshoots the cog and drops off. Adjust in quarter-turn increments and test shift after each adjustment.
Is it safe to ride with a slipped chain?
No. A slipped chain means the drivetrain is not functioning correctly. Attempting to pedal with a dropped chain can jam the chain between the frame and chainring, lock the rear wheel, or cause a crash. Always stop safely and fix the chain before continuing to ride.
How long does a bike chain last?
A road bike chain typically lasts 1,000 to 1,500 miles. A mountain bike chain lasts 750 to 1,000 miles due to harsher conditions. A commuter chain lasts 12 to 18 months depending on mileage and maintenance. Checking chain wear with a chain checker tool every 300 miles is the most reliable way to know when replacement is due.
What causes a bike chain to keep falling off on one specific gear?
If the chain drops consistently on one specific gear the cassette tooth on that cog is likely worn. Worn teeth develop a hook shape that grabs the chain and then releases it suddenly. Replace the chain and cassette together. If the problem persists after replacement the derailleur limit screw for that cog range needs adjustment.
Should I replace the cassette when I replace the chain?
Not always. If the chain reads below 0.75 on a wear indicator and you replace it at the right time the cassette should be fine with a new chain. If the chain has worn past 0.75 and been ridden for a significant period replace both together. A new chain on a heavily worn cassette skips immediately because the tooth profile no longer matches the new chain spacing.
How do I know if my derailleur hanger is bent?
Stand behind the bike and look at the rear derailleur from directly behind. The derailleur body should sit perfectly parallel to the cassette not angled inward or outward. If it looks twisted, skewed, or if the upper jockey wheel does not align directly below the cassette cog you are in, the hanger is likely bent. A professional derailleur hanger alignment tool gives a definitive answer.

- 10 Best Jack For Ford Raptor Review (October 2026) - October 12, 2026
- 10 Best Jack For Ford Ranger Review (October 2026) - October 12, 2026
- 10 Best Jack For F350 Review (October 2026) - October 12, 2026