How to Fix a Broken Bicycle Chain: Step-by-Step Guide

A broken bicycle chain can happen at the most inconvenient times, but fixing it doesn’t have to be difficult.
Whether you’re on a long ride or at home, understanding how to repair or reconnect your chain quickly is essential for getting back on the road.
Chains can snap, twist, or come off the gears, and each issue requires slightly different techniques. With the right tools or sometimes even without them you can restore your bike to smooth, safe operation.
This guide covers step-by-step methods for fixing broken chains, including DIY solutions for Shimano chains, twisted chains, and ways to repair your bike without special tools.
2. Tools You Need to Repair a Bicycle Chain
Repairing a bicycle chain requires a few essential tools to make the job safe and efficient. Having the right equipment ensures that you can handle common chain issues, from a simple link removal to a complete replacement.
Essential Tools
- Chain Tool: The most important tool for breaking and reconnecting chain links. A chain tool pushes out the pins in your chain for removal or replacement.
- Replacement Pins: Many chain repairs need new pins, especially for chains that use special quick-link pins or when the original pin gets damaged.
- Pliers: Useful for handling quick links or for small adjustments in tight spots. Needle-nose pliers are ideal.
- Bike Stand (Optional): Keeps your bike elevated, making it easier to rotate the pedals and access the drivetrain. Not necessary for every repair but can speed up the process.
Additional Helpful Items
- Chain Lubricant: Essential after reinstallation to keep the chain moving smoothly and prevent rust.
- Rag or Cleaning Cloth: For cleaning the chain before or after repairs.
- Gloves: Protect hands from grease and sharp edges.
Having these tools ensures you are prepared for most chain-related repairs and maintenance tasks.
3. How to Fix a Broken Bicycle Chain Without Tools
Emergencies sometimes happen on the road or trail when you don’t have a chain tool. Luckily, you can temporarily fix a chain to reach safety or home.
DIY Emergency Fixes
- Using a Quick Link: Many modern chains come with a master or quick link. If the chain breaks, you can reconnect it by hand using the quick link, even without pliers.
- Removing a Damaged Link: If a single link is bent or damaged, you can remove it with your hands or two strong objects (like screwdrivers) to push the pin out. The chain will be slightly shorter but usable temporarily.
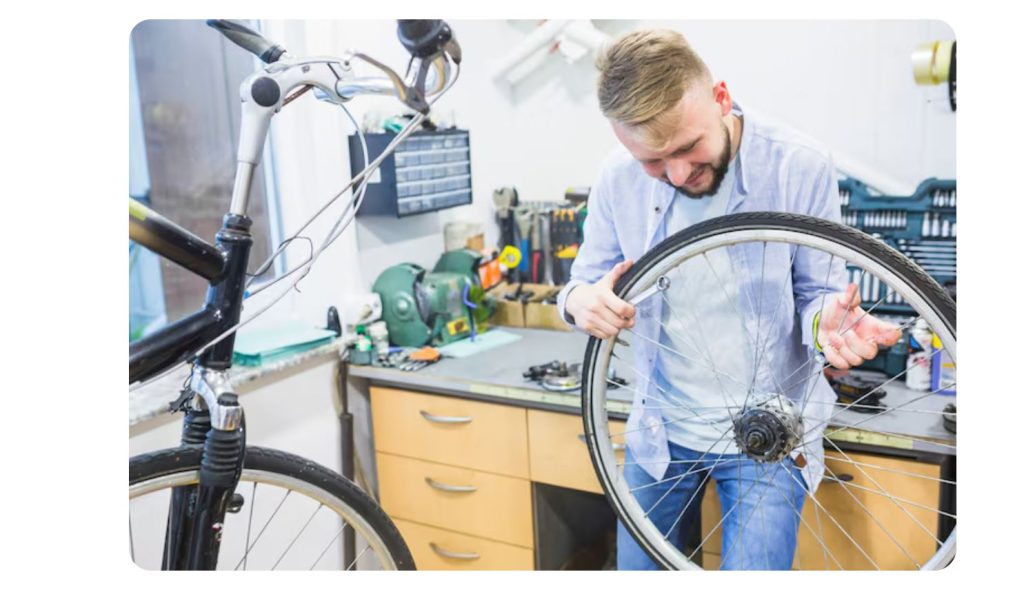
- Twisting and Aligning Links: If the chain has come off but isn’t broken, manually twisting the links back into alignment allows the chain to run until you can repair it properly.
These methods are temporary solutions. After reaching home or a bike shop, replace the damaged links or reinstall the chain properly using a chain tool for safety.
4. How to Fix a Snapped Bicycle Chain
A snapped chain means one or more links have completely separated. Repairing this requires careful handling to avoid further damage.
Steps to Fix a Snapped Chain
- Identify the Broken Link: Check if the break is at a single link or multiple links.
- Remove Damaged Links: Using a chain tool, push the pins out of the broken section. This prevents the damaged portion from interfering with chain rotation.
- Rejoin the Chain: Use a replacement pin or quick link to reconnect the chain. Make sure the pin is fully seated and the link moves freely.
- Test Movement: Rotate the pedals backward to ensure smooth operation. Check for stiff links that may need flexing by hand.
- Lubricate: Apply chain lubricant to prevent rust and reduce friction.
Snapped chains are common under high tension, such as uphill cycling or shifting under load. Regular chain maintenance helps reduce the risk.
5. How to Fix a Twisted Bicycle Chain
A twisted chain occurs when the links get rotated or misaligned. Twists often happen during derailleur issues, improper installation, or when the chain falls off.
Causes of a Twisted Chain
- Dropping the chain while pedaling
- Over-tensioning during installation
- Derailleur misalignment
Steps to Fix a Twisted Chain
- Remove the Chain: If the twist is severe, remove the chain using a chain tool or quick link.
- Straighten Links: Lay the chain flat and rotate the twisted link so it aligns with the rest. Hand pressure is usually sufficient.
- Reinstall Chain: Place the chain back on the chainring and cassette. Ensure it runs smoothly over the gears.
- Check Movement: Rotate the pedals backward, ensuring no stiff or misaligned links remain.
Twisted chains can wear down faster and affect shifting. Fixing them promptly prevents further damage.
Table: Bicycle Chain Repair Summary
| Issue | Tools Needed | Steps | Notes |
|---|---|---|---|
| Broken Chain | Chain tool, replacement pins, pliers | Remove damaged link, reinstall with pin or quick link, lubricate | Test before riding |
| Snapped Chain | Chain tool, replacement pins | Identify break, remove damaged links, reconnect, lubricate | Check for stiff links |
| Twisted Chain | Hands, chain tool (optional) | Remove chain if needed, straighten links, reinstall | Inspect for wear |
| No Tools Emergency Fix | Quick link or manual removal | Reconnect or remove damaged link, ride to safety | Temporary solution only |
How to Put a Bicycle Chain Back on With Gears
Reattaching a chain on a geared bike is different from a single-speed fix. You have a derailleur system, jockey wheels, and cable tension all working together. Miss one step and the chain drops again before you reach the end of the street.
Pain point: Riders reattach the chain without routing it through the derailleur pulleys correctly. It looks right. It feels right. Then it drops again on the first gear change.
Follow these steps in order and it stays on.
Step-by-Step for Multi-Speed and Shimano Derailleur Bikes
Step 1 — Shift to the smallest gears first Before touching the chain, shift to the smallest rear cog and smallest front chainring. Do this while stationary. This creates maximum slack in the chain and gives you room to work without fighting the derailleur spring tension.
Step 2 — Create slack using the rear derailleur Push the rear derailleur cage forward with your hand. This releases tension in the lower run of the chain and makes the whole system easier to handle. Hold it forward while you position the chain.
Step 3 — Route chain through the derailleur pulleys This is the step most riders miss. The chain must pass through both jockey wheels — the upper guide pulley and the lower tension pulley. Feed the chain through carefully. If it bypasses either pulley the chain will not tension correctly and will drop under load.
Step 4 — Seat chain on the rear cog With the chain routed through the pulleys, loop several links onto the smallest rear cog. Hold it in place with one finger.
Step 5 — Loop chain onto front chainring Bring the chain forward and place several links onto the smallest front chainring. You do not need it fully seated yet — just enough to hold.
Step 6 — Rotate pedals slowly forward Turn the pedals by hand in the forward direction. One full rotation will feed the chain around both sprockets and seat it completely. Keep the movement slow and even.
Step 7 — Test shift through all gears Once the chain is running, shift up and down through every gear combination slowly. Listen for skipping or hesitation. If it runs smoothly you are done.
| Step | Action | Common Mistake |
|---|---|---|
| 1 | Shift to smallest gears | Skipping this makes chain too tight to work with |
| 2 | Push derailleur cage forward | Not creating enough slack before routing |
| 3 | Route through both jockey wheels | Missing a pulley — most common error |
| 4 | Seat on rear cog | Forcing chain without proper alignment |
| 5 | Loop onto front chainring | Placing on wrong chainring for tension |
| 6 | Rotate pedals forward | Turning backward — chain will not seat |
| 7 | Test all gears | Riding without checking smooth operation |
How to Fix a Broken Shimano Bicycle Chain
Shimano chains are reliable and widely used across road, mountain, and hybrid bikes. When a Shimano chain breaks it needs a specific approach. Shimano uses a proprietary pin system and recommends against reusing standard master links on certain chain models.
Riders use a generic quick link on a Shimano chain without checking compatibility. The connection fails under load. Always use a Shimano-specific connecting pin or Shimano quick link for the correct chain speed.
What You Need
- Chain breaker tool
- Shimano connecting pin or Shimano quick link (speed-matched to your chain — 9, 10, 11, or 12 speed)
- Needle-nose pliers
- Snap-off pin tip remover or small flat screwdriver
Step-by-Step Shimano Chain Repair
Step 1 — Find the broken or damaged link Lay the chain flat. Look for a bent plate, cracked link, or a pin that has partially pushed out. On a Shimano chain the damaged section is usually obvious — it will not flex smoothly with the rest of the chain.
Step 2 — Break the chain at the damaged section Use your chain breaker tool to push the pin out of the link immediately before and immediately after the damaged section. Remove the damaged link or links entirely. You want clean, undamaged links on both ends.
Step 3 — Check chain length Count the remaining links. A standard road bike chain runs 114 links. A mountain bike chain runs 116 to 118 links. If you are removing one or two damaged links the length reduction is acceptable for most drivetrains. More than two links removed and the chain may be too short for your largest gear combination.
Step 4 — Insert Shimano connecting pin Shimano connecting pins are tapered at one end for easy insertion. Feed the narrow end through the outer and inner link plates at the chain break point. Use the chain breaker tool to press the pin through until it seats fully and flush with the outer plate.
Step 5 — Snap off the guide tip Shimano connecting pins have a breakaway tip. Once the pin is fully seated, use pliers or a small flat screwdriver to snap the guide tip off cleanly. The pin should sit flush and level with the chain plate on both sides.
Step 6 — Flex and test the repaired link Work the repaired section back and forth with your fingers. It should flex as freely as every other link. A stiff link skips on the jockey wheels and puts stress on the whole drivetrain. If it feels tight, gently work it sideways until it loosens.
| Shimano Chain Speed | Correct Connecting Pin | Quick Link Alternative |
|---|---|---|
| 6 / 7 / 8 speed | CN-7901 pin | Shimano SM-CN900-8 |
| 9 speed | CN-7701 pin | Shimano SM-CN900-9 |
| 10 speed | CN-7901 pin | KMC Missing Link 10 |
| 11 speed | CN-9000 pin | Shimano SM-CN900-11 |
| 12 speed | CN-M9100 pin | Shimano SM-CN910-12 |
Always match the connecting pin or quick link to your exact chain speed. Using the wrong speed link is a safety risk.
Common Bicycle Chain Problems and How to Avoid Them
Most chain problems are predictable and preventable. Understanding what causes them is the first step to avoiding a mid-ride failure.
Chain Wear
Every chain stretches with use. The metal pins and rollers wear down gradually and the chain elongates. A worn chain skips on the cassette, accelerates wear on the chainrings and sprockets, and eventually snaps.
How to check: Use a chain wear indicator tool. A reading of 0.5 indicates moderate wear — replace soon. A reading of 0.75 or higher means replace immediately before it damages your cassette.
How to avoid it:
- Check chain wear every 500 to 800 miles for road riding
- Replace every 1,000 to 1,500 miles depending on conditions and riding style
- Never run a worn chain on a new cassette — the worn chain will destroy the new cassette within days
Chain Rust
Rust weakens the chain plates and pins. It causes stiffness, skipping, and eventual link failure. Rust forms fast on steel chains exposed to rain, humidity, or salt.
How to avoid it:
- Dry the chain thoroughly after every wet ride
- Apply a wet lubricant for riding in rain and muddy conditions
- Store your bike indoors away from damp environments
- Never leave a washed chain unlubricated overnight
Poor Lubrication
An under-lubricated chain is noisy, stiff, and wears fast. An over-lubricated chain attracts dirt and grit that grinds the drivetrain like sandpaper. Both extremes cause damage.
| Lubrication Type | Best For | Reapply Every |
|---|---|---|
| Dry lube (wax-based) | Dry conditions, road cycling | 60 to 100 miles |
| Wet lube | Rain, mud, winter riding | 150 to 200 miles |
| Ceramic lube | All conditions, performance focus | 100 to 150 miles |
How to lubricate correctly:
- Apply lube to the inner rollers — not the outer plates
- Wipe off all excess with a clean cloth after application
- Never lubricate a dirty chain — clean it first or the lube locks in the grit
Tips to Prevent Chain Breaks
- Avoid cross-chaining — big ring to big cog or small ring to small cog
- Shift under reduced pedalling load — ease off slightly before changing gears
- Replace the chain before it reaches 0.75 wear — every time without exception
- Inspect the chain monthly for stiff links, rust spots, and bent plates
Testing Your Repaired Chain for Safety
Never trust a repaired chain without testing it fully before you ride hard. A failed repair under load is a serious safety risk — especially descending or sprinting.
How to Test Properly
Test 1 — Hand rotation Lift the rear wheel off the ground. Turn the pedals by hand through 10 full rotations. Watch the chain pass through the jockey wheels and over the sprockets. It should run smoothly with no jumping, clicking, or hesitation at the repaired link.
Test 2 — Flex the repaired link Find the repaired section and flex it manually side to side. It should move as freely as every other link. A stiff link that passes visual inspection will still skip under load. Work it loose before you ride.
Test 3 — Shift through all gears While turning the pedals by hand, shift through every gear combination. Front and rear. Smallest to largest and back again. The chain should move to each gear cleanly without hesitation or skipping.
Test 4 — Short test ride Ride 200 to 300 metres at low effort. Shift gears. Pedal moderately. Listen for any unusual noise from the drivetrain. If everything feels smooth, increase effort gradually. If you hear skipping or feel hesitation stop immediately and recheck the repair.
| Test | What to Check | Pass Condition |
|---|---|---|
| Hand rotation | Chain movement through full drivetrain | Smooth — no skipping or clicking |
| Flex test | Repaired link flexibility | Moves freely — no stiffness |
| Gear shift test | Shifting accuracy across all gears | Clean movement — no hesitation |
| Short ride test | Real-world performance under load | No noise, no skipping, no slipping |
Do not skip the test ride. A workshop test tells you the chain is mechanically sound. A road test tells you it is safe to ride on.
When to Replace Your Bicycle Chain Instead of Repairing
Repairs are not always the right answer. Sometimes the chain has reached the end of its life and repairing it is just delaying an inevitable failure.
Replace the Chain When:
- Chain wear reads 0.75 or higher on a chain checker — the stretch is too far gone for a repair to hold reliably under load
- Multiple links are damaged — removing two or more damaged links shortens the chain too much for safe use across all gears
- The chain has rusted through — surface rust can be cleaned but deep rust that has pitted the metal weakens the structural integrity of the links
- The chain has broken in the same place twice — a second break at or near the same link means the metal is fatigued and the whole chain is compromised
- The chain is more than two years old with heavy use — age and accumulated wear make the entire chain a risk regardless of visible condition
Chain Replacement Guidelines by Riding Type
| Rider Type | Replace Every | Signs to Watch |
|---|---|---|
| Casual rider (1 to 2 rides per week) | 18 to 24 months | Check wear at 12 months |
| Regular commuter (daily riding) | 12 months or 2,000 miles | Check wear every 500 miles |
| Road cyclist (high mileage) | 1,000 to 1,500 miles | Check wear every 300 miles |
| Mountain biker (off-road, mud) | 750 to 1,000 miles | Check wear every 200 miles |
| Racing / performance cyclist | 500 to 800 miles | Check wear every 150 miles |
When to Replace Chain and Cassette Together
If your chain has worn past 0.75 and you have been riding it for a significant period, the cassette teeth have likely worn to match the stretched chain. Fitting a new chain onto a worn cassette causes immediate skipping because the new chain spacing does not match the worn teeth profile.
Replace both together when:
- Chain wear reads 0.75 or higher and the cassette has more than 3,000 miles on it
- The new chain skips on the cassette immediately after fitting
- Cassette teeth look visibly hook-shaped or pointed rather than square-topped
A new chain costs a fraction of what a new cassette costs. Replacing the chain at 0.5 wear every time is the cheapest long-term maintenance strategy in cycling.
Bicycle Chain Fixes While Riding & Maintenance Tips to Prevent Future Chain Breaks
A broken or slipped bicycle chain can turn an enjoyable ride into a frustrating experience. While most chain problems require proper tools to fix, there are several emergency solutions you can use while riding. Additionally, consistent chain maintenance can prevent most breaks and keep your bike running smoothly. Understanding both emergency fixes and preventive care will save you time, money, and stress on the road.
Here’s a quick overview of what you can do in an emergency and simple maintenance routines to keep your chain healthy:
| Emergency Fixes on the Road | Preventive Maintenance Tips |
|---|---|
| Use a paperclip to temporarily link a broken chain | Regularly clean the chain to remove dirt and grime |
| Zip ties to hold chain links together | Lubricate the chain at least once a week or after wet rides |
| Spare quick links for temporary connection | Check chain wear using a chain checker tool |
| Remove the damaged link and reconnect using chain pliers | Inspect the chain for twisted or stiff links |
| Use a chain hook to keep chain in place while riding to the nearest repair shop | Replace the chain every 2,000–3,000 miles or as needed |
11. Quick Emergency Bicycle Chain Fixes While Riding
Sometimes, a chain may snap or derail in the middle of a ride, leaving you stranded. While these are temporary fixes, they can help you get home safely or to the nearest bike shop.
1. Using a Paperclip or Safety Pin
If a chain link breaks and you don’t have tools, a paperclip or safety pin can temporarily hold the chain together. Simply straighten the paperclip, hook it through the broken link, and twist it to secure. This method allows the pedals to turn without further damaging the chain.
2. Zip Ties as a Temporary Link
Zip ties are lightweight and easy to carry. You can wrap a strong zip tie around a broken or twisted link to hold it in place. Make sure it is tight enough to support the chain movement but not so tight that it bends the link excessively.
3. Using Spare Quick Links
Many cyclists carry a spare quick link in their repair kit. Quick links are designed for fast chain repairs and can reconnect a broken chain without a chain tool. Simply insert the link, close it, and the chain should function enough to ride to safety.
4. Removing the Damaged Link
If part of the chain is twisted or bent beyond temporary repair, you can remove that section entirely. This may shorten the chain slightly but will allow you to pedal safely to a repair shop. Always reconnect the chain using a temporary pin or quick link.
5. Using a Chain Hook or Strap
A chain hook or a small strap can hold the chain in place on the bike frame while you pedal. This method works when the chain has slipped off the gears but hasn’t snapped completely. It can prevent further damage until you can properly repair it.
Tips for Emergency Repairs:
- Always carry a small repair kit including quick links, zip ties, and a paperclip when riding long distances.
- Avoid high-speed riding until the chain is properly fixed, as emergency fixes may fail under high tension.
- Inspect the chain for sharp edges or twisted links before pedaling to prevent injury.
12. Maintenance Tips to Prevent Future Chain Breaks
The best way to deal with broken chains is to prevent them from breaking in the first place. Regular chain maintenance extends the life of your bike and keeps your rides smooth.
1. Regular Cleaning
Dirt, dust, and debris build up on your chain over time, causing wear and corrosion. Clean the chain with a degreaser and brush at least once a week or after riding in muddy or wet conditions. Rinse with water and dry thoroughly.
2. Lubrication
A well-lubricated chain reduces friction and prevents metal-on-metal wear. Use bicycle-specific lubricants and apply a drop on each link. Wipe off excess lubricant to avoid attracting dirt. Lubricate more frequently after rain or wet rides.
3. Inspect Chain Wear
Chains stretch over time. Use a chain checker tool to measure wear. A stretched chain can damage sprockets and derailleur gears, increasing the risk of a break. Replace the chain if it reaches the wear limit.
4. Check for Twisted or Stiff Links
Run your fingers along the chain to feel for stiff links that don’t bend smoothly. Stiff or twisted links can snap under pressure. Gently flex and realign them using pliers or a chain tool.
5. Replace Worn Chains Regularly
Even with proper maintenance, chains eventually wear out. Most chains last between 2,000 and 3,000 miles depending on riding conditions. Replacing the chain before it fails can save your gears and prevent on-road emergencies.
6. Avoid Excessive Force
Avoid cross-chaining (using extreme gear combinations) as it stresses the chain. Shift gears smoothly and avoid pedaling hard while the chain is jammed. This simple habit reduces stress on the links.
7. Store Your Bike Properly
Keep your bike dry and sheltered from rain and humidity when not in use. Exposure to moisture accelerates rusting, which weakens the chain over time.
Conclusion
Fixing a broken bicycle chain while riding doesn’t have to be stressful. Using emergency solutions like paperclips, zip ties, quick links, or chain hooks can get you home safely. However, the real key is preventive maintenance: regular cleaning, lubrication, chain inspection, and timely replacement will keep your bike running smoothly and prevent most chain breaks. By combining emergency preparedness with proper care, you can enjoy safer and more reliable cycling every ride.

- 10 Best Jack For F250 Review (October 2026) - October 12, 2026
- 10 Best Jack For F150 Review (October 2026) - October 12, 2026
- 10 Best Electric Hydraulic Jack For Car Review (October 2026) - October 12, 2026