How to Repair a Loose or Spinning Screw Hole (Wood, Metal & Plastic)

A screw that keeps spinning can quickly turn a simple DIY project into a frustrating repair job. Whether you’re working on furniture, drywall, wood, metal, or plastic, a spinning screw usually means the threads can no longer grip the material properly. As a result, the screw may turn endlessly without tightening or loosening.
The good news is that most spinning screw problems can be fixed using simple tools and materials you may already have at home. The right repair method depends on whether the screw hole is stripped, the screw head is damaged, or the surrounding material has weakened over time.
How Do You Fix a Screw That Keeps Spinning?
If a screw keeps spinning and won’t tighten, the most common fix is to repair the stripped screw hole. For wood, insert toothpicks coated with wood glue into the hole, let the glue dry, and reinstall the screw. For drywall, replace the damaged anchor. For metal, use a thread repair insert or a slightly larger screw.
If the screw spins but won’t come out, apply upward pressure with a flathead screwdriver or pliers while turning the screw counterclockwise.
This guide explains every major cause of spinning screws and the best ways to fix them permanently.
Why Does a Screw Keep Spinning?
Before attempting any repair, it’s important to understand why the screw is spinning in the first place. In most cases, the problem isn’t the screw itself—it’s the material surrounding it.
When threads lose their ability to grip, the screw simply rotates without moving in or out.
Stripped Screw Hole
A stripped screw hole is the most common reason a screw keeps spinning.
Every screw creates threads in the material it enters. Over time, repeated tightening and loosening can wear those threads down. Once they become damaged, the screw no longer has anything to grab onto.
Common causes include:
- Overtightening
- Frequent removal and reinstallation
- Soft wood deterioration
- Excessive vibration
- Incorrect screw size
Signs of a stripped screw hole include:
- The screw turns endlessly
- The screw feels loose
- The screw pulls out easily
- The material around the hole appears enlarged
This issue frequently occurs in furniture, cabinets, door hinges, and wooden frames.
Damaged Screw Threads
Sometimes the screw itself is the problem.
If the threads on the screw become worn, flattened, or damaged, they may no longer engage properly with the surrounding material.
Thread damage often occurs due to:
- Rust and corrosion
- Excessive force during installation
- Cross-threading
- Low-quality fasteners
- Repeated reuse
Inspect the screw carefully after removal. If the threads appear smooth or damaged, replacing the screw may solve the issue immediately.
Worn-Out Anchor or Insert
Many screws installed in drywall or masonry rely on anchors for support.
When an anchor becomes loose or deteriorates, the screw may continue spinning because the anchor rotates with it.
Common warning signs include:
- Anchor spinning behind the wall
- Loose mounting brackets
- Enlarged wall holes
- Cracked drywall surrounding the fastener
This problem is especially common with:
- Curtain rods
- Shelving brackets
- TV mounts
- Bathroom fixtures
- Wall-mounted organizers
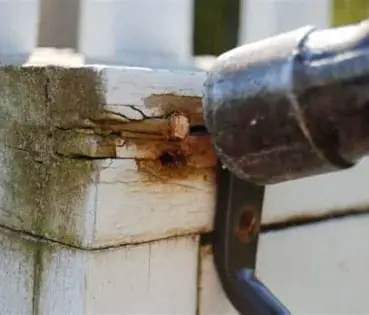
Rotting or Soft Wood Around the Screw
Wood naturally expands and contracts due to moisture changes.
Over time, exposure to water, humidity, or age can weaken the fibers surrounding a screw hole.
When this happens, the screw loses holding power because the wood can no longer support the threads.
You may notice:
- Crumbling wood fibers
- Water damage
- Soft or spongy areas
- Discoloration around the fastener
In severe cases, replacing the damaged wood may be necessary before reinstalling the screw.
How to Identify the Type of Spinning Screw Problem
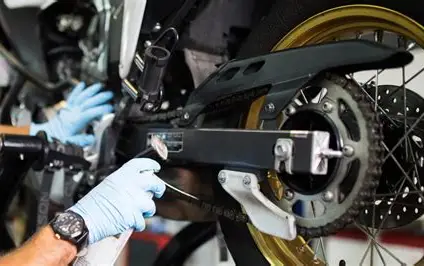
Not every spinning screw requires the same repair method.
A quick inspection helps determine whether you’re dealing with a stripped hole, damaged threads, a stuck fastener, or a failed anchor.
Screw Spins but Won’t Tighten
This is usually a sign that the hole has become stripped.
As you turn the screwdriver clockwise, the screw rotates but never becomes secure.
Common causes include:
- Enlarged screw hole
- Worn wood fibers
- Damaged drywall anchor
- Stripped metal threads
The repair typically involves restoring the hole or using a larger fastener.
Screw Spins but Won’t Come Out
This situation occurs when the threads lose their grip while the screw remains trapped inside the material.
The screw rotates freely but refuses to back out.
Possible causes include:
- Broken internal threads
- Rotating anchors
- Hidden obstructions
- Damaged mounting materials
Special removal techniques are often required to extract the screw.
Screw Head Is Stripped
A stripped screw head occurs when the driver can no longer grip the recess in the head.
This problem often develops after:
- Using the wrong screwdriver
- Applying excessive force
- Working with rusty fasteners
- Repeated removal attempts
Once the head becomes damaged, standard screwdrivers may no longer work.
Screw Hole Is Enlarged or Damaged
Over time, screw holes can become larger than intended.
This is especially common in:
- Furniture assembly points
- Door hinges
- Cabinets
- Drywall anchors
- Wooden decks
An enlarged hole prevents proper thread engagement and often requires repair before reinstalling the screw.
Tools and Materials You May Need
The exact tools required depend on the type of repair, but most spinning screw problems can be fixed using common household tools.
Basic Hand Tools
Having basic tools available makes troubleshooting much easier.
Recommended tools include:
- Phillips screwdriver
- Flathead screwdriver
- Power drill
- Needle-nose pliers
- Locking pliers
- Utility knife
- Hammer
These tools can handle many common screw repair tasks.
Screw Extractors and Specialty Tools
For stubborn or damaged screws, specialized tools may be necessary.
Helpful options include:
- Screw extractor kit
- Impact driver
- Rotary tool
- Left-hand drill bits
- Magnetic bit holders
These tools improve your chances of removing difficult fasteners without causing further damage.
Wood Fillers and Repair Materials
Wood repairs often require materials that restore the stripped hole.
Popular options include:
- Toothpicks
- Wooden dowels
- Wood glue
- Epoxy putty
- Wood filler
These products rebuild the damaged area and provide new material for the screw to grip.
Anchors, Inserts, and Replacement Screws
Sometimes replacing the original fastener is the best solution.
Useful replacement components include:
- Drywall anchors
- Thread repair inserts
- Helical inserts
- Larger-diameter screws
- Expansion anchors
Choosing the correct replacement hardware helps ensure a long-lasting repair.
Fixing a Screw That Spins but Won’t Tighten in Wood
Wood is one of the easiest materials to repair when a screw keeps spinning. In most cases, the hole has simply become too large for the screw to grip properly.
Fortunately, several proven repair methods can restore the hole and allow the screw to hold securely again.
Use Toothpicks and Wood Glue
One of the simplest and most effective DIY fixes involves ordinary wooden toothpicks and wood glue.
This method works because the toothpicks fill the enlarged hole and create new material for the screw threads to bite into.
Steps:
- Remove the screw.
- Apply wood glue to several toothpicks.
- Insert the toothpicks into the stripped hole.
- Break off excess material flush with the surface.
- Allow the glue to dry completely.
- Reinstall the screw carefully.
For small stripped holes, this repair often works surprisingly well and can last for years.
Fill the Hole With Wooden Dowels
When a screw hole is severely stripped, toothpicks may not provide enough support. In these cases, using a wooden dowel creates a stronger and more permanent repair.
Wood dowels work particularly well for:
- Door hinges
- Furniture frames
- Cabinets
- Wooden decks
- Structural wood repairs
The goal is to completely replace the damaged wood inside the hole with fresh material that can securely hold a screw.
How to Repair a Stripped Screw Hole With a Dowel
Follow these steps:
- Remove the loose screw.
- Drill the damaged hole to match the diameter of your dowel.
- Apply wood glue to the dowel.
- Insert the dowel firmly into the hole.
- Allow the glue to dry completely.
- Trim the dowel flush with the surface.
- Drill a new pilot hole.
- Reinstall the screw.
This method essentially restores the hole to its original condition and is often used by professional carpenters because of its durability.
Benefits of Using Wooden Dowels
Compared to temporary fixes, dowels offer several advantages:
- Stronger screw retention
- Long-lasting repair
- Better load-bearing capability
- Ideal for frequently used hardware
- Professional-quality results
For heavy-duty applications such as doors and cabinets, dowels are often the preferred solution.
Install a Larger Screw
Sometimes the fastest fix is simply replacing the original screw with a slightly larger one.
If the hole is only mildly stripped, a larger screw can create new threads and restore holding power without requiring additional repairs.
This solution works best when:
- The material remains structurally sound.
- The hole isn’t excessively enlarged.
- The surrounding area isn’t cracked.
- The original screw was undersized.
How to Choose a Larger Screw
When selecting a replacement screw:
- Increase the diameter slightly.
- Keep the length similar if possible.
- Match the original screw type.
- Use corrosion-resistant hardware when appropriate.
Avoid choosing a screw that’s excessively large, as it may split wood or damage surrounding materials.
When This Method Works Best
A larger screw is often effective for:
- Furniture repairs
- Cabinet hinges
- Interior trim
- Wood framing
- Light-duty mounting points
If the replacement screw still fails to tighten properly, the hole likely requires filling or rebuilding before reuse.
Use Wood Filler or Epoxy
For heavily damaged holes, wood filler or epoxy can provide a strong repair solution.
Unlike toothpicks or dowels, these materials completely rebuild the damaged area and allow new threads to form after curing.
Wood Filler vs. Epoxy
Both products can be effective, but they serve slightly different purposes.
Wood Filler
- Easy to apply
- Sands smoothly
- Good for cosmetic repairs
- Suitable for light-duty applications
Epoxy
- Extremely durable
- Resistant to moisture
- Ideal for structural repairs
- Creates strong thread support
For high-stress locations, epoxy is usually the better choice.
How to Repair a Screw Hole With Epoxy
- Remove loose debris from the hole.
- Mix the epoxy according to manufacturer instructions.
- Fill the stripped hole completely.
- Allow the epoxy to cure fully.
- Drill a pilot hole.
- Reinstall the screw.
The cured epoxy provides a solid surface that often holds screws as well as—or better than—the original material.
Common Applications
Epoxy repairs are especially useful for:
- Exterior wood projects
- Water-damaged wood
- Deck repairs
- Fence posts
- High-load hardware installations
Because epoxy is moisture resistant, it’s an excellent option for outdoor repairs.
How to Fix a Screw That Spins but Won’t Come Out
A screw that spins but refuses to back out can be even more frustrating than one that won’t tighten.
In this situation, the threads have usually lost their grip on the surrounding material. As a result, turning the screw simply causes it to rotate in place.
Fortunately, several proven removal techniques can help extract the screw without causing unnecessary damage.
Pull Up While Unscrewing
One of the easiest methods involves applying upward pressure while turning the screw.
The added tension encourages the remaining threads to catch the surrounding material and move the screw outward.
How to Do It
- Insert your screwdriver into the screw head.
- Turn the screw counterclockwise.
- Simultaneously apply gentle upward pressure.
- Continue turning until the screw begins to rise.
This method works particularly well when:
- The threads are partially stripped.
- The screw is not deeply embedded.
- The surrounding material still provides some resistance.
Many spinning screws can be removed using this technique alone.
Helpful Tip
A flat pry tool placed beneath the screw head can provide additional lifting force while you turn the screw.
This often increases the chances of successful removal.
Use Locking Pliers
If the screw head protrudes above the surface, locking pliers can provide much greater leverage than a screwdriver.
Locking pliers grip the screw firmly and allow you to pull and rotate simultaneously.
Steps for Using Locking Pliers
- Clamp the pliers tightly onto the screw head.
- Pull upward gently.
- Rotate counterclockwise.
- Continue applying tension until the screw begins backing out.
This technique is particularly effective when:
- The screw head is exposed.
- The screwdriver slot is damaged.
- Traditional tools no longer work.
The extra grip often makes stubborn screws much easier to remove.
Benefits of Locking Pliers
Advantages include:
- Increased gripping force
- Better control
- Effective on damaged screws
- Works on partially stripped heads
- No special tools required
For many DIYers, locking pliers are one of the most valuable screw-removal tools available.
Insert a Flat Tool Under the Head
When a screw spins freely, lifting it slightly while turning can help re-engage the remaining threads.
A flat tool placed under the head creates constant upward pressure.
Suitable tools include:
- Flathead screwdriver
- Putty knife
- Trim removal tool
- Small pry bar
Step-by-Step Process
- Slide the flat tool beneath the screw head.
- Apply gentle upward pressure.
- Turn the screw counterclockwise.
- Maintain tension as the screw rises.
The key is avoiding excessive force that could damage the surrounding surface.
Best Uses
This technique works particularly well for:
- Cabinet hardware
- Furniture screws
- Drywall anchors
- Door hinges
- Decorative fixtures
In many cases, combining this method with locking pliers produces even better results.
Use a Screw Extractor Kit
If simpler methods fail, a screw extractor kit is often the most reliable solution.
Screw extractors are specifically designed to remove damaged, stripped, or spinning screws.
They are commonly used by:
- Contractors
- Mechanics
- Woodworkers
- Furniture repair specialists
- DIY homeowners
How Screw Extractors Work
Most extractor kits include:
- A drill bit
- A reverse-thread extractor
- Specialized driver attachments
The extractor bites into the screw and allows it to be removed without relying on the damaged original threads.
How to Use a Screw Extractor
- Drill a pilot hole into the center of the screw.
- Insert the extractor into the pilot hole.
- Turn the extractor counterclockwise.
- Continue until the screw backs out completely.
Because the extractor tightens as it turns, it gains grip while removing the screw.
When to Use an Extractor
A screw extractor is usually the best option when:
- The screw head is severely damaged.
- Pliers cannot grip the screw.
- The screw is deeply embedded.
- Other removal methods have failed.
Although extractor kits require a bit more effort, they often save time and prevent damage that could result from more aggressive removal attempts.
Common Mistakes to Avoid
When using a screw extractor:
- Don’t drill too large a pilot hole.
- Avoid excessive force.
- Use the correct extractor size.
- Keep the drill centered.
- Work slowly and carefully.
Following these guidelines greatly improves your chances of removing the screw successfully without breaking the extractor.
Best Ways to Remove a Spinning Screw
If a screw keeps spinning and won’t come out, try these methods in order:
- Apply upward pressure while unscrewing.
- Use locking pliers for additional grip.
- Insert a flat tool under the screw head.
- Use a screw extractor kit for stubborn cases.
Choosing the right method depends on the condition of the screw, how much of the head is exposed, and the material you’re working with.
How to Remove a Stripped Screw Head
A stripped screw head is one of the most common fastener problems homeowners and DIY enthusiasts encounter. Unlike a stripped screw hole, where the threads lose grip, a stripped screw head occurs when the screwdriver can no longer properly engage the recess in the screw.
This often happens because of:
- Using the wrong screwdriver size
- Excessive force during installation
- Rust and corrosion
- Worn-out screw heads
- Repeated tightening and loosening
Once the head becomes damaged, removing the screw can seem impossible. Fortunately, several proven methods can help restore grip and remove the fastener without damaging the surrounding material.
Use the Rubber Band Trick
One of the easiest solutions for a stripped screw head involves using a simple rubber band.
The rubber creates extra friction between the screwdriver and the damaged screw head, allowing the driver to grip areas that would otherwise slip.
How the Rubber Band Method Works
You’ll need:
- A wide rubber band
- The correct screwdriver
- Firm hand pressure
Steps:
- Place the rubber band directly over the screw head.
- Insert the screwdriver through the rubber band.
- Apply firm downward pressure.
- Turn the screw slowly counterclockwise.
The rubber fills small gaps inside the stripped recess and helps the screwdriver gain traction.
When the Rubber Band Trick Works Best
This method is most effective when:
- The stripping is minor.
- The screw head is still partially intact.
- Rust is not severe.
- The screw is not overtightened.
For lightly damaged screws, the rubber band trick often works surprisingly well and requires no special tools.
Switch to a Larger Driver Bit
Sometimes a stripped screw head still contains enough material for a larger driver bit to grip.
A slightly oversized bit may engage areas of the screw that the original bit can no longer reach.
Steps for Using a Larger Driver Bit
- Select a driver bit slightly larger than the original.
- Position it carefully inside the damaged recess.
- Tap it gently with a hammer if necessary.
- Apply steady pressure while turning.
The goal is to create a tighter connection between the driver and the screw head.
Advantages of This Method
Benefits include:
- Fast solution
- No drilling required
- Minimal risk of surface damage
- Works with common tools
Always avoid forcing the bit excessively, as further damage can make removal more difficult.
Cut a New Slot With a Rotary Tool
If the screw head is severely stripped, creating a new slot can restore enough grip for removal.
A rotary tool equipped with a cutting wheel is commonly used for this repair.
How to Create a New Screw Slot
You’ll need:
- Rotary tool
- Cutting disc
- Safety glasses
- Flathead screwdriver
Steps:
- Cut a straight slot across the screw head.
- Make the slot deep enough for a flathead screwdriver.
- Insert the screwdriver into the new slot.
- Turn counterclockwise to remove the screw.
This technique effectively converts a damaged Phillips or Torx screw into a slotted screw.
Safety Considerations
When using a rotary tool:
- Wear eye protection.
- Work slowly.
- Avoid cutting surrounding materials.
- Maintain control of the tool.
A careful approach reduces the risk of damaging nearby surfaces.
Use Screw Extraction Tools
When other methods fail, specialized screw extraction tools provide the most reliable solution.
Professional contractors often rely on extractor kits because they work on severely damaged screws that cannot be removed by conventional means.
Types of Screw Extractors
Common options include:
- Spiral extractors
- Reverse-thread extractors
- Drill-and-extract systems
- Multi-piece extraction kits
Each design works by biting into the screw and creating enough grip to remove it.
How to Use a Screw Extractor
- Drill a small pilot hole into the center of the screw.
- Insert the extractor.
- Turn counterclockwise.
- Continue until the screw backs out.
Because the extractor tightens as it rotates, it often succeeds where other methods fail.
When to Use an Extractor
A screw extractor is recommended when:
- The screw head is completely stripped.
- The screw is recessed below the surface.
- Pliers cannot grip the head.
- Previous removal attempts have failed.
For stubborn screws, extractors are often the fastest and safest solution.
Fixing a Spinning Screw in Drywall
Drywall presents unique challenges because it is softer and more fragile than wood or metal.
When a screw spins in drywall, the issue usually involves a damaged anchor or an enlarged hole that can no longer support the fastener.
Common causes include:
- Overloaded wall fixtures
- Loose anchors
- Repeated screw removal
- Poor installation practices
- Aging drywall
Fortunately, most drywall repairs are straightforward and inexpensive.
Replace the Drywall Anchor
A failed drywall anchor is one of the most common reasons a screw keeps spinning.
When the anchor loses its grip, both the screw and anchor may rotate together inside the wall.
Signs of a Failed Anchor
Look for:
- Loose wall-mounted items
- Anchor rotating with the screw
- Enlarged anchor hole
- Cracked drywall around the fastener
If any of these symptoms are present, replacing the anchor is usually the best solution.
How to Replace a Drywall Anchor
- Remove the screw.
- Extract the damaged anchor.
- Inspect the hole.
- Install a new anchor of appropriate size.
- Reinsert the screw.
A properly sized anchor restores holding strength and prevents future movement.
Install a Larger Anchor
If the original hole has become enlarged, simply replacing the anchor may not be enough.
A larger anchor often provides a stronger and more secure repair.
Benefits of a Larger Anchor
Advantages include:
- Increased holding power
- Better load distribution
- Improved wall stability
- Reduced chance of future spinning
Many heavy-duty anchors are designed specifically for damaged drywall openings.
Choosing the Correct Anchor
Consider:
- Weight of the mounted object
- Drywall thickness
- Hole size
- Wall condition
Using an undersized anchor may lead to another failure in a short period of time.
Move the Screw to a New Location
Sometimes the simplest solution is relocating the fastener.
If the drywall around the original hole is severely damaged, creating a new mounting point can provide a stronger and more reliable installation.
When Relocation Makes Sense
Consider moving the screw when:
- The hole is excessively enlarged.
- Multiple repair attempts have failed.
- The drywall is cracked.
- Structural integrity is compromised.
A fresh section of drywall often provides better support than a heavily repaired area.
Best Practices for New Mounting Locations
To maximize holding strength:
- Stay clear of damaged drywall.
- Use proper anchors.
- Check for studs when possible.
- Follow manufacturer recommendations.
Whenever possible, anchoring directly into a wall stud provides the strongest attachment point.
Repair the Drywall Before Reinstalling
In some situations, repairing the drywall itself is necessary before reinstalling the screw.
This approach is particularly useful when:
- The hole is oversized.
- Drywall paper is torn.
- The surface has crumbled.
- Existing anchors no longer fit properly.
How to Repair a Damaged Drywall Hole
Basic repair steps include:
- Remove loose material.
- Apply drywall patch compound.
- Allow it to dry completely.
- Sand the surface smooth.
- Drill a new pilot hole.
- Install an anchor and screw.
For larger holes, a drywall repair patch may be required before mounting hardware can be reinstalled.
Why Proper Drywall Repair Matters
Repairing the wall before reinstalling the screw provides several benefits:
- Stronger fastener support
- Cleaner appearance
- Longer-lasting repair
- Improved load capacity
- Reduced risk of future failures
Taking the time to rebuild damaged drywall often prevents recurring problems and helps ensure a professional-looking result.
Drywall Repair Summary
If a screw keeps spinning in drywall, follow these solutions:
| Drywall Problem | Most Effective Fix |
|---|---|
| Anchor spins with screw | Replace the anchor |
| Enlarged hole | Install a larger anchor |
| Severely damaged drywall | Move screw location |
| Crumbling wall material | Repair drywall first |
| Repeated anchor failures | Mount into a stud |
Using the appropriate repair method helps restore strength, improve safety, and prevent future fastener issues.
How to Fix a Spinning Screw in Metal
Metal surfaces present a different challenge than wood or drywall. When a screw keeps spinning in metal, the problem is usually caused by stripped threads inside the metal hole rather than damage to the screw itself.
This commonly occurs in:
- Automotive panels
- Metal furniture
- Appliances
- Machinery
- Sheet metal assemblies
If left unrepaired, stripped metal threads can make the fastener completely unusable.
Re-Tap the Threads
One of the most effective repairs involves using a tap tool to create new threads inside the damaged hole.
Thread tapping works by cutting fresh threads into the metal so a new screw can grip properly.
Steps to Re-Tap a Hole
- Remove the damaged screw.
- Select the appropriate tap size.
- Apply cutting oil.
- Carefully cut new threads.
- Clean away metal shavings.
- Install a replacement screw.
This method works best when enough metal remains around the hole.
Use a Thread Repair Insert
When the original threads are severely damaged, a thread repair insert can restore the hole.
Popular thread repair systems include:
- Helical inserts (Heli-Coil)
- Solid threaded inserts
- Thread sleeves
- Rivet nuts
These inserts create durable internal threads that are often stronger than the original metal.
Benefits of Thread Inserts
- Long-lasting repair
- Excellent thread strength
- Suitable for high-load applications
- Commonly used in automotive and industrial repairs
For heavily damaged threaded holes, inserts are often the preferred professional solution.
Install a Larger Screw
If the damage is minor, switching to a slightly larger screw may be enough.
The larger fastener cuts new threads into the metal and restores holding power.
This repair works best when:
- The hole is only slightly enlarged.
- Structural integrity remains intact.
- Thread damage is limited.
Always verify that a larger screw will not interfere with nearby components.
How to Fix a Spinning Screw in Plastic
Plastic materials are particularly vulnerable to stripped threads because they are softer than wood and metal.
Overtightening is one of the most common causes of spinning screws in plastic.
Use Plastic-Compatible Epoxy
For damaged plastic holes, epoxy can rebuild the stripped area and create new material for the screw to grip.
Repair Process
- Remove the screw.
- Clean the damaged hole.
- Fill the hole with epoxy.
- Allow full curing time.
- Drill a pilot hole.
- Reinstall the screw.
Choose an epoxy specifically designed for plastic whenever possible.
Install a Threaded Insert
Threaded inserts provide a durable repair solution for frequently used plastic components.
They are commonly found in:
- Electronics
- Automotive trim
- Household appliances
- Plastic furniture
Benefits include:
- Strong thread retention
- Repeated screw removal capability
- Improved durability
- Professional-quality repair
Use a Slightly Larger Screw
A slightly larger screw can sometimes restore grip without requiring extensive repairs.
However, avoid selecting a screw that’s too large because it may crack the plastic.
Avoid Overtightening
Many plastic thread failures occur because the screw was tightened excessively.
When reinstalling screws in plastic:
- Tighten only until snug.
- Avoid power tools when possible.
- Follow manufacturer torque specifications.
- Stop immediately if resistance increases sharply.
These practices help prevent future thread damage.
When You Should Replace the Screw
Sometimes the problem isn’t the hole—it’s the screw itself.
Replacing a worn or damaged fastener is often the simplest and most effective solution.
Signs of Damaged Threads
Inspect the screw carefully after removal.
Replace it if you notice:
- Flattened threads
- Missing thread sections
- Excessive wear
- Bent shafts
- Visible thread damage
A damaged screw cannot properly engage the surrounding material.
Rust and Corrosion Issues
Corrosion weakens both the screw and the surrounding threads.
Signs of corrosion include:
- Rust buildup
- Pitting
- Discoloration
- Flaking metal
Severely corroded fasteners should always be replaced.
Choosing the Correct Replacement Screw
When selecting a new screw:
- Match the original screw type.
- Choose the proper length.
- Verify thread compatibility.
- Use corrosion-resistant materials when appropriate.
Common options include:
- Stainless steel screws
- Zinc-coated screws
- Brass screws
- Hardened steel fasteners
Using the correct replacement hardware greatly improves long-term reliability.
Common Mistakes to Avoid
Many screw repairs fail because of a few avoidable errors.
Understanding these mistakes can save time and prevent additional damage.
Overtightening the Screw
Overtightening is the leading cause of stripped screw holes.
Excessive torque can:
- Damage threads
- Crack materials
- Strip anchors
- Weaken mounting points
Always tighten screws only as much as necessary.
Using the Wrong Screw Size
An undersized screw may never grip properly.
An oversized screw can:
- Split wood
- Crack plastic
- Distort metal threads
Choose the correct size for the application.
Ignoring Material Damage
Repairing the screw without repairing the surrounding material often leads to repeated failures.
Always inspect:
- Wood condition
- Drywall integrity
- Metal threads
- Plastic surfaces
Addressing underlying damage ensures a stronger repair.
Reusing Severely Damaged Screws
Many DIYers attempt to reuse screws that should be discarded.
A damaged screw often causes:
- Poor holding strength
- Cross-threading
- Future failures
When in doubt, replace the fastener.
How to Prevent Screws From Spinning Again
Preventive measures can help you avoid future screw problems altogether.
Drill Proper Pilot Holes
Pilot holes guide the screw and reduce stress on surrounding materials.
Benefits include:
- Improved alignment
- Reduced splitting
- Better thread engagement
- Easier installation
Pilot holes are especially important in hardwoods and plastics.
Use Quality Anchors and Fasteners
Cheap hardware often fails prematurely.
Invest in:
- High-quality screws
- Appropriate anchors
- Corrosion-resistant fasteners
- Heavy-duty mounting hardware
Better components typically result in stronger, longer-lasting installations.
Avoid Excessive Torque
Whether using hand tools or power tools, avoid overtightening.
Best practices include:
- Use adjustable clutch settings on drills.
- Tighten gradually.
- Stop when resistance increases.
- Follow torque recommendations.
Inspect Mounting Surfaces Regularly
Routine inspections help identify problems before they become serious.
Check for:
- Loose screws
- Cracked materials
- Rust
- Water damage
- Anchor movement
Early intervention often prevents major repairs.
Quick Fix Summary Table
| Problem | Likely Cause | Best Solution |
|---|---|---|
| Screw spins but won’t tighten | Stripped hole | Toothpicks and wood glue |
| Screw spins but won’t come out | Damaged threads | Pull while unscrewing |
| Stripped screw head | Driver can’t grip | Rubber band or extractor |
| Drywall anchor spins | Failed anchor | Replace anchor |
| Screw spins in metal | Stripped threads | Re-tap or install insert |
| Screw spins in plastic | Worn plastic threads | Epoxy or threaded insert |
| Loose furniture screw | Enlarged wood hole | Dowel repair |
| Corroded screw | Rust damage | Replace screw |
Frequently Asked Questions
Why does my screw keep spinning and not tightening?
The most common reason is a stripped screw hole. The threads in the surrounding material have worn away, preventing the screw from gripping properly.
How do I remove a screw that just spins?
Apply upward pressure while turning the screw counterclockwise. If that doesn’t work, use locking pliers or a screw extractor kit.
Can I fix a stripped screw hole without replacing the screw?
Yes. Methods such as toothpicks and wood glue, wooden dowels, epoxy, or thread inserts can repair the hole while allowing the original screw to be reused if it’s undamaged.
Will a larger screw fix a stripped hole?
In some cases, yes. A slightly larger screw can create new threads and restore grip. However, severely damaged holes usually require additional repairs.
What is the fastest way to remove a spinning screw?
The quickest solution is often applying upward pressure while unscrewing. For damaged heads, the rubber band method or locking pliers may work immediately.
How do professionals repair stripped screw holes?
Professionals typically use wooden dowels, epoxy fillers, threaded inserts, or thread-repair systems depending on the material and load requirements.
Can a stripped screw hole be repaired permanently?
Yes. Repairs using dowels, epoxy, threaded inserts, or properly sized anchors can provide long-lasting and often permanent results.
Conclusion
A screw that keeps spinning is usually a sign of stripped threads, damaged material, or a worn-out fastener. While the problem can be frustrating, it’s often easier to fix than many people realize.
For wood, simple solutions such as toothpicks, wood glue, dowels, or epoxy can restore holding power. For drywall, replacing the anchor or repairing the wall usually solves the issue. Metal and plastic often require thread repairs, inserts, or replacement hardware.
The key is identifying the underlying cause before choosing a repair method. By using the correct technique and avoiding common mistakes such as overtightening or reusing damaged screws, you can create a durable repair that lasts for years.
Whether you’re fixing furniture, repairing drywall, working on a vehicle, or maintaining household fixtures, the methods in this guide will help you stop a spinning screw, restore secure fastening, and prevent the problem from returning in the future.

- Top 10 Best Helmet For A Running Back 2026 - September 16, 2026
- Best Bug Remover For Car Wash 2026 - September 16, 2026
- Best Bug And Bird Poop Remover For Cars 2026 - September 15, 2026