Peloton Bike Plus Replacement Parts: Complete Parts List

The Peloton Bike+ is an advanced evolution of the original bike, featuring a digital resistance system and a rotating screen that makes it a centerpiece for home fitness. However, the moving parts from the pedals to the internal drive belt are subject to wear and tear.
Performance & Safety: Worn parts don’t just cause noise; they can lead to mechanical failure. A loose pedal or a frayed belt can turn a high-intensity workout into an injury risk.
Why Users Search for Parts: Most searches are triggered by unusual noises (clicking, grinding), electrical issues (screen won’t power on), or routine maintenance (annual pedal replacement).
What This Guide Covers: We will break down the exact parts compatible with the Bike+, how they differ from the original model, and provide a maintenance roadmap to keep your ride silent and smooth.
2. Understanding Peloton Bike+ Replacement Parts
Navigating the world of fitness equipment repair can be confusing. The first step is identifying what makes the Bike+ parts unique.
Difference Between Peloton Bike vs. Bike+ Parts
While they look similar, many internal and structural components are not interchangeable:
The Screen: The Bike+ uses a 23.8″ rotating touchscreen with different mounting screws and power requirements (USB-C) compared to the original’s 21.5″ fixed screen. Resistance System: The Bike+ features a digital auto-resistance motor.
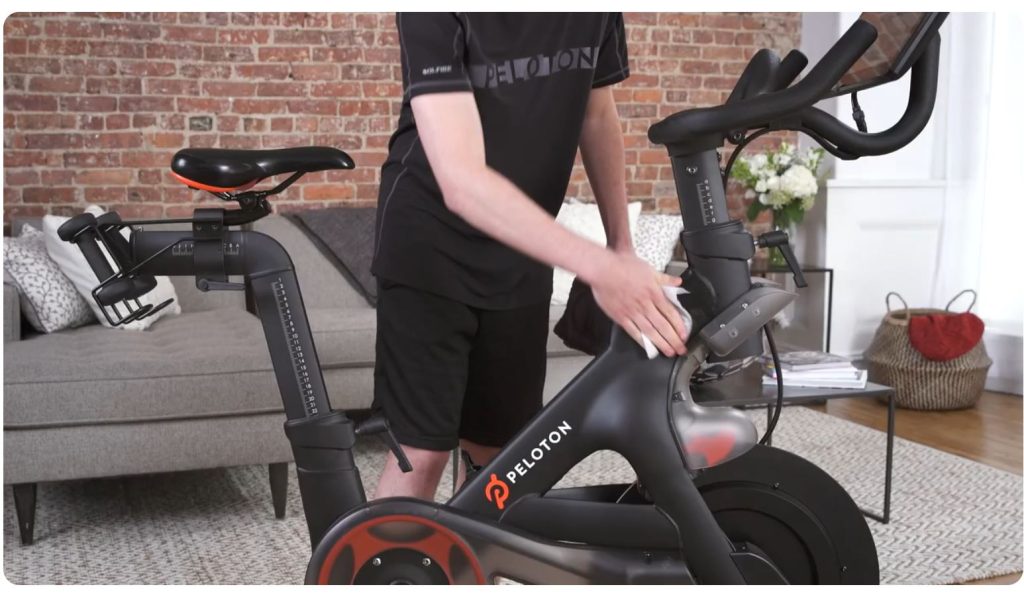
Unlike the original bike’s manual tension cable, the Plus uses an electronic actuator that requires specific wiring. Hardware: Items like the water bottle holder, weight holders, and even the adjustment knobs are specifically designed for the Bike+ frame geometry and are often labeled “Not compatible with Bike.”
OEM vs. Third-Party Replacement Parts
- OEM (Original Equipment Manufacturer): These are official parts sold by Peloton. They are the only parts guaranteed to fit perfectly and maintain your warranty.
- Third-Party: You may find pedals or power adapters on sites like Amazon. While often cheaper, using non-Peloton electrical components can risk damaging the sensitive tablet, and third-party pedals may have different threading tolerances.
When You Should Replace vs. Repair
Repair Minor issues like a loose seat, squeaky pedals (lubrication), or screen glitches (software reset) can usually be repaired without new parts.
Replace Components like flywheel bearings, pedals, and power cables should be replaced entirely once they show signs of failure. Bearings, for example, cannot be “serviced” effectively once they start grinding.
How Often Peloton Bike+ Parts Wear Out
Even with perfect care, certain parts have a “shelf life” based on usage:
| Part | Replacement Interval | Sign of Wear |
| Pedals | Every 12 months | Clicking sounds or difficulty clipping in/out. |
| Cleats (on shoes) | Every 6–12 months | Unexpected releasing or “float” feeling. |
| Flywheel Bearings | Every 2,500+ miles | Loud humming or grinding noise. |
| Drive Belt | Every 3–5 years | Slipped feeling during heavy resistance. |
| Tablet Cables | As needed | Intermittent power or flickering screen. |
3. Complete Peloton Bike Plus Parts List
3.1 Peloton Bike Replacement Pedals
The Bike+ comes standard with Look Delta-compatible aluminum pedals.
Types: While they use the “Delta” cleat standard, they are distinct from the pedals on the original Bike in their internal bearing design.
Signs of Wear: Clicking, squeaking, or a “gritty” feeling while pedaling. If you feel excessive “float” (your foot moving too freely), the tension springs may be worn.
Third-Party Info: Most road cycling pedals (SPD, Look Keo) use the same 9/16″ threading, making them compatible, but sticking to OEM Delta pedals maintains the intended experience.
Cost: Expect to pay $60–$75 for a replacement set.
3.2 Peloton Bike Seat Replacement Parts
The Bike+ features an upgraded sports series saddle with a deeper ergonomic channel than the standard bike.
- Standard vs. Comfort: Peloton offers a “Performance” saddle (standard) and a “Comfort” saddle (wider/softer).
- Aftermarket: Any standard cycling seat with a twin-rail mount will fit. Brands like Selle Royal or Cloud-9 are popular for those seeking extra padding.
3.3 Peloton Bike Seat Slider
The seat slider allows for fore/aft (front to back) adjustments. Common Problems: The slider can become “stuck” due to sweat corrosion or the L-handle stripping. Compatibility: The Bike+ seat slider is a unique assembly. Note: As of late 2025, there was a voluntary recall for certain Bike+ seat posts (Model PL02); always check your serial number on the Peloton website to see if you are eligible for a free replacement.
3.4 Peloton Bike Handlebars & Adjustment Parts
The handlebars on the Bike+ house the front-facing speakers and the swivel mount for the screen.
- Loose Handlebars: Often caused by a loose L-handle or worn plastic sleeves inside the frame.
- Replacement Parts: You can order replacement L-handles, sleeves, and the handlebar post bolts individually if they become cross-threaded or stripped.
3.5 Peloton Bike Resistance System Parts
Unlike the manual “friction” feel of the original, the Bike+ uses a digitally controlled magnetic resistance system.
- Auto-Follow Motor: If your resistance doesn’t change when the instructor calls out a range, the internal motor/actuator may need replacement.
- Calibration: The Bike+ supports auto-calibration via the “Home Installation” menu in settings. If you replace the sensor board or motor, a digital recalibration is mandatory.
3.6 Peloton Bike Frame & Hardware Components
Small hardware keeps the 140lb machine stable.
- Leveling Feet: These often wear out if the bike is moved frequently. They are essential for preventing the “wobble” that causes frame stress.
- Stabilizers: The front stabilizer (with wheels) and rear stabilizer are secured by 6mm Allen bolts. Check these every 6 months to ensure they haven’t vibrated loose.
4. Peloton Bike Parts Diagram (Visual Explanation)
Understanding the “skeleton” of your bike makes DIY repairs significantly less intimidating.
4.1 Peloton Bike Parts Diagram Overview
A standard diagram labels the Flywheel (G), Drive Belt (J), and Crank Arms (L).
- Why Use a Diagram? When ordering parts, saying “the knob thingy” isn’t helpful. Using the correct terms like “Resistance Actuator” or “Seat Post Sleeve” ensures you get the right part from support.
4.2 Peloton Bike Plus Parts Diagram vs. Standard Bike
There are critical “No-Fly Zones” where parts are not interchangeable:
- Digital Actuator: The Bike+ has a motorized brake; the standard bike has a cable-pull brake.
- Monitor Mount: The Bike+ uses a swivel-mount system; the standard bike uses a fixed-tilt bracket.
- Internal Wiring: The Bike+ uses USB-C architecture for power and data; the original bike uses a proprietary DC barrel jack.
5. Peloton Tread Parts List
If you are a multi-equipment household, understanding the Peloton Tread maintenance schedule is vital, as treadmills involve higher friction and more mechanical wear than bikes.
- Walking Belt: Unlike the Bike+ drive belt, the Tread belt is a high-wear item that may need alignment or tensioning (using a 6mm Allen key) if it begins to slip or veer.
- Safety Key: A critical safety component. Without this magnetic key, the Tread will not operate. These are easily lost and are a common replacement part.
- Deck Springs/Bushings: These provide the “cushion” in the Tread’s impact-absorbing deck. If the Tread starts feeling “stiff” or makes a loud banging noise, these internal dampers may need replacement.
- Difference from Bike+: Tread parts are largely focused on vibration dampening and motorized incline, whereas Bike+ parts focus on magnetic resistance and rotational mechanics.
6. Best Back Parts for a Peloton
Many users search for “back parts” when they experience instability or discomfort. In Peloton terminology, this usually refers to the rear stabilizer and the seat assembly.
- Rear Stabilizer: This is the horizontal bar at the back of the bike. It features leveling feet that must be adjusted to ensure the bike doesn’t “rock” during heavy climbs.
- Seat Post & Slider: The “back” of the riding interface. Issues here usually involve a slipping seat post or a slider that won’t lock, often caused by a stripped L-handle.
- Improving Posture: Replacing a worn seat slider or tightening the rear stabilizer can eliminate the “wobble” that forces your back to overcompensate, significantly improving long-term comfort.
7. What Are the Different Types of Back Parts?
To find the right part, you must categorize it by its function:
- Structural Back Parts: The Rear Stabilizer and the End Caps. These protect your floors and keep the frame rigid.
- Adjustment Back Parts: The Seat Post, L-Handles, and Plastic Sleeves. These are the parts you touch to fit the bike to your body.
- Safety-Critical Rear Parts: The Leveling Feet. If one is missing or broken, the bike can tip or cause structural frame cracks over time.
8. Tools Needed to Service a Peloton Bike
Most Peloton Bike+ units come with a basic toolkit, but for advanced “self-service” repairs, you may need to supplement your kit.
8.1 Basic Tools Required
- Allen Keys (Hex Wrenches): Specifically 3mm, 4mm, 5mm, and 6mm. These cover 90% of the bolts on the bike, from the water bottle holders to the stabilizer bars.
- Wrenches: A 13mm and 15mm wrench are standard for adjusting the seat and pedals.
- Screwdrivers: A Phillips #2 is occasionally needed for the plastic belt guard or the DC jack cover.
8.2 Optional Tools for Advanced Repairs
- Torque Wrench: Crucial for the stabilizer bolts. Over-tightening can strip the frame, while under-tightening causes noise.
- Pedal Wrench: A specialized thin wrench that provides the leverage needed to remove pedals that have “seized” over time.
- Lubricants: High-quality White Lithium Grease for pedal threads or a silicone-based spray for the leather brake pad (on original bikes).
8.3 Safety Tips Before Servicing
Important: Always power off and unplug your Bike+ before any internal maintenance.
- Protect the Screen: If you are tipping the bike to replace stabilizers, remove the touchscreen or wrap it in a heavy towel/blanket to prevent cracking.
- Warranty Considerations: DIY repairs on the Digital Resistance Motor or Tablet may void your warranty. Always check with Peloton Support if your bike is less than 12 months old.
9. Where to Order Peloton Bike Replacement Parts
When your bike is out of its initial 12-month warranty, you have three primary avenues for sourcing parts.
9.1 Official Peloton Replacement Parts
Ordering directly from Peloton is the safest route, especially for electrical or resistance components.
- Pros: Guaranteed compatibility; maintains any remaining extended warranty; includes a 30-day (or remaining original) warranty on the part itself.
- Pricing: Small hardware (screws, caps) typically starts at $13–$26. Larger assemblies like the Bike+ Seat Slider are around $37, while the Touchscreen is a premium replacement at $650.
- How to Order: Most small kits (Water Bottle Holders, Pedal sets) are available on the official Peloton shop. For complex internal parts (Sensor Boards, Hubs), you must contact Member Support.
9.2 Third-Party & Aftermarket Parts
While Peloton recommends only original parts, certain “wear items” can be sourced elsewhere.
- Trusted Stores: Sportsmith is a widely recognized vendor for gym-quality replacement bearings and belts.
- Amazon Compatibility: Great for pedals and saddles. Look for “9/16 thread” for pedals.
- What to Avoid: Never buy third-party Power Adapters or Internal Cables. The Bike+ is sensitive to voltage fluctuations; a “cheap” $20 power brick from Amazon can fry your $650 monitor.
9.3 Local vs. Online Ordering
- Online: Best for price transparency and tracking. Peloton shipping is generally fast but can be expensive for small hardware.
- Local Techs: If you are in a major metro area, independent bike technicians often stock “universal” parts like bearings or can facilitate a Peloton-authorized repair faster than shipping a part yourself.
10. Common Peloton Bike Plus Replacement Issues & Fixes
Don’t buy a part until you’ve confirmed the symptom. Many “broken” parts just need a 5-minute adjustment.
Clicking Pedal Noise
- The Problem: A rhythmic “click” every time you rotate the crank.
- The Fix: First, tighten the cleats on your shoes (the #1 cause of clicking). If the noise persists, check the pedal-to-crank arm connection with a 15mm wrench. If the pedal itself has internal “play,” it’s time to order a new set.
Loose Seat or Wobbling Frame
- The Problem: The bike feels unstable during out-of-saddle climbs.
- The Fix: Check the Leveling Feet on the rear stabilizer. If a rubber foot is cracked or missing, the frame will flex and eventually crack. If the seat is wobbling, tighten the L-handle on the seat slider. If the handle spins without tightening, the internal threads are stripped and the slider assembly needs replacement.
Resistance Not Changing (Bike+ Specific)
- The Problem: You turn the knob, but the “Target Resistance” on screen doesn’t move.
- The Fix: This is often a cable issue. Check the USB-C cable behind the brake shroud and the one tucked under the Peloton logo on the frame. If cables are secure, perform a Home Calibration in the settings menu. If it fails, the Digital Actuator (resistance motor) likely needs replacement.
Errors Caused by Misinstalled Parts
- The Problem: Screen shows “Error X0101” or no metrics.
- The Fix: This usually happens after a monitor or handlebar replacement. Ensure the USB-C cable is plugged into the middle port on the back of the screen. Using the side ports will provide power but will not transmit your riding data.
Maintaining the mechanical integrity of your Peloton Bike+ requires moving from a “reactive” mindset (fixing things when they break) to a “proactive” one. Since the Bike+ features more electronic components than the original, consistent care is the only way to avoid expensive out-of-warranty repairs.
11. Maintenance Tips to Extend Part Lifespan
Sweat is the #1 “bike killer.” Its salt content corrodes metal and destroys electronic sensors. Follow this schedule to protect your investment:
Weekly Cleaning Routine
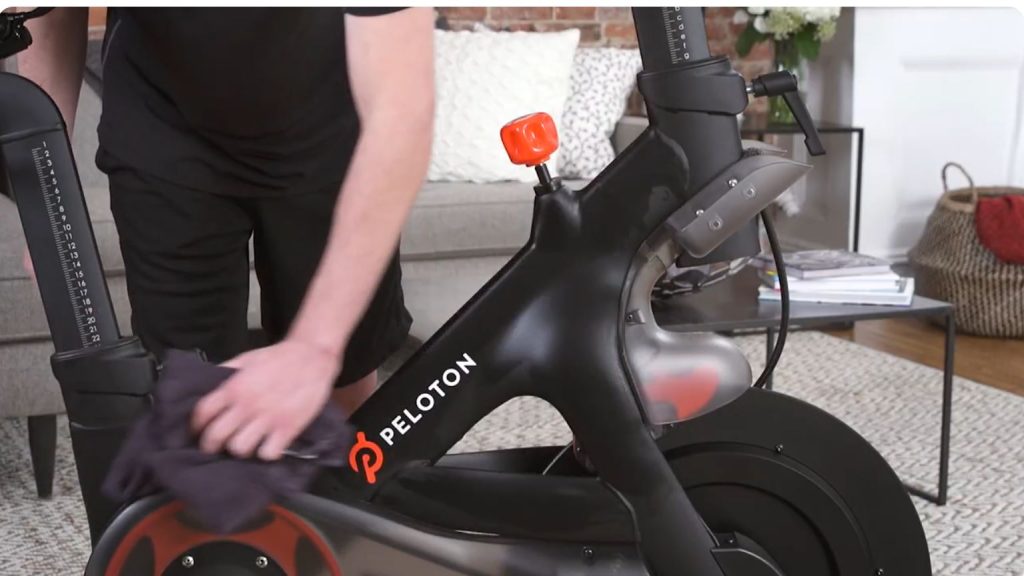
- Wipe Down Everything: Use a microfiber cloth dampened with a mild, diluted dish soap or non-bleach disinfectant wipes. Pay special attention to the “sweat path”: the handlebars, the flywheel, and the base stabilizers.
- Vacuum the Area: Dust and pet hair can be sucked into the belt guard and flywheel magnets, causing grinding noises over time.
Monthly Bolt Checks
- The “Snug” Test: Using your 3mm to 6mm Allen keys, check the tightness of the stabilizer bolts, seat screws, and handlebar post.
- Pedal Tightness: Use a 15mm wrench to ensure pedals are fully seated. A loose pedal can strip the threads on your crank arm, a repair that costs significantly more than a new set of pedals.+1
Storage Environment Tips
- Climate Control: Keep your Bike+ in a room between 65–75°F. High humidity in garages or basements can lead to rust on the flywheel and “fogging” inside the touchscreen.
- Direct Sunlight: Avoid placing the bike in direct sun, which can overheat the tablet and fade the plastic shrouds.
12. FAQs
Which Peloton Bike+ parts wear out the fastest?
Pedals and cleats are the most frequent “wear” items. Internally, flywheel bearings tend to be the first major mechanical component to fail (usually after 2–3 years of heavy use).
Are Peloton Bike+ replacement parts expensive?
Standard hardware like knobs and screws are affordable ($13–$37). However, the Bike+ Digital Resistance Motor and the 23.8″ Touchscreen are the most expensive components, ranging from $150 to $650+.
Can I replace Peloton parts myself?
Yes. Peloton categorizes many repairs as “Member-friendly,” such as replacing the pedals, seat, or even the touchscreen. However, complex internal issues like the Bottom Bracket or Drive Belt may require a certified technician.
Are Peloton Bike+ parts interchangeable?
Mostly no. While the pedals and seat can be swapped, the Bike+ resistance system, monitor mount, and power cables are unique and will not work with the original Peloton Bike.
How long do Peloton pedals last?
Peloton officially recommends replacing pedals annually for safety. While many home users get 2+ years out of them, you should replace them immediately if you hear clicking or feel “play” in the pedal axle.
13. Conclusion
Your Peloton Bike+ is a precision machine, not just a stationary cycle. By staying ahead of wear and tear specifically regarding pedals, seat sliders, and electronics you ensure that your 45-minute “Power Zone” ride isn’t interrupted by a mechanical failure.
Final Buying Advice: Always prioritize OEM parts for electrical components to protect your bike’s computer. For comfort items like seats or pedals, high-quality third-party options are a safe way to customize your ride.

- 10 Best Electric Hydraulic Jack For Car Review (October 2026) - October 12, 2026
- 10 Best Electric Jack For Car Review (October 2026) - October 12, 2026
- 10 Best Jack For Electric Vehicle Review (October 2026) - October 12, 2026