How to Fix a Kids Bike Chain That Fell Off (Step-by-Step Guide)

To fix a kids bike chain that fell off, flip the bike upside down so it rests on the seat and handlebars.
For a single-speed kids bike, loosen the rear axle bolts, slide the wheel slightly forward, loop the chain back over the chainring teeth.
Then pull the rear wheel back until the chain has about half an inch of up-and down movement, and retighten the bolts firmly while keeping the wheel straight.
For a geared kids bike, push the rear derailleur arm forward to create slack, hook the chain onto the front chainring starting at the bottom, then slowly hand-pedal forward and the chain will seat itself automatically. Always check chain tension and wheel alignment before letting your child ride again
2. First, Know What Type of Kids Bike
The Fix Method Is Completely Different Depending on Your Bike — Start Here
Before you touch the chain, spend 30 seconds identifying which type of kids bike you’re dealing with. A single-speed fix done on a geared bike — or vice versa — can make the problem worse. Here’s how to tell them apart at a glance.
The Three Types of Kids Bikes
| Bike Type | Common Wheel Size | Key Features | Chain Fix Method |
|---|---|---|---|
| Type A — Single-Speed / No Gears | Under 20″ | One gear, coaster brake, no derailleur, no shifters | Rear axle slack method |
| Type B — Geared Kids Bike (Shimano) | 20″ and above | Multiple speeds, visible rear derailleur, handlebar shifters | Derailleur arm method |
| Type C — Budget Brand (Royal Baby etc.) | Varies | Single-speed, basic tensioner, no derailleur | Tensioner adjustment method |
How to Identify Your Bike in 10 Seconds
- Look at the rear wheel. If you see a cage-like mechanism with two small pulleys hanging below the cassette — that’s a derailleur. Your bike is Type B (geared).
- Look at the handlebars. If there are twist-grip or lever shifters, it’s a geared bike. If the handlebars are plain with only brake levers (or nothing at all), it’s single-speed.
- Check the rear hub. A large, wide hub with no external gears is the hallmark of a coaster brake single-speed — the most common type for kids under 7 or 8.
- Check the brand. Royal Baby, Huffy, and most entry-level supermarket bikes are almost always Type C single-speed with a basic chain tensioner bolt rather than a sliding axle.
3. Why Does a Kids Bike Chain Keep Falling Off?
Understanding the Root Cause Stops It From Happening Again Not Just Today
A bike chain falls off due to poor chain tension, misaligned gears, worn sprockets, or damaged derailleur components. For kids bikes specifically, the causes tend to be more mechanical and more basic than on adult bikes and that’s actually good news, because they’re easier to fix permanently once you identify them.
The Most Common Culprits at a Glance
| Cause | Bike Type Affected | How to Spot It | Urgency |
|---|---|---|---|
| Loose rear axle nuts | Single-speed (Type A & C) | Wheel shifts sideways or forward under pedaling | 🔴 Fix immediately |
| Chain too long or stretched | All types | Excessive slack, chain sags between sprockets | 🔴 Fix immediately |
| Worn chainring or cassette teeth | All types | Teeth look narrow, pointed, or “shark finned” | 🔴 Replace parts |
| Misaligned rear wheel | All types | Wheel sits off-centre in the frame dropouts | 🟡 Fix before next ride |
| Stiff or rusted chain links | All types | Chain doesn’t flex smoothly, jumps or skips | 🟡 Lube or replace |
| Worn or slack derailleur cable | Geared (Type B) | Shifting is slow, imprecise, or doesn’t engage | 🟡 Adjust cable tension |
| Pedaling backward repeatedly | Single-speed coaster brake | Classic kid habit on coaster brake bikes | 🟢 Teach the child |
Breaking Down Each Cause
- Loose rear axle nuts are the single most common cause on single-speed kids bikes. The nuts holding the rear axle gradually work loose — especially after a bump or a fall — which allows the wheel to creep forward in the frame. This shortens the distance between the two sprockets and creates excess chain slack that eventually causes a drop.
- A chain that’s too long or has stretched with use creates slack even when the wheel is properly positioned. Kids chains stretch faster than adult chains because they’re lower quality and subjected to hard pedaling, sudden stops, and the occasional dragging of the chain along the ground.
- Worn chainring or cassette teeth lose their sharp, square profile over time and become narrow and pointed — often called “shark fin” wear. A bicycle normally drops a chain when the teeth have worn and become narrow, or when the chain has developed a bad link and stretched beyond its usable length. A worn chain on worn sprockets is almost guaranteed to drop repeatedly until both are replaced.
- Rear wheel misalignment after a bump or fall is extremely common with kids bikes. If the wheel isn’t sitting squarely in the frame dropouts — even slightly off on one side — the chain runs at an angle instead of straight, and will eventually walk itself off the sprocket.
- Stiff chain links caused by rust or aggressive shifting fail to curve smoothly around the cassette and derailleur pulleys. A stiff link will cause a noticeable click or jerk with every rotation — and eventually that jerk becomes a chain drop.
- Budget shifters losing cable tension is a Type B issue. On cheaper geared kids bikes, the derailleur cable stretches or the barrel adjuster loosens mid-ride, which throws off indexing and can push the chain beyond the outermost or innermost gear and off the cassette entirely.
- Pedaling backward is worth its own mention because it’s so specific to kids. On coaster brake bikes, the chain tension works in one direction only. Kids who habitually pedal backward to engage the brake — or who spin the pedals backward out of habit routinely dislodge the chain. This isn’t a mechanical fault; it’s a riding habit worth addressing.
Section 4 — Tools You’ll Need
You Might Already Have Everything Required — Here’s What to Gather Before You Start
The good news is that putting a kids bike chain back on requires very little. Most fixes can be done with one basic tool — and in a pinch, with no tools at all. Here’s what helps.
Tool Checklist
| Tool | Used For | Essential? |
|---|---|---|
| 15mm wrench or socket | Loosening and tightening rear axle nuts (single-speed) | ✅ For single-speed bikes |
| Gloves or a rag | Keeping hands clean during chain handling | 🟡 Recommended |
| Chain lubricant | Re-lubricating chain after reseating and inspection | 🟡 Recommended |
| Bike stand or upturned bike | Holding the bike steady while you work | 🟡 Helpful |
| Zip ties | Temporary chain keeper if guide is broken or missing | 🟡 Optional |
| A stick or leaves | Emergency hand protection from grease on the trail | ✅ If no tools available |
For single-speed bikes (Type A & C), the only tool you genuinely need is a 15mm wrench or socket to loosen and retighten the rear axle nuts. Without it, you can still reseat the chain — but you can’t properly tension it, and it will fall off again.
For geared bikes (Type B), no tools are required at all for a standard reseating. The entire fix is done by hand using the derailleur arm to create slack.
Gloves are worth it. Bike chain grease is notoriously difficult to remove from skin and clothing and kids are very good at touching things immediately after you’ve handled a greasy chain. A rag, disposable gloves, or even a plastic bag over your hand works fine.
Zip ties as a temporary chain guide are a genuine trail hack. If your child’s chain guide is cracked or missing and the chain keeps walking off the inboard side, a zip tie looped around the chain and frame tube isn’t a permanent fix — but it will get you home.
5. How to Fix a Single-Speed Kids
The Complete Step-by-Step Fix for Bikes Without Gears — Including Royal Baby and Coaster Brake Models
This is the core fix for Type A and Type C bikes — single-speed kids bikes with no derailleur. This method uses the rear axle to create chain slack, reseat the chain, then re-tension everything properly before riding. It takes about five minutes with the right tool.
What You’ll Need
- 15mm wrench or socket
- A rag or gloves
- Somewhere stable to work (bike upside down on a flat surface)
Step-by-Step Fix
Step 1 — Flip the bike upside down. Rest the bike on its seat and handlebars on a flat surface. This keeps the bike stable and gives you clear access to both the chain and the rear axle from above. Remove any accessories clipped to the handlebars first so they don’t get scratched.
Step 2 — Loosen the rear axle nuts and slide the wheel slightly forward. Using your 15mm wrench, loosen the nut on both sides of the rear axle — just enough so the wheel can slide. Push the wheel forward slightly within the frame dropouts. This shortens the distance between the two sprockets and creates the slack you need to get the chain back on without forcing it.
Step 3 — Seat the chain on the rear sprocket first. Lift the loose chain and loop it over the top of the rear sprocket. Get 3–4 teeth engaged cleanly before moving to the front. Trying to do both sprockets at once is the most common mistake — always start at the rear.
Step 4 — Loop the chain over the front chainring. Once the rear is seated, bring the remaining chain up and over the front chainring. At this point it may feel slightly slack and loose — that’s correct. Don’t try to tension it by pulling the wheel back yet.
Step 5 — Pedal slowly by hand to fully seat the chain. Reach around and turn the pedal slowly by hand — one or two full rotations. This walks the chain around both sprockets and ensures it’s sitting properly in every tooth. Watch the chain as it rotates and check for any links that are jumping or sitting incorrectly.
Step 6 — Pull the wheel back to set correct tension. Slide the rear wheel backward within the dropouts until there is approximately 12–15mm (half an inch) of chain slack when pressed down at the midpoint. Not too tight — a chain under excessive tension will snap or wear the bearings. Not too loose — excess slack will drop again immediately.
Step 7 — Tighten the axle nuts evenly, keeping the wheel straight. Before fully tightening, eyeball the rear wheel from behind to confirm it sits centred in the frame — equal gap on both sides between the tyre and the chainstays. Tighten the right nut partially, then the left, then alternate until both are fully tight. An off-centre wheel is one of the leading causes of repeat chain drops.
Step 8 — Flip upright and test before your child rides. Turn the bike right-side up and spin the pedals by hand for a few rotations. Watch the chain travel through its full cycle. Then do a slow roll test across a few metres before handing it back. The chain should run quietly, smoothly, and without any jumping.
Quick-Reference Summary
| Step | Action | Key Detail |
|---|---|---|
| 1 | Flip bike upside down | Rest on seat and handlebars |
| 2 | Loosen axle nuts, slide wheel forward | Just enough to create slack |
| 3 | Seat chain on rear sprocket first | 3–4 teeth engaged before moving on |
| 4 | Loop chain over front chainring | Don’t tension yet |
| 5 | Pedal slowly by hand | Confirms chain is properly seated |
| 6 | Pull wheel back to set tension | 12–15mm / half an inch of play |
| 7 | Tighten axle nuts evenly | Check wheel is centred in frame |
| 8 | Test spin before child rides | Watch for jumping or noise |
6.How to Fix a Geared Kids Bike Chain
The Step-by-Step Fix for Kids Bikes With a Rear Derailleur and Multiple Speeds
This fix covers Type B geared kids bikes — any bike with a Shimano (or similar) rear derailleur and handlebar shifters. No tools are required for a standard reseating. The entire fix is done by hand using the derailleur arm to create slack. It takes about three minutes once you know what you’re doing.
What You’ll Need
- Your hands (no tools required for a standard fix)
- A rag or gloves
- About three minutes
Step-by-Step Fix
Step 1 — Flip the bike upside down. Same starting point as the single-speed fix. Rest the bike on its seat and handlebars so you have clean access to the drivetrain from above.
Step 2 — Downshift into the lowest front gear. Use the left handlebar shifter to move the chain into the lowest (smallest) front chainring setting. Being in the lowest gear positions the chain on the smallest chainring, which reduces tension and gives you the slack needed to reseat the chain. If the chain has fallen completely off, just set the shifter to its lowest position so the derailleur is ready to receive the chain.
Step 3 — Push the rear derailleur arm forward to create slack. Using one hand, push the rear derailleur arm forward — away from the rear of the bike, toward the handlebars. This compresses the derailleur spring and creates a significant amount of chain slack, giving you room to work the chain back onto the sprocket without forcing it.
Step 4 — Place the chain back onto the correct gear. While holding the derailleur forward with one hand, use your other hand to wrap 2–3 fingers around the chain and guide it onto the appropriate rear cog — aim for the largest rear cog (lowest gear) for the easiest reseating. Then bring the front of the chain up and onto the front chainring, ensuring the chain engages cleanly into 10 to 15 teeth before releasing the derailleur arm.
Step 5 — Pedal backward then forward by hand to seat the chain. Release the derailleur arm slowly and pedal backward one full rotation by hand. Then pedal forward two or three rotations. This walks the chain around the full system and confirms it’s seated on both sprockets and running correctly through the derailleur.
Step 6 — If the chain fell off the derailleur entirely, re-thread it. If the chain came off the derailleur pulleys completely — not just the sprocket — you’ll need to re-thread it manually. Feed the chain along the guide pulley (the top of the two pulleys on the derailleur), then thread it inside the derailleur cage between the tension pulley and the guide pulley. The chain should form a rough S-shape through the derailleur cage when correctly threaded.
Step 7 — Flip upright and test-shift through all gears. Turn the bike right-side up and shift slowly through every gear combination before your child rides. Listen for any clicking, jumping, or hesitation that indicates the derailleur cable tension needs adjustment. If the chain runs cleanly through all gears — you’re done.
Quick-Reference Summary
| Step | Action | Key Detail |
|---|---|---|
| 1 | Flip bike upside down | Stable work position |
| 2 | Downshift to lowest front gear | Reduces chain tension for easier reseating |
| 3 | Push derailleur arm forward | Creates slack to work with |
| 4 | Guide chain onto largest rear cog, then front chainring | 10–15 teeth engaged before releasing |
| 5 | Pedal backward once, then forward 2–3 times | Confirms chain is fully seated |
| 6 | Re-thread through derailleur cage if fully dislodged | Guide pulley first, then tension pulley |
| 7 | Test-shift all gears before riding | Listen for jumping or hesitation |
⚠️ If the chain keeps falling off after this fix, the most likely cause is derailleur cable stretch, a bent derailleur hanger, or a chain that’s simply too worn and stretched to stay seated. See Section 7 for how to diagnose whether your chain needs replacing entirely.
Section 7 — How to Fix Without Tools (Emergency Park-Side Fix)
Your Child’s Chain Just Dropped Mid-Ride and You Have Nothing in Your Hands Here’s What to Do
You’re at the park. Your child’s chain just fell off. You have no tools, no bag, and two other kids to watch. This section is for exactly that situation. It’s not a permanent fix it’s a get-home-safely fix.
Emergency Fix at a Glance
| Bike Type | Emergency Method | Can You Ride Home? | What to Avoid |
|---|---|---|---|
| Single-speed (no gears) | Push wheel forward by hand, reseat chain manually | ✅ Yes — ride slowly | Hard acceleration, kerbs |
| Geared bike (Shimano) | Push derailleur, reseat on largest rear cog | ✅ Yes — avoid shifting | Any gear changes until home |
| Chain dragging on ground | Do not ride — chain is too loose or broken | ❌ No | Any riding at all |
The Park-Side Fix — Step by Step
- Protect your hands first. Pick up a stick from the ground or grab a handful of large leaves. Use these to handle and push the chain into position without coating your hands in grease. It works better than you’d expect.
- For a single-speed bike: Push the rear wheel forward by hand within the dropouts — just enough to create a little slack. Loop the chain over the rear sprocket with your stick or fingers, then over the front chainring. Pedal forward slowly by hand to seat it. Ride home slowly without hard pedaling or sudden stops. The axle nuts are still loose, so the tension will be off — but it’ll hold for a gentle ride home.
- For a geared bike: Push the derailleur arm forward with one hand to create slack. Use the other hand to guide the chain back onto the largest rear cog. Pedal forward gently to seat it. Do not shift gears at any point on the way home. Shifting with an improperly tensioned or freshly reseated chain on a budget derailleur is the fastest way to drop the chain again.
- Signs it won’t hold for the ride home:
- The chain sags visibly below the chainstay even after reseating
- The chain re-drops as soon as you attempt to pedal forward
- You can feel a stiff or kinked link as you rotate the pedals by hand
- The chain makes a scraping or grinding noise when pedaled
Section 8 — How to Tighten a Kids Bike Chain (Prevent It Falling Off Again)
(Target: “how to tighten chain on bike with gears” + “kids bike chain keeps falling off”)
If your child’s bike chain keeps falling off, proper tension and alignment are the real solution — not just putting the chain back on. The fix depends on whether the bike is single-speed or geared.
The Half-Inch Rule for Single-Speed Kids Bikes
For most single-speed kids bikes, the chain should have 12–15mm (about ½ inch) of up-and-down movement at the midpoint.
Too loose → chain falls off
Too tight → damages bearings and makes pedaling hard
This small adjustment makes a huge difference in preventing repeat chain drops.
How to Use Rear Axle Bolts to Adjust Single-Speed Chain Tension (Step-by-Step)
- Loosen both rear axle nuts slightly.
- Pull the rear wheel straight backward in the frame dropouts.
- Check slack — aim for 12–15mm of movement.
- Ensure the wheel is centered between the frame stays.
- Tighten both axle nuts evenly and securely.
⚠️ Keep the wheel perfectly straight. If it sits crooked, the chain will derail again.
Check That the Chainring Runs True
Spin the pedals slowly. If the front chainring wobbles side to side, the chain will jump off repeatedly.
A bent crank or warped chainring must be straightened or replaced. Even a slight wobble creates inconsistent chain tension.
For Geared Kids Bikes: Derailleur Alignment & Cable Tension
Many 20-inch and larger kids bikes use drivetrains from brands like Shimano.
For these bikes:
- Check derailleur alignment.
- Inspect cable tension.
- Ensure the derailleur hanger isn’t bent (especially after a fall).
Poor alignment is one of the biggest reasons a kids bike chain keeps falling off with gears.
Adjusting the Limit Screws (Preventing Chain Drop)
Every rear derailleur has two small screws marked H (high) and L (low).
- If the chain falls off toward the spokes → adjust the L screw.
- If the chain falls off toward the outside → adjust the H screw.
Turn the screw in small increments (¼ turn at a time) until the chain stays aligned with the cassette.
Limit screws act like guardrails for the chain.
Keep the Rear Wheel Perfectly Straight
Use the frame dropouts or alignment marks as a visual guide.
Both sides must be set equally.
If one side sits farther back than the other, the chain won’t track straight and will continue slipping off.
Section 9 — How to Know If the Chain Needs Replacing
(Target: “bike chain coming off” / worn chain)
Sometimes tightening the chain isn’t enough — the chain itself may be worn out.
Visual Signs of a Stretched Chain
- Chain sags even after adjustment
- Chain skips under pressure
- Uneven tight and loose spots
- Frequent derailments
Chains naturally elongate over time. When they stretch too much, they struggle to stay seated on the cassette.
If the chain keeps coming off while your child pedals hard, elongation is likely the cause.
It Might Not Just Be the Chain
If the chain and sprocket teeth are worn together, replacing only the chain won’t solve the problem.
Check for:
- Hooked cassette teeth
- Worn front chainring
- Weak derailleur pulley spring
If multiple parts show wear, replace the drivetrain together to prevent recurring problems.
Simple Stretch Test Without a Chain Tool
No chain checker? Try this:
- Shift to the smallest rear cog.
- Pull the chain forward off the front chainring.
- If you can expose half a tooth or more, the chain is stretched and needs replacement.
Cost of Replacing a Kids Bike Chain
Kids bike chains are affordable:
- Basic single-speed chain: $10–$20
- Geared chain: $15–$30
- Professional installation (optional): $10–$25
Replacing early prevents costly cassette damage later.
Section 10 How to Prevent a Kids Bike Chain From Falling Off Again
(Target: “fix bike chain slipping” + prevention)
Prevention is easier than mid-ride repairs.
Check Chain Tension Before Every Ride
It takes 10 seconds.
Lift the chain and confirm it moves only 12–15mm.
Small checks prevent big frustrations.
Clean and Lubricate Regularly
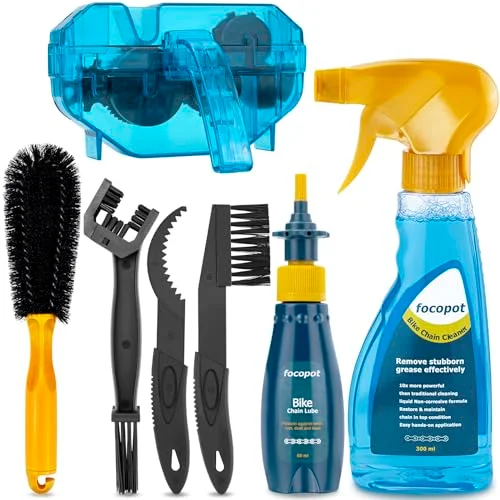
Use a bike-specific degreaser and apply proper chain lubricant.
A clean drivetrain:
- Shifts smoother
- Lasts longer
- Resists rust
- Reduces slipping
Dirt buildup is a major cause of chain derailment on kids bikes.
Inspect the Chain Monthly
Look for rust, stiff links, and excessive slack.
Replacing early prevents:
- Chain drops
- Gear skipping
- Worn sprockets
Teach Proper Pedaling Habits
Kids often pedal backward repeatedly — especially on coaster brake bikes.
Excessive backward pedaling can derail loose chains.
Teach smooth forward pedaling habits instead.
Check Rear Axle Bolts Regularly
After a few rides, axle nuts can loosen slightly.
A quick check keeps the wheel aligned and tension correct.
Consider Adding a Chain Guard or Chain Keeper
For younger riders on single-speed bikes, a chain guard reduces derailment risk and keeps clothing clean.
It’s a simple upgrade that prevents many common issues.
Section 11 — FAQs
(Target PAA + Bing Related Searches)
Why does my kids bike chain keep coming off?
Usually caused by:
- Loose rear axle
- Worn or stretched chain
- Misaligned wheel
- Improper derailleur adjustment
How do I fix a Royal Baby bike chain that fell off?
Most RoyalBaby bikes are single-speed.
Loosen the rear axle nuts, pull the wheel backward, reinstall the chain, adjust to 12–15mm slack, and tighten evenly.
Can I Fix a Kids Bike Chain Without Tools?
Yes — temporarily.
You can manually loop the chain back on and roll the bike forward slowly.
However, proper tension adjustment requires basic tools.
How Tight Should a Kids Bike Chain Be?
About 12–15mm (½ inch) of vertical play at midpoint for single-speed bikes.
How Do I Fix a Shimano Geared Kids Bike Chain?
If the bike uses Shimano gears:
- Check derailleur alignment
- Adjust cable tension
- Fine-tune limit screws
- Inspect chain stretch
Why Does the Chain Fall Off Inside?
Usually:
- Chain too tight
- Rear wheel misaligned
- Low limit screw set incorrectly
Why Does the Chain Fall Off Outside?
Often caused by:
- Chain too loose
- High limit screw not properly adjusted
At What Age Do Kids Bikes Get Gears?
Most kids bikes start adding gears at 20-inch wheel size, typically around 6–7 years old, depending on height and riding ability.
Conclusion
Fixing a kids bike chain that keeps falling off isn’t complicated — it just requires proper tension, alignment, and occasional maintenance.
For single-speed bikes:
- Follow the half-inch slack rule
- Keep the rear wheel straight
For geared bikes:
- Adjust derailleur limits
- Maintain cable tension
- Monitor chain wear
The key takeaway: regular tension checks prevent most chain problems before they start.

- Top 10 Best Helmet For A Running Back 2026 - September 16, 2026
- Best Bug Remover For Car Wash 2026 - September 16, 2026
- Best Bug And Bird Poop Remover For Cars 2026 - September 15, 2026