9 Steps Bicycle Saddle Installation Instructions (Beginner-Friendly Guide)

Installing a bicycle saddle the right way is essential for a comfortable, safe, and efficient ride. Whether you’re replacing an old seat or fitting a new one, correct saddle installation ensures proper weight distribution, better pedaling efficiency, and reduced strain on your back, knees, and hips.
A poorly installed saddle can lead to discomfort, numbness, loss of control, and even long-term injury.
Proper bicycle saddle installation involves loosening the seatpost clamp with a 4–6mm Allen key or wrench, removing the old saddle, positioning the new saddle rails securely in the clamp, centering and leveling the saddle, and tightening the bolts to the recommended torque.
Applying a small amount of grease to the bolts helps prevent seizing and makes future adjustments easier.
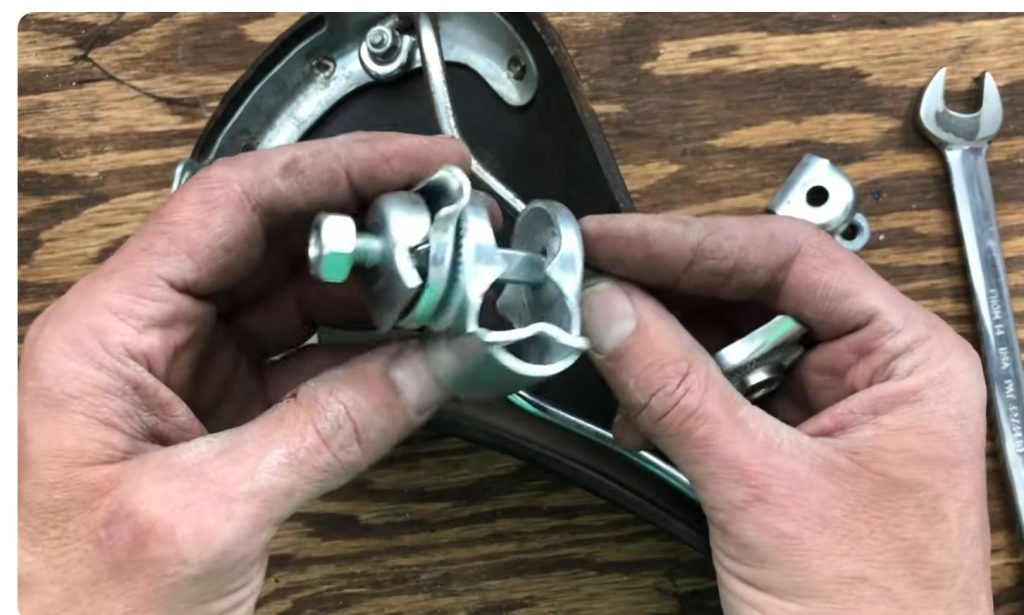
Many beginners make common mistakes such as installing the saddle too high or too low, misaligning the saddle nose, overtightening the clamp, or skipping proper torque settings. These small errors can significantly affect riding comfort and bike performance.
This step-by-step guide is designed for road bike, mountain bike (MTB), and hybrid bike riders who want clear, reliable bicycle saddle installation instructions whether you’re a first-time cyclist or simply upgrading your seat for better comfort and performance.
2. Tools You Need Before Installing a Bicycle Saddle
You don’t need a full mechanic’s workshop to swap a saddle, but having the right tools on hand prevents rounded bolts and frustrated afternoons.
Allen/Hex Keys: Most modern seatposts use a 4mm, 5mm, or 6mm hex bolt. A multi-tool will work, but a T-handle or L-shaped key provides better leverage.
Adjustable Wrench: Only necessary for “plain” seatposts (common on older or entry-level bikes) that use a nut-and-bolt clamp system.
Torque Wrench (Optional but Recommended): If you are working with carbon fiber rails or seatposts, a torque wrench is vital. Over-tightening can crush carbon components, leading to catastrophic failure.
Grease or Assembly Paste: Use a standard bicycle grease for metal-on-metal interfaces. For carbon-on-carbon, use carbon assembly paste (friction paste) to prevent slipping without over-torquing.
Clean Cloth: To wipe away old grit and grime from the seatpost cradle before installing the new gear.
3. Bicycle Seat & Saddle Components
To the casual observer, it’s just a “bike seat.” To a rider, it’s a system of precision parts working in tandem.
What is a Bicycle Saddle?
While often called a seat, the term saddle is more accurate in cycling. It’s designed to support your weight while allowing your legs to move freely. It consists of a shell (the base), padding, a cover, and the rails.
Saddle Rails Explained
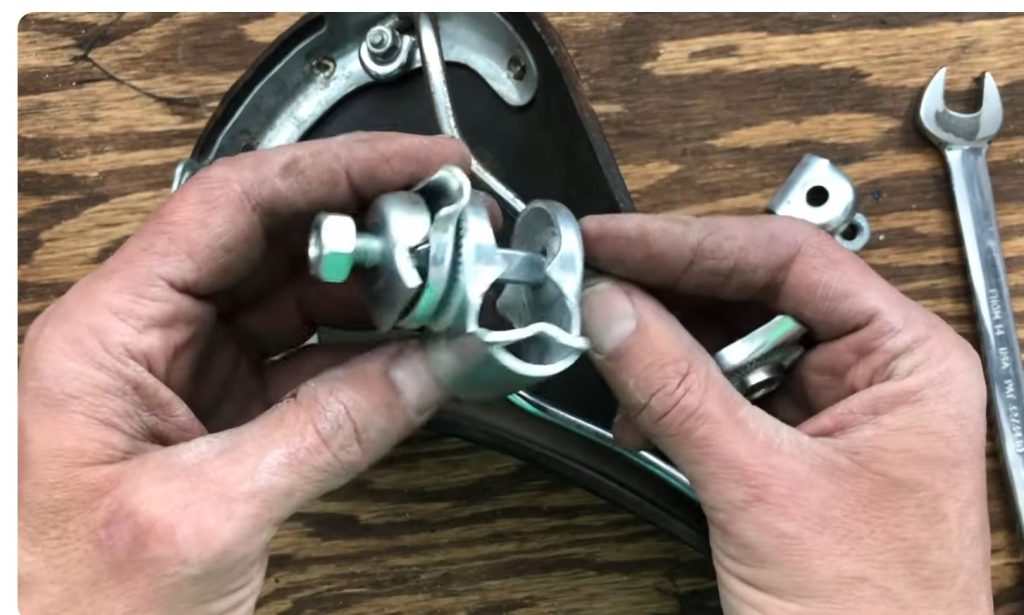
The rails are the two parallel bars on the underside of the saddle that provide the mounting point.
- Materials: Common rails are made of steel, chromoly (CrMo), titanium, or carbon fiber.
- Standard Size: Most rails are 7mm round. However, high-end carbon rails are often 7x9mm oval, which may require a specific seatpost clamp.
Seatpost Basics
The seatpost is the tube that slides into your bike frame. It features a “head” at the top which houses the clamping mechanism.
Rigid Posts: The standard for road and gravel.
Dropper Posts: Common on mountain bikes, allowing you to lower the saddle at the push of a button.
Saddle Clamp & Mount Types
There are three primary mounting styles you’ll encounter:
Single-Bolt (Micro-Adjust): A single vertical bolt through the center. Easy to adjust but can sometimes “tilt” if not tightened properly.
Two-Bolt One bolt at the front and one at the rear. This is the gold standard for precision, allowing you to fine-tune the saddle angle to the millimeter.
Pillar/Plain Mount: An older style where a separate clamp (the “guts”) slides onto a plain metal pipe.
4. How to Remove an Old Bicycle Saddle
If you are upgrading your setup, the removal process is your first step. It is also the perfect time to inspect your seatpost for any signs of fatigue or corrosion.
Bike Saddle Removal Instructions
Removing a saddle is generally straightforward, but older bikes can present challenges.
- Loosen the Clamp: Locate the bolt(s) underneath the saddle. Turn the Allen key counter-clockwise. You do not usually need to remove the bolts entirely—just loosen them enough so the top plate of the clamp can rotate or be lifted.
- Free the Rails: Once the tension is off, wiggle the saddle. If it’s a two-bolt system, you may need to loosen both bolts significantly. Rotate the top cradle plate 90 degrees to lift the rails out.
- Inspect the “Guts”: Take a moment to look at the clamp plates. If they are caked in dry mud or show signs of rust, clean them with your cloth.
Common Stuck Saddle Problems
Sometimes, a saddle feels “welded” to the seatpost even after the bolts are loose. This is often due to galvanic corrosion or dried-up assembly paste.
The Fix Apply a small amount of penetrating oil (like WD-40 or PB Blaster) to the clamp area and let it sit for ten minutes. A gentle tap with a rubber mallet can also help break the “stiction.”
When to Remove the Entire Seatpost
You should remove the entire seatpost from the frame if:
You hear creaking noises while riding (this often comes from the seatpost-to-frame interface).
You are performing a deep clean.
You need more leverage to adjust a stubborn saddle clamp.
Note: If you remove the post, mark your height with a piece of electrical tape first so you don’t lose your perfect fit.
5. How to Install a Bicycle Saddle on a Seatpost
Installing a new saddle is more than just a mechanical task; it is an ergonomic upgrade. Whether you are fitting a sleek racing saddle or a cushioned long-distance seat, the connection between the saddle rails and the seatpost clamp is where comfort meets safety.
A correct installation ensures that your saddle remains stable under pressure, prevents annoying creaks, and preserves the lifespan of your components—especially if you are working with lightweight carbon fiber parts.
How to Install a Saddle on a Seatpost Correctly
The goal is to seat the metal or carbon rails into the “cradles” of the seatpost head. Most modern seatposts use either a single vertical bolt or a two-bolt (fore and aft) system.
- Aligning Saddle Rails: The rails have a “sweet spot” in the middle, often marked with a measurement scale. Avoid clamping at the extreme ends of the rails, as this creates leverage that can lead to rail failure.
- The Temporary Tighten: Before you fully torque the bolts, tighten them just enough so the saddle doesn’t slide under its own weight but can still be moved by hand. This allows you to perform the crucial “fine-tuning” of the angle and fore-aft position.
6. Bicycle Saddle Installation Instructions
Follow these steps for a professional-grade setup that maximizes both performance and comfort.
Step 1: Loosen the Saddle Clamp
If you haven’t already, loosen the bolt(s) on your seatpost. For a single-bolt system, you’ll need to loosen it enough to rotate the top plate. For two-bolt systems, loosen both until the top cradle can be moved out of the way to accept the new rails.
Step 2: Position the Saddle Rails
Place the saddle rails into the lower cradle of the seatpost head. Ensure the rails sit flush in the grooves. If your rails are oval (carbon), confirm your seatpost clamp is compatible with that shape.
Step 3: Center the Saddle on the Clamp
Initially, position the saddle so the clamp is centered on the rails. You can adjust the “fore-aft” (forward and backward) position later, but starting in the center is the safest baseline for weight distribution.
Step 4: Set Initial Saddle Height
Slide the seatpost into the frame to your measured height (using the electrical tape mark you made earlier). If this is a new bike, use the “heel-to-pedal” method mentioned in previous sections to find a starting point.
Step 5: Align Saddle Nose
Look down from the top of the bike. The nose of the saddle must be perfectly straight, pointing directly toward the center of the stem and handlebars. A crooked saddle can lead to hip pain and uneven pedaling.
Step 6: Adjust Saddle Angle (Level Setup)
Place a spirit level (or a level app on your smartphone) across the top of the saddle. For 90% of riders, a dead-level saddle is the best starting point. If you experience pressure, a tiny 1–2 degree downward tilt is acceptable, but avoid extreme angles.
Step 7: Tighten the Clamp Evenly
This is critical for two-bolt systems. Tighten the front and rear bolts in small increments (half-turns).
Front Bolt: Tightening this usually pulls the nose down.
Rear Bolt: Tightening this pulls the nose up.
Torque: If you have a torque wrench, tighten to the manufacturer’s spec (usually 5–8 Nm for two-bolt systems).
Step 8: Check Saddle Stability
Once tightened, grab the front and back of the saddle and give it a firm shake. There should be zero movement or “clicking.” If it moves, the rails are likely not seated properly in the grooves.
Step 9: Test Ride and Fine-Tune
Wear your usual cycling shorts and take a 10-minute ride. Bring your Allen key in your pocket. Often, you won’t notice a slight height or angle issue until you are actually pedaling under load. Don’t be afraid to make 2mm adjustments until it feels perfect.
7. Bicycle Saddle Replacement Instructions
Replacing a saddle is a standard part of bike maintenance. While many riders wait for a catastrophic failure, proactive replacement can prevent physical injury and improve the overall ride quality.
How to Replace a Bike Saddle Step-by-Step
The replacement process follows the removal and installation steps outlined previously, with one critical addition: The Baseline Transfer. Before removing your old saddle, measure the distance from the floor to the top of the saddle and from the saddle nose to the handlebars. This allows you to replicate your existing fit on the new gear.
When Replacement is Necessary
Collapsed Foam: If the padding feels “mushy” or stays compressed after you stand up, the internal structure has failed.
Bent Rails: Even a slight bend in the rails (often from a crash or a heavy landing) can cause permanent hip misalignment.
Cracked Shell: Inspect the underside of the saddle. If the plastic or carbon base shows white stress marks or cracks, it is no longer safe to ride.
Frayed Covers: Torn edges can catch on your cycling shorts, leading to dangerous snags or painful skin abrasions.
Compatibility Tips for New Saddles
Most saddles and seatposts are universal, but watch for these outliers:
Rail Shape: Standard rails are 7mm round. High-end carbon rails are often 7x9mm oval. If your seatpost clamps from the top and bottom, it usually works with both. If it clamps from the sides, you may need a specific “oval rail adapter.”
Cloud 9 Bike Saddle Installation: Cloud 9 saddles are popular for their high-density gel and dual-spring suspension. Because they are often wider and taller than racing saddles, you may need to lower your seatpost significantly to maintain the same leg extension.
8. Saddle Installation for Different Bike Types
While the mechanical steps are similar, the “ideal” position changes based on the geometry of the bike.
Mountain Bike Saddle Installation
On a mountain bike, the saddle spends less time supporting your full weight and more time acting as a point of control.
- Nose Position: Some MTB riders prefer the nose to be pointed down by 1–3 degrees. This makes it easier to climb steep, technical hills without the nose catching on clothing.
- Dropper Post Care: When installing a saddle on a dropper post, never pull upward on the saddle to “test” the height, as this can introduce air into the hydraulic system.
Road & Hybrid Bike Saddle Setup
- Performance (Road): These bikes require a very precise height. The focus is on a consistent, repetitive pedaling motion. Stability is key; any sliding or rocking will cause issues over long distances.
- Comfort (Hybrid): Hybrid riders sit more upright. Because more weight is on the sit bones, the saddle should be positioned slightly further forward than on a road bike to keep the rider’s center of gravity over the pedals.
9. How to Fix Common Bike Saddle Problems
Even with a perfect installation, issues can arise after a few miles of vibration and road shock.
How to Fix a Bike Seat from Moving
If your saddle shifts during a ride, it is almost always a clamp issue.
Loose Clamp: Check your bolts. If they are tight but the seat still moves, you may have reached the “bottom” of the bolt’s thread. You may need a washer or a shorter bolt.
Incorrect Torque: Metal-on-metal interfaces often require 5–10 Nm of torque. Without a torque wrench, “hand tight” is often not enough to resist the leverage of a rider’s body weight.
Worn Clamp Signs: Inspect the grooves in the seatpost head. If the “teeth” that hold the angle are rounded off, the seatpost is compromised and must be replaced.
Saddle Tilting or Sliding Issues
Rail Alignment Mistakes: If the rails are not perfectly centered in the cradle, the clamp cannot apply even pressure. This causes the saddle to “pop” or slide suddenly when you hit a bump.
Clamp Compatibility: If you are using 7x9mm carbon rails in a 7mm-only side-clamp seatpost, the saddle will slide no matter how tight you turn the bolt. Always verify that the “clamping surface” matches the rail diameter.
10. Special Installation Cases
Bicycle saddle installation isn’t always about racing or solo performance. There are specific scenarios like riding with children or dealing with proprietary bike frames that require a different technical approach.
How to Install Bike Seat for Child
Adding a child seat to your bicycle changes the weight distribution and frame stress significantly.
Safety Considerations: Never mount a child seat to a carbon fiber seatpost or a lightweight racing frame unless specifically approved by the manufacturer. The extra weight can cause carbon to snap without warning.
Mounting Differences: Unlike standard saddles that mount to the seatpost head, child seats usually utilize frame-mounted brackets (clamped to the seat tube) or rack-mounted systems (bolted to a rear pannier rack). Ensure you leave at least 10–12 cm of clearance between the seat and the rear wheel to allow the seat’s built-in suspension to move.
Different Bike Seat Mount Types Explained
Understanding your specific hardware is the key to a silent, stable ride.
Single-Bolt Clamp: Found on most entry-level and older bikes. One vertical bolt controls both the fore-aft position and the tilt. It’s simple but can be prone to “slipping” or tilting unexpectedly if hit by a large bump.
Dual-Bolt Clamp: The gold standard for precision. One bolt sits in front and one in back. By tightening one while loosening the other, you can micro-adjust the saddle angle. These provide superior stability and even pressure distribution, making them essential for carbon rails.
Integrated Seatpost Systems: Found on high-end aero road bikes (e.g., Trek Madone). The seatpost is part of the frame itself, and a “seat mast cap” slides over the top. These require specific torque settings and are not interchangeable with standard parts.
11. Saddle Height & Comfort Check
Once your installation is complete, a quick diagnostic check ensures your new setup won’t lead to long-term injury.
Basic Saddle Height Setup Tips
Your saddle height should allow for a 25–35 degree bend in the knee at the bottom of the pedal stroke. If you find yourself “pointing your toes” to reach the pedals, your seat is too high. If your knees feel like they are coming up toward your chest, it’s too low.
Signs Your Saddle Position is Incorrect
Knee Pain (Front): Usually a sign the saddle is too low or too far forward.
Knee Pain (Back): Often a sign the saddle is too high, causing the hamstrings to overstretch.
Lower Back Discomfort: Can be caused by a saddle that is too high (causing the hips to rock) or a saddle that is too far back (increasing the “reach” to the bars).
12. Bicycle Saddle vs. Game Saddles
When searching for “how to remove saddle” or “saddle installation,” the internet occasionally provides results for popular video games like Minecraft or Terraria. It is important to clarify the context to ensure you are getting safe, mechanical advice for your physical bicycle.
Minecraft Context: In the game, a saddle is a loot-only item (or recently craftable in specific 2026 mods) used to ride horses, pigs, or striders. “Removing a saddle” in a game is a button press; removing a bicycle saddle requires mechanical tools and safety checks.
Why Context Matters: While game guides discuss “durability” and “mounting,” they are virtual mechanics. For your safety, always ensure you are following cycling-specific technical guidelines when performing maintenance on your actual bike. A mechanical failure in a game results in a “respawn”; a mechanical failure on the road can result in a serious accident.
13. Final Checklist Before Riding
Before you start riding, complete a final inspection to ensure safety and comfort. These checks take only a few minutes but can prevent serious discomfort or mechanical issues.
Clamp Tightness Check
Confirm that the saddle clamp bolts are fully tightened. Apply firm pressure, but avoid over-tightening, as this can damage the saddle rails or strip the bolts. If the saddle can be twisted by hand, it needs further tightening.
Saddle Alignment Confirmation
Stand behind the bicycle and ensure the saddle is straight and aligned with the frame. A misaligned saddle can lead to uneven weight distribution, knee strain, and poor riding posture.
Safety Test Before Long Rides
Sit on the saddle and gently shift your weight from side to side. Then take a short test ride of a few minutes. If the saddle remains stable and feels comfortable, it is ready for longer rides.
14. Conclusion: Install Once, Ride Comfortably
Correct saddle installation is essential for both comfort and performance. A properly fitted saddle improves posture, reduces fatigue, and prevents common riding injuries.
FAQ
How do you install a bicycle saddle?
To install a bicycle saddle, remove the existing saddle from the seatpost, attach the new saddle rails to the clamp, adjust the saddle height and angle, and tighten the clamp securely. Always test the saddle before extended rides.
Can I install a bike saddle without tools?
Most saddle installations require basic tools such as an Allen key or wrench. While some seatposts allow tool-free height adjustments, proper saddle installation typically requires tools for safety.
Why does my bike seat keep slipping?
A slipping bike seat is usually caused by a loose clamp, worn saddle rails, incorrect seatpost size, or excessive grease on the seatpost. Correct tightening and compatibility checks usually resolve the issue.
Are all bike saddles universal?
Not all bike saddles are universal. While many use standard rails, some saddles require specific clamps or seatposts. Always verify compatibility before purchasing a new saddle.
How tight should a bike saddle clamp be?
The saddle clamp should be tight enough to prevent movement under your weight without damaging the saddle rails. Most manufacturers recommend a torque range of 12–15 Nm. Always follow the manufacturer’s specifications.

- Best Bug And Bird Poop Remover For Cars 2026 - September 15, 2026
- Can Vaseline Work As Wd-40? - September 15, 2026
- Best Bug Remover For Bumper 2026 - September 15, 2026