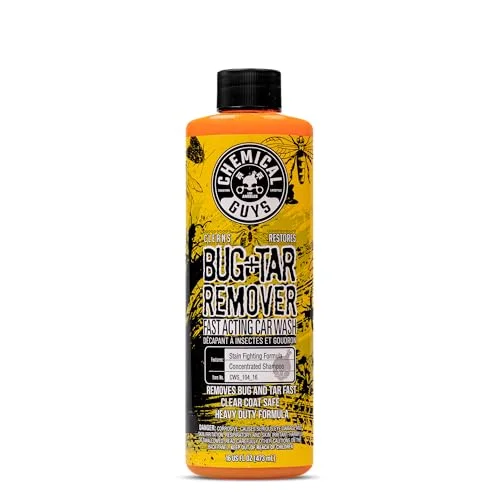
How to Make Bug Remover for Automobiles: Easy DIY Methods

When I drive on highways, especially during warm weather, I often end up with bug splatter across the hood, front bumper, windshield, mirrors, and grille. If I leave those bugs sitting on the car for too long, they become surprisingly difficult to remove.
I have found that I do not always need an expensive detailing product for fresh or moderately dried bug residue. A simple homemade solution using warm water and automotive car-wash soap can loosen the residue enough to remove it without aggressive scrubbing.
In this guide, I’ll show you how I make a basic bug remover for automobiles, how I use it on different surfaces, and which ingredients I avoid to reduce the chance of damaging the paint or trim.
Quick Answer: What Is the Best Homemade Bug Remover for a Car?
For most situations, I start with warm water and a small amount of automotive car-wash soap. I put the mixture in a clean spray bottle, apply it to the bug-covered area, and let it soak for several minutes.
The important part, in my experience, is not trying to wipe dried bugs away immediately. I first soften the residue. Once the bugs become easier to lift, I use a clean microfiber towel and very light pressure.
For stubborn spots, I may need a second application rather than increasing the scrubbing force. This approach is particularly useful on painted surfaces because excessive rubbing can create unnecessary scratches or marring.
What Makes Bug Splatter Difficult to Remove From a Car?
Bug splatter looks harmless when it first lands on a vehicle. The problem starts when it dries.
During a drive, bugs can hit the front of the vehicle at high speed and leave behind a mixture of insect remains and organic residue. Heat from sunlight and the vehicle’s surface can make that residue dry and become more difficult to remove.
I notice the biggest problem on the front-facing areas of my vehicle because these surfaces receive the most direct impact.
Why Dried Bugs Stick to Automotive Paint
When bug residue dries, it becomes much harder than it was when fresh. If the car sits in direct sunlight, the heat can make the residue even more stubborn.
I used to make the mistake of attacking dried spots with a towel. That usually meant more rubbing than necessary.
Now I prefer to soften the residue first. The cleaning solution helps loosen the material so that I can lift it away with much less effort.
This gives me a simple relationship to remember:
Dried bug residue → soaking → softened residue → gentle wiping → easier removal.
Where Bug Splatter Usually Builds Up
The front of the vehicle is normally the first place I check after a highway trip. I commonly find bug remains on:
- Front bumper
- Hood
- Grille
- Side mirrors
- Windshield
- Headlights
- License-plate area
- Lower front body panels
The grille can be particularly annoying because bugs can get trapped between narrow openings. I usually deal with those areas separately instead of trying to wipe everything with one towel.
How Bug Residue Can Affect Car Surfaces
I do not like leaving bug splatter on automotive paint for several days. Besides making the car look dirty, dried organic residue can become increasingly difficult to remove.
The same issue is even more noticeable on glass because dried bugs can interfere with visibility.
My general rule is simple: the sooner I remove bug residue, the less effort I need later.
What Ingredients Do You Need to Make Homemade Car Bug Remover?
I keep my basic homemade solution simple. There is no reason to combine a long list of household chemicals when a mild automotive cleaning solution can do the job.
For a basic recipe, I use:
| Ingredient | What I Use It For |
|---|---|
| Warm water | Softening dried residue |
| Automotive car-wash soap | Loosening dirt and organic residue |
| Clean spray bottle | Applying the solution |
| Microfiber towel | Gentle wiping |
| Clean water | Final rinsing |
The exact amount of soap is not something I try to make unnecessarily complicated. I use a mild mixture rather than creating an extremely concentrated solution.
Which Ingredients Are Safe for Automotive Paint?
When I am cleaning painted panels, I prefer products specifically intended for automotive surfaces.
My first choice is always a car-wash soap designed for automotive paint. It gives me a predictable starting point and reduces the temptation to experiment with harsh household cleaners.
I also make sure the towel is clean. Even a gentle cleaning solution can cause problems if the microfiber towel has trapped dirt or grit.
Which Ingredients Should I Avoid?
I avoid experimenting with strong household chemicals simply because they appear powerful.
I would not use aggressive solvents, abrasive powders, rough scouring pads, or unknown chemical mixtures on automotive paint.
The goal is to loosen the bug residue—not chemically attack the paint underneath it.
I also avoid mixing different household cleaning chemicals together. A stronger-looking recipe is not necessarily a better or safer recipe for a vehicle.
Why Car Wash Soap Is Better Than Household Cleaners
For me, automotive car-wash soap is the safest starting point because it is formulated specifically for vehicle cleaning.
Household cleaners can be designed for very different surfaces, such as kitchen counters, bathrooms, glass, or floors. Those surfaces do not necessarily have the same requirements as automotive paint and clear coat.
That is why I keep my DIY bug remover simple:
automotive soap + warm water + gentle application.
How to Make a Basic Homemade Bug Remover for Automobiles
This is the recipe I would start with if the bug residue is fresh or moderately dried.
Step 1 — Gather the Ingredients
First, I gather warm water, automotive car-wash soap, a clean spray bottle, and two clean microfiber towels.
I keep one towel for the initial wipe and another for drying. If the vehicle is particularly dirty, I use additional towels so that I am not dragging loosened dirt across the paint.
Before starting, I also make sure the vehicle is parked somewhere away from direct sunlight if possible.
Step 2 — Mix Warm Water and Car Wash Soap
I fill the spray bottle with warm—not extremely hot—water and add a small amount of automotive car-wash soap.
I do not try to make the solution extremely concentrated. More soap does not automatically mean better bug removal.
The purpose of the mixture is to help wet and loosen the residue so I can remove it with less physical force.
Step 3 — Put the Mixture Into a Spray Bottle
A spray bottle makes the process much easier for me because I can apply the solution directly to the affected areas.
I spray enough to thoroughly wet the bug splatter rather than giving the surface one quick mist.
For larger areas such as a bumper or hood, I work in smaller sections. This helps me keep track of which areas have already been treated.
Step 4 — Shake the Solution Gently
Before applying the solution, I give the bottle a gentle shake to distribute the soap through the water.
I do not shake it aggressively because excessive agitation simply creates unnecessary foam inside the bottle.
My goal is a usable cleaning solution—not a bottle full of bubbles.
Step 5 — Test It on a Small Area
Whenever I try a new homemade mixture, I prefer testing it on a small, less noticeable section first.
I spray the solution, allow it to sit briefly, and then wipe the area gently with a clean microfiber towel.
If the surface reacts normally, I continue with the rest of the vehicle.
This small test gives me an extra layer of confidence, especially when I am working with older paint, aftermarket coatings, or unusual trim materials.
How to Make a Stronger DIY Bug Remover for Stubborn Splatter
Sometimes the basic soap-and-water mixture is not enough. When bugs have been sitting on the vehicle for a long time, I do not immediately jump to an aggressive chemical.
Instead, I normally repeat the soaking process.
Warm Water and Car Soap Method
This remains my preferred first step for stubborn residue.
I apply the solution generously and give it time to soften the dried material. Then I gently wipe the area with a microfiber towel.
If the bug remains attached, I repeat the process rather than pressing harder.
This is especially useful on painted panels where unnecessary friction is something I want to avoid.
Baking Soda Cleaning Method
Baking soda is sometimes suggested as a DIY cleaning ingredient, but I treat it cautiously around automotive surfaces.
I do not use dry baking soda as a scrubbing powder on painted panels. Its abrasive nature can create unnecessary surface marks when rubbed against paint.
If I ever consider a baking-soda-based cleaning approach, I would first verify that it is appropriate for the specific surface and test it in an inconspicuous area.
For routine bug removal, I would still choose automotive soap and water first.
Vinegar-Based Method for Glass
Glass is different from painted body panels, so some people use diluted vinegar-based solutions for certain deposits.
If I use vinegar around the vehicle, I keep it limited to appropriate glass-cleaning situations and avoid treating it as a universal automotive cleaner.
I also make sure the solution does not remain sitting on surrounding trim, painted surfaces, or sensitive materials.
For heavy bug buildup on a windshield, I still prefer a dedicated automotive glass cleaner when the simple soap-and-water approach is not enough.
Isopropyl Alcohol Spot-Cleaning Method
Isopropyl alcohol can dissolve certain types of residue, but I consider it a specialized spot-cleaning option rather than my normal bug-removal solution.
I would use extra caution around paint, coatings, plastics, rubber, and aftermarket finishes. Before using it on a vehicle, I would check the surface manufacturer’s recommendations and test a small hidden area.
For ordinary bug splatter, I rarely see a reason to start with a stronger solvent when soaking with automotive soap can do the job.
How to Use Homemade Bug Remover on a Car
Making the solution is only half the process. How I apply it makes a major difference.
The biggest mistake I try to avoid is scrubbing dry bug residue.
Rinse the Car Before Applying Bug Remover
If the vehicle is covered with loose dust and road dirt, I rinse it first.
This helps remove particles that could otherwise become trapped between the towel and paint during wiping.
I pay particular attention to the front bumper, grille, hood, mirrors, and lower body panels.
Spray the Solution Over Bug Splatter
Next, I spray the homemade solution directly onto the affected areas.
I make sure the bug residue is properly wet. A light mist may evaporate before it has a chance to soften anything, especially on a warm day.
For a large bumper, I work section by section rather than spraying the entire vehicle at once.
Let the Solution Soak the Bugs
This is the step that changed the way I remove dried bugs.
Instead of immediately wiping, I allow the solution to sit long enough to soften the residue.
I do not let the surface dry while the solution is sitting on it. If necessary, I apply a little more solution to keep the area wet.
The basic principle is:
More softening = less scrubbing.
Wipe With a Clean Microfiber Towel
Once the residue has softened, I gently wipe the area with a clean microfiber towel.
I use light pressure and let the cleaning solution do most of the work.
If a spot does not come off easily, I stop and soak it again. I would rather spend another minute softening one stubborn bug than aggressively scrub the paint.
Rinse and Dry the Surface
After removing the residue, I rinse the area with clean water.
Then I use a clean microfiber towel to dry the surface.
I check the panel again after drying because sometimes a small amount of residue becomes visible only when the surface is completely dry.
At that point, I can repeat the process on any remaining spots rather than increasing the cleaning pressure.
How to Remove Dried Bugs From Different Car Surfaces
Not every part of my car needs exactly the same cleaning approach. Painted panels, glass, plastic trim, grilles, and headlights can react differently to cleaning products and physical pressure.
Because of that, I adjust my technique depending on where the bug residue is located.
How to Remove Bugs From Car Paint
Painted panels are where I am most careful. The hood, bumper, fenders, and front doors can collect a lot of bug splatter after highway driving.
I start by rinsing away loose dirt. Then I spray my homemade bug-removing solution over the dried bugs and let it soak.
After the residue has softened, I gently wipe with a clean microfiber towel.
If a bug does not come away easily, I do not force it. I apply more solution and give it another chance to soften.
This simple habit helps me avoid unnecessary rubbing against the clear coat.
How to Remove Bugs From a Windshield
The windshield usually needs a slightly different approach because visibility is the priority.
I first rinse away loose dirt and then apply a glass-safe cleaning solution. For dried bug spots, I let the cleaner sit briefly before wiping.
I use a clean microfiber towel and avoid using anything abrasive that could scratch the glass.
After cleaning, I inspect the windshield from different angles to make sure there are no remaining oily marks or streaks.
If the glass still looks hazy, I clean it again rather than trying to remove the residue with excessive pressure.
How to Remove Bugs From a Grille
The grille can be one of the hardest areas to clean because bugs often become trapped between narrow openings.
For this area, I use a soft detailing brush along with my cleaning solution.
I spray the area first and allow the residue to soften. Then I gently work the brush around the grille openings.
I avoid pushing the brush aggressively into delicate fins or forcing it into areas where it could become trapped.
For me, the combination of soaking + soft brush + low pressure works much better than trying to scrub the grille dry.
How to Remove Bugs From Headlights
I treat headlights carefully because the lens material is different from traditional glass.
I use a mild automotive cleaning solution and a clean microfiber towel. I gently wipe the surface after the bug residue has been softened.
I avoid abrasive pads and aggressive polishing unless I am specifically performing a headlight restoration.
If the headlights have a protective coating or aftermarket treatment, I also follow the product manufacturer’s cleaning recommendations.
How to Remove Bugs From Plastic and Trim
Plastic trim can collect bug residue around mirrors, grilles, badges, and bumper sections.
I start with the mildest method possible: water, automotive soap, and a microfiber towel.
I avoid allowing strong chemicals to sit on plastic or rubber for extended periods.
If the residue is trapped around an emblem or textured trim, a soft detailing brush can help reach those small areas without requiring heavy pressure.
How Long Should I Let Homemade Bug Remover Sit?
There is no single soaking time that works for every situation. I adjust the process depending on how fresh or dried the bugs are.
Fresh bug splatter normally needs less effort because it has not had as much time to dry.
Dried residue needs more patience.
Fresh Bug Splatter
When the bugs are fresh, I usually rinse the area and apply my cleaning solution.
Because the residue has not hardened as much, it normally loosens relatively quickly.
This is one reason I prefer cleaning the front of the car soon after a long trip instead of waiting until the residue has completely dried.
Dried Bug Splatter
For dried bugs, I focus on keeping the affected area wet.
I spray the solution generously and let it work on the residue. If the solution starts drying before I am ready to wipe, I apply more.
I then gently test the area with the microfiber towel.
If the bug remains firmly attached, I repeat the soaking process.
Heavy Bug Buildup
When I find a large amount of baked-on residue, I work in small sections.
Trying to clean the entire front bumper at once can cause the solution to dry before I get to every area.
Instead, I divide the bumper into sections, soak one area, clean it, rinse it, and then move to the next.
This gives me much better control over the process.
When I Should Rinse Instead of Letting It Sit
I never want a cleaning solution to dry completely on a hot vehicle surface.
If I notice the solution drying too quickly, I either add more or rinse the surface.
The goal is controlled soaking—not leaving chemicals on the vehicle indefinitely.
What Should I Not Use as Homemade Car Bug Remover?
One of the biggest lessons I have learned with DIY car cleaning is that stronger does not always mean better.
A vehicle’s paint, clear coat, plastic, rubber, glass, and coatings all have different properties.
Avoid Harsh Household Chemicals
I avoid using random bathroom, kitchen, or industrial cleaners on automotive paint.
A product that works well on a household surface may not be appropriate for a vehicle’s clear coat or trim.
Avoid Strong Solvents
Strong solvents can affect paint, plastic, rubber, coatings, or previously applied protection products.
I would rather spend a little more time soaking bug residue than risk damaging the surface with an unnecessarily aggressive chemical.
Avoid Abrasive Powder Cleaners
I also avoid rubbing dry abrasive powders directly onto painted surfaces.
Even if the powder removes the bug, the physical abrasion can create another problem.
For automotive paint, I prefer chemical softening and gentle microfiber wiping.
Avoid Rough Sponges
A rough kitchen sponge is not my first choice for car paint.
I use a clean microfiber towel or an appropriate automotive wash mitt instead.
The towel should also be free from trapped grit because dirt particles can cause scratches when rubbed across the surface.
Avoid Scraping With Metal or Hard Plastic
If a dried bug is stubborn, I do not reach for a knife, metal scraper, or other hard object.
The risk of scratching the surface is not worth it.
I soften the residue instead and repeat the cleaning process.
Avoid Using Extremely Hot Water on a Hot Car
I use warm water rather than extremely hot water.
I also avoid cleaning the vehicle while the panels are extremely hot from direct sunlight.
A cooler surface gives me more time to work with the cleaning solution and reduces the chance of it drying too quickly.
Homemade Bug Remover vs Commercial Automotive Bug Remover
After making DIY cleaning solutions, I still see a place for dedicated commercial bug removers.
For light or moderate bug splatter, my homemade soap-and-water method is often enough.
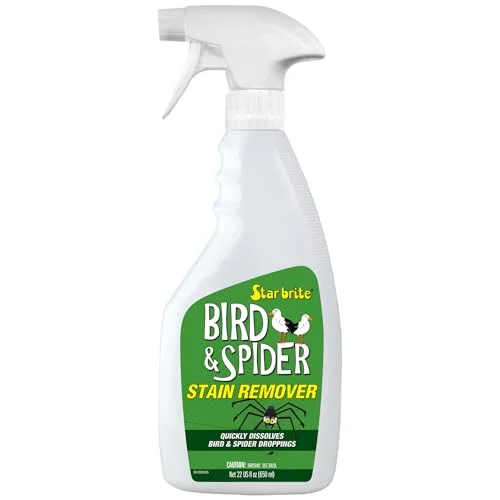
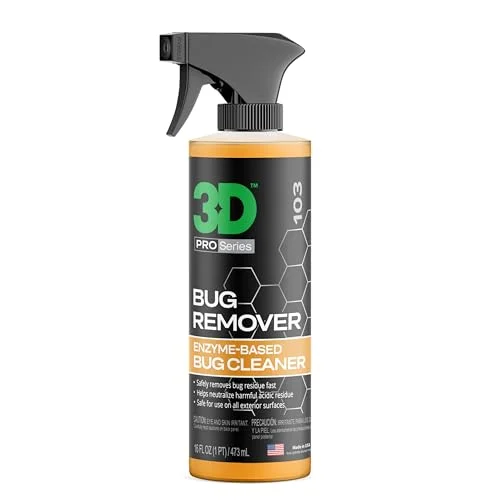
For heavy buildup, frequent highway driving, or situations where I want a ready-to-use product, a commercial automotive bug remover can be more convenient.
| Attribute | Homemade Bug Remover | Commercial Bug Remover |
|---|---|---|
| Cost | Usually low | Usually higher |
| Preparation | Requires mixing | Ready to use |
| Convenience | Moderate | High |
| Cleaning strength | Mild to moderate | Product dependent |
| Surface-specific formula | Limited | More common |
| Storage | Depends on recipe | Easy |
| Heavy buildup | May need repeated applications | Often designed for tougher residue |
| Best for | Simple routine cleaning | Convenience and specialized cleaning |
When a Homemade Bug Remover Makes Sense
I like the homemade approach when I have fresh bug splatter and the necessary ingredients already available.
It is inexpensive, simple, and gives me control over the cleaning process.
I also like that I can make a small amount instead of buying another specialized bottle for every minor cleaning task.
When I Should Buy a Commercial Bug Remover
If I regularly drive long distances and deal with heavy bug buildup, a dedicated automotive bug remover can save time.
A commercial product may also be preferable when I need a formula specifically designed for a particular surface or type of residue.
I always check the product label before using it on paint, coatings, plastic, or other sensitive materials.
Which Option Is Better for Delicate Paint?
For delicate or recently treated paint, I prefer starting with the mildest method.
I would rather use automotive soap and water first than immediately use a stronger chemical.
If the vehicle has ceramic coating, paint protection film, vinyl, or another specialty finish, I also check the manufacturer’s care instructions.
How to Prevent Bug Splatter From Sticking to Your Car
Removing bugs is only half the battle. I also try to make future cleaning easier.
Wash Bug Splatter as Soon as Possible
The easiest bug to remove is the one that has not had time to dry.
After a long highway trip, I try to clean the front of the vehicle when practical.
Even a quick rinse can help prevent residue from becoming heavily baked onto the surface.
Apply a Quality Wax or Paint Sealant
Surface protection can make routine cleaning easier because contaminants may have less opportunity to bond directly with the paint.
I consider wax or paint sealant useful when I want an additional layer of protection and easier maintenance.
Consider a Ceramic Coating
A ceramic coating can provide another type of paint protection and may make routine washing easier.
However, I do not treat a ceramic coating as a guarantee that bugs will never stick.
I still remove bug residue promptly.
Use Paint Protection Film on High-Impact Areas
If I frequently drive on highways, the front bumper, hood, and mirror areas can receive a lot of contamination and road debris.
Paint protection film can be worth considering for owners who want additional protection on vulnerable painted areas.
Keep a Microfiber Towel and Car Cleaner Available
One of my simplest habits is keeping basic cleaning supplies available.
Having a microfiber towel and appropriate automotive cleaner nearby means I can deal with fresh contamination before it becomes a much bigger cleaning job.
How Often Should I Remove Bugs From My Automobile?
I do not follow a strict calendar for bug removal. Instead, I base it on how much exposure the vehicle has had.
After Long Highway Trips
This is when I check the front bumper, hood, mirrors, and windshield first.
During Bug-Heavy Seasons
If there are more insects in the area or I am driving frequently at night, I check the front of the vehicle more often.
After Parking Outdoors
Outdoor parking can expose the vehicle to insects, dust, pollen, and other contaminants.
I try not to let multiple types of contamination build up together.
Before Regular Car Washing
If there is heavy bug buildup, I like to loosen it before performing a normal wash.
This makes the regular washing process easier and reduces the amount of aggressive wiping required.
What Tools Make Bug Removal Easier?
Once I started paying attention to the tools I use, I realized that the cleaning solution is only one part of the process.
The right tools can make bug removal faster and gentler.
Microfiber Towels
A good microfiber towel is one of the most useful items in my car-cleaning setup.
I use clean towels for painted surfaces and avoid using towels that have already picked up dirt or grit.
For best results, I also separate towels used for very dirty areas from those used for final drying.
Automotive Detailing Brushes
A soft detailing brush is especially useful around:
- Grilles
- Badges
- Emblems
- Trim
- Mirror edges
- Small body gaps
Instead of forcing a microfiber towel into a narrow space, I can use a soft brush to loosen the residue.
Spray Bottles
A quality spray bottle makes homemade cleaner much easier to apply.
I can target a specific section without pouring the solution over the entire vehicle.
Bug Removal Sponges
Specialized bug-removal sponges can be useful, but I am careful about using anything abrasive on automotive paint.
I always check the manufacturer’s instructions and use the least aggressive option that gets the job done.
Pressure Washers
A pressure washer can help remove loose contamination before I begin hand cleaning.
I use appropriate distance and pressure rather than placing a high-pressure nozzle extremely close to the paint or trim.
Car Wash Soap
This is the foundation of my basic DIY approach.
A dedicated automotive soap gives me a simple starting point for loosening bug residue while performing routine exterior cleaning.
Commercial Bug Removers
When I have heavy buildup or want convenience, a dedicated automotive bug remover can be useful.
This is also where I would compare products based on surface compatibility, cleaning strength, application method, and whether the product is safe for waxes or coatings.
Common Mistakes When Removing Bugs From Cars
I have found that most problems come from the cleaning technique rather than the bug remover itself.
Scrubbing Bugs Before Soaking Them
This is probably the mistake I try hardest to avoid.
Dry residue can require significant friction to remove. Soaking it first usually makes the process easier.
Using a Dirty Microfiber Towel
A dirty towel can carry grit across the paint.
I always inspect my towel before using it and switch to a fresh one when necessary.
Cleaning a Hot Paint Surface
A hot panel can cause the cleaning solution to dry rapidly.
Whenever possible, I work in a shaded area with a cool vehicle.
Using Too Much Pressure
If a bug does not come off, I do not automatically push harder.
I apply more cleaner, allow it to soften, and try again.
Leaving Cleaning Chemicals on the Surface
I do not allow cleaning solutions to dry on the vehicle.
After the residue is removed, I rinse the surface thoroughly.
Ignoring the Windshield
Bug splatter on the windshield is not only a cosmetic issue.
It can create glare and reduce visibility, particularly when driving at night or when sunlight hits the windshield.
Using the Same Towel for Wheels and Paint
I keep towels used for wheels and heavily contaminated areas separate from towels used on paint.
Brake dust and road grime are not something I want to drag across a clean painted panel.
Frequently Asked Questions About Homemade Car Bug Remover
What is the best homemade bug remover for automobiles?
For routine bug splatter, I start with warm water and automotive car-wash soap. I spray the mixture onto the residue, allow it to soften the bugs, and then gently wipe with a clean microfiber towel.
Can I use dish soap to remove bugs from my car?
Dish soap can remove oily contamination, but I prefer automotive car-wash soap for routine vehicle cleaning. It is specifically intended for automotive surfaces, so it is my first choice when cleaning painted panels.
Does vinegar remove bugs from car paint?
I would not use vinegar as my first-choice bug remover for painted body panels. I prefer automotive soap and water for paint. If vinegar is used for a specific glass-cleaning purpose, I keep it away from surfaces that may be sensitive to it.
How do you remove baked-on bugs from a car?
I soften baked-on bugs instead of trying to scrape them away. I apply a suitable automotive cleaner, allow the residue to loosen, and gently wipe it with a clean microfiber towel. For very stubborn spots, I repeat the process.
Can baking soda remove bug splatter from a car?
Baking soda can have cleaning uses, but I avoid rubbing dry baking soda against automotive paint because it can act as an abrasive. For painted surfaces, I prefer a mild automotive soap solution.
What is the safest way to remove dried bugs from car paint?
For me, the safest starting method is to rinse the surface, soak the bugs with a mild automotive cleaning solution, and gently wipe with a clean microfiber towel. The key is reducing the amount of force needed to remove the residue.
Can I use homemade bug remover on a windshield?
A mild soap-and-water solution can help with bug residue on glass, but I prefer a glass-safe automotive cleaner when I need better visibility and fewer streaks. I also make sure the windshield is thoroughly rinsed and cleaned afterward.
How can I prevent bugs from sticking to my car?
I remove bug splatter promptly and maintain the exterior with appropriate paint protection, such as wax, sealant, or a compatible coating. Regular cleaning is still important because no protection completely eliminates contamination.
Final Takeaway: The Safest Way to Make and Use Car Bug Remover
When I need to remove bugs from my automobile, I do not try to make the strongest possible cleaning chemical. I focus on making the residue easier to remove.
My basic process is simple:
Warm water + automotive car-wash soap → spray → soak → gently wipe → rinse → dry.
For fresh bugs, this can be a quick job. For dried or baked-on bugs, I take more time to soften the residue and repeat the process when necessary.
I also pay attention to the surface I am cleaning. Paint, glass, plastic trim, headlights, and grilles may require slightly different techniques.
Most importantly, I avoid aggressive scrubbing, abrasive materials, harsh chemicals, and dirty towels. In my experience, patience is often more effective than force.
If I regularly deal with heavy bug splatter, I would also consider keeping a microfiber towel, detailing brush, spray bottle, car-wash soap, and dedicated automotive bug remover in my cleaning kit.
That combination gives me both a simple DIY option and a convenient commercial option when the basic method is not enough.

- Best Bug And Bird Poop Remover For Cars 2026 - September 15, 2026
- Can Vaseline Work As Wd-40? - September 15, 2026
- Best Bug Remover For Bumper 2026 - September 15, 2026