How to Remove Nut from Spinning Bolt: Quick Fixes That Work

Hold the bolt head steady first. Use penetrating oil if it’s stuck. Add tools like locking pliers or a breaker bar for extra torque. These steps fix most cases.
A spinning nut happens when the bolt turns along with it instead of staying put — common on rusty bikes, cars, furniture, and even bolts buried in a wall. Let’s fix it step by step.
Why Does the Nut Spin with the Bolt?
When a nut spins together with a bolt instead of tightening or loosening, the threads are no longer gripping each other correctly. Instead of one part staying fixed, both rotate at the same time. This makes removal or tightening difficult and often signals thread damage or corrosion.
Loose Fit Between Threads
A common reason is a loose fit. If the nut and bolt are worn out or slightly mismatched, the threads fail to lock together firmly. When you apply force, the bolt turns along with the nut instead of staying in place.
Loose fit problems usually happen when:
- The hardware has been reused many times
- Incorrect size nuts are used
- Threads are partially stripped
Once the grip weakens, spinning becomes unavoidable.
Rust and Corrosion
Rust is another major cause. Moisture and air create corrosion inside the threads. Over time, rust damages the grooves that let the nut and bolt hold together.
Corrosion can:
- Reduce thread strength
- Cause uneven friction
- Break down metal surfaces
When this happens, the nut can’t properly catch the bolt threads, so both spin together.
Common Causes of the “Infinite Spin”
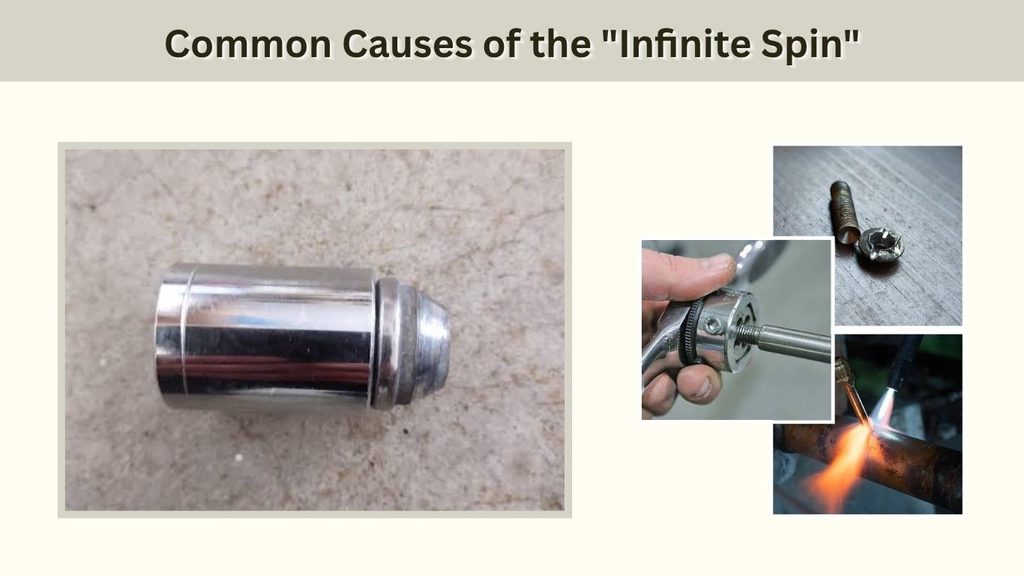
1. Stripped or Flattened Threads — The most common culprit is a loss of grip. Threads are interlocking grooves that give a wrench mechanical advantage. If a bolt was over-tightened or cross-threaded in the past, the grooves can shear off. With no ridges to climb, the nut spins aimlessly.
2. Lack of an Anchor (Free-Spinning Bolt Head) — For a nut to move, the bolt has to be braced. If the bolt passes through an enlarged hole, or the head isn’t held by a second wrench, the whole assembly rotates as one unit. If you can’t reach the far side of the bolt, you’re fighting a ghost.
3. Corrosion and “Cold Welding” — Over time, moisture and salt cause rust to bond the nut and bolt so tightly they behave like a single piece of metal. Torque on the nut transfers straight through the rust into the bolt, so the whole assembly turns together.
4. Rounded Corners or Wrong Tools — If a slipping wrench has rounded off the nut or bolt head, your tool can no longer get a “bite.” It looks like spinning, but really your tool is just sliding around the fastener.
How to Hold a Bolt from Turning When Removing a Nut
This is the single most useful skill in this whole guide, because almost every “spinning” problem is really a bracing problem — the bolt has nothing holding it still.
- Second wrench on the head. The cleanest fix: put one wrench on the bolt head and one on the nut, and turn them in opposite directions (the “double-wrench method”). This is the standard approach any time the bolt head is accessible.
- Locking pliers as a clamp. If the head is rounded or awkward to reach with a wrench, clamp locking pliers (Vise-Grips) onto it. The crushing grip holds it steady even on damaged corners.
- Wedge it against something solid. No second tool? Jam the bolt head against a hard edge, a stud, or a piece of the frame so it physically can’t rotate.
- The pressure trick for hidden heads. If you can’t reach the bolt head at all, wedge a flat-head screwdriver or pry bar between the nut and the surface it rests against, then pull outward while turning. That tension is often enough to make the threads bite.
Why Is My Bolt Spinning?
If you’re asking this, it usually means there’s zero resistance behind the nut — the clamping force is gone. Before reaching for heavier tools, check for access: can you even see the bolt head? If it’s hidden inside a frame or wall, you may be dealing with a “blind nut” or captured bolt that’s broken loose from its housing (more on that below).
Basic Steps: How to Remove a Nut from a Spinning Bolt
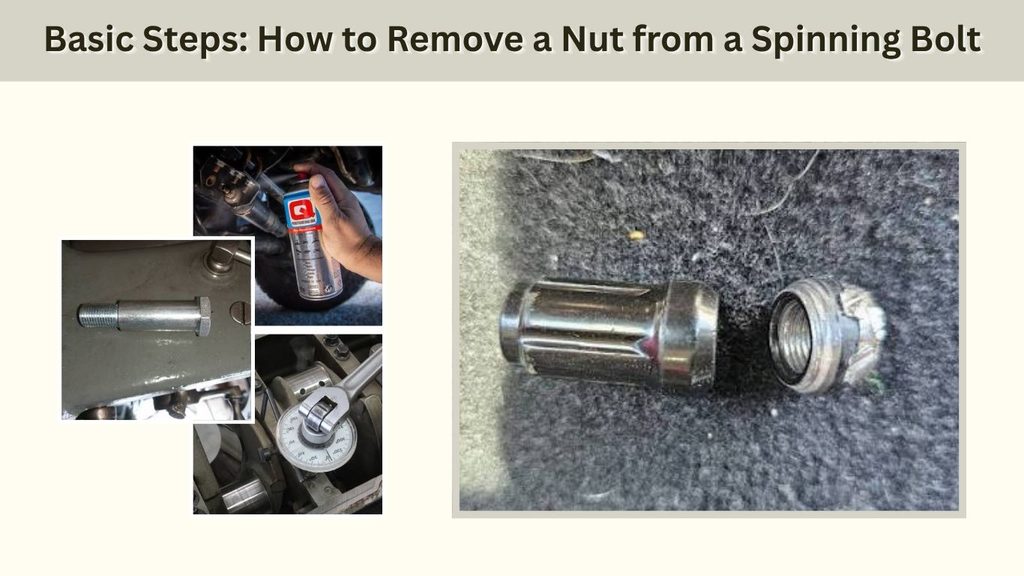
Start simple — no fancy tools needed.
Step 1: Hold the Bolt Head. Push down on the bolt head with a finger or pliers and turn the nut counterclockwise. Use needle-nose pliers if the head is small. On a car, a lug wrench works on the opposite side. Success rate is high for light rust.
Step 2: Tighten First. Turn the nut slightly clockwise before loosening it. This “shocks” the rust loose by re-engaging the threads before you back it off.
Step 3: Apply Penetrating Oil. Spray WD-40 or PB Blaster on the threads and wait 10–30 minutes, reapplying every 10 minutes. Wipe off excess before you grip anything, so your tool doesn’t slip.
Quick recap: hold the bolt → oil the threads → turn slowly.
Tools for a Nut That Just Spins
Upgrade if the basics fail.
| Tool | Best For | Cost |
|---|---|---|
| Locking Pliers / Vise-Grips | Rounded nuts, 3-sided grip | $10–20 |
| Hex Socket + Ratchet | Standard hex, avoids rounding | $5–15 |
| Breaker Bar | High torque via leverage (18–24″) | $25–50 |
| Ratchet Set | Everyday fasteners | $20 |
A 6-point socket grips better than a 12-point on a nut that’s already showing wear, since it spreads force across flatter surfaces instead of edges.
Carpenter’s Trick: Removing a Nut from a Spinning Long Screw
Long screws and threaded rod (common in furniture assembly and carpentry) spin for a slightly different reason than a short bolt: there’s more shaft length for the whole rod to twist and flex before the nut ever “feels” resistance.
- Clamp the far end. If any of the threaded rod or screw shank sticks out the other side, clamp it with locking pliers or a small vise so it can’t twist along its length.
- Support the middle. On long rods, torque can wind up like a spring partway down the shaft. Bracing the rod in the middle (not just at one end) stops that flex.
- Cut a screwdriver slot. If it’s a carriage-bolt-style screw with no flats to grip, a hacksaw can cut a shallow notch in the exposed end so a flat-blade screwdriver can hold it while you turn the nut.
- Double-nut it. Same trick as below — thread a second nut on to create a grippable “head” partway down the rod.
Solenoid Shaft Spinning? How to Remove the Nut Without Damage
Solenoids and similar components (actuators, some motor shafts) have a thin, often smooth plunger or shaft with a nut on the end — and almost no flats to grip, so the whole shaft just rotates in its housing.
- Grip the shaft, not just the nut. Use small pliers or a shaft wrench directly on the exposed rod (protect it with a rag or piece of rubber first — these shafts are usually softer or plated metal and scratch or dent easily).
- Hold it from inside. Many solenoid plungers have a flat or a slot machined into the end specifically for a small screwdriver — check before forcing anything.
- Go slow and low-torque. These parts are far more fragile than a car bolt. Skip the breaker bar and heat here; excess force can bend the plunger or damage the coil housing.
- Support the housing. Brace the solenoid body itself in a vise (with padded jaws) so the reaction torque doesn’t twist the whole unit instead of just the nut.
How to Remove a Bolt from a Wall When the Nut Keeps Spinning
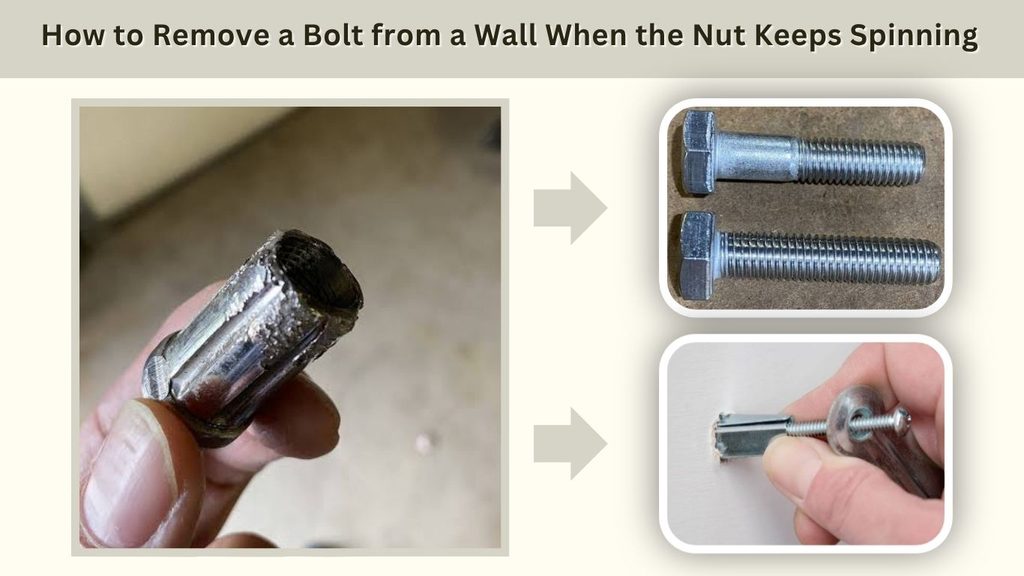
This is a different animal — the bolt is usually anchored behind drywall, brick, or masonry, and you can’t get a second wrench on it.
- Identify the anchor type first. If it’s a toggle bolt or spring-wing anchor, the “nut” is really the wing mechanism inside the wall — it can’t be held from the front at all. In that case, tightening further just spins the wings uselessly.
- Push-and-turn. For expanding wall anchors, push the bolt in slightly while turning; this can re-seat the anchor’s grip long enough to back the bolt out.
- Cut it flush. If the anchor has broken free inside the wall cavity, the practical fix is often to cut the bolt flush with a hacksaw or oscillating tool rather than fight it, then patch and re-anchor nearby.
- For a bolt going all the way through (with a nut on the far side, e.g., in a stud wall or furniture mounted to a wall): you likely need a helper on the other side, or access from behind (an outlet cut-out, attic, or basement) to brace the nut or bolt head directly — there’s no way to stabilize it from one side alone.
Advanced Methods for a Bolt That Keeps Spinning
When heavy rust, stripped threads, or a hidden nut won’t respond to basic tools:
1. The Double Nut Method
Thread a second nut onto the bolt and tighten it firmly against the first, jamming them together into a temporary “head.” Put a wrench on the bottom nut to back the assembly out, or use the top nut as a bracing point. Works especially well on studs (bolts with no head) or a bolt that’s stripped smooth at the top. If threads are too damaged even for that, welding a fresh nut onto the stub is a more permanent version — the weld’s heat also helps break the rust bond.
2. Thermal Expansion (Heat)
Heat makes the outer nut expand away from the bolt, which can crush the rust bonding them together.
- A propane torch is enough for most home jobs; a heat gun works in tight spaces but takes longer.
- Focus the flame on the nut for 2–5 minutes until it’s very hot.
- The candle trick: touch a stick of beeswax or a regular candle to the hot threads — the heat wicks the melted wax deep into the threads as a high-temp lubricant.
- Safety: never use a torch near fuel lines, rubber bushings, or brake lines, and keep a fire extinguisher or water nearby.
3. Vibration and Impact Tools
An impact wrench doesn’t just twist a bolt — it hammers it thousands of times a minute, creating shockwaves that can free a spinning bolt even with damaged threads. Cordless impact wrenches now handle most household and automotive jobs. An air hammer with a blunt tip, pressed against the bolt head while you turn the nut, works on the same principle.
4. Destructive Removal (Last Resort)
- Nut splitter — a C-frame tool that wedges the nut open without damaging the bolt’s threads underneath. Quiet, safe, and effective on seized nuts.
- Angle grinder — fastest method: slice a notch in the nut or cut the bolt head off with a cutoff wheel. High-stakes: spins at 8,000–11,000 RPM, so wear a full face shield and gloves.
- Bolt extractor + drilling — for a bolt that’s snapped off or rounded to a circle, drill into the center and insert a reverse-threaded extractor, which bites deeper as you turn it counterclockwise until it grabs enough metal to back the remains out.
| Method | Risk Level | Damage to Part | Cost | Best For |
|---|---|---|---|---|
| Double Nut | Very Low | None | ~$1 | Furniture & studs |
| Heat/Torch | Medium | Possible melted rubber nearby | ~$20 | Heavy rust/corrosion |
| Nut Splitter | Low | None | $10–15 | Seized nuts |
| Angle Grinder | High | High (cuts everything) | $50+ | Total failure / speed |
| Extractor Kit | Medium | Risk of broken drill bit | ~$20 | Broken/snapped bolts |
Removing Rusty Nuts on Spinning Bolts: Quick Hacks
If rust is the whole problem, these are the fastest wins before you escalate to heat or grinding:
- Oil first, always. Penetrating oil before anything else — heat and force work better once rust is already softened.
- Rock it, don’t just pull. Tighten a fraction of a turn, then loosen; repeat. This flexes and cracks the rust bridge instead of relying on one big pull.
- Tap it. A few sharp hammer taps on the nut (not the threads) vibrate loose rust scale without needing a full impact wrench.
- Anti-seize on reassembly. Once you’re back together, a dab of anti-seize on the threads prevents this exact problem next time.
How to Remove a Stuck Nut Without Tools
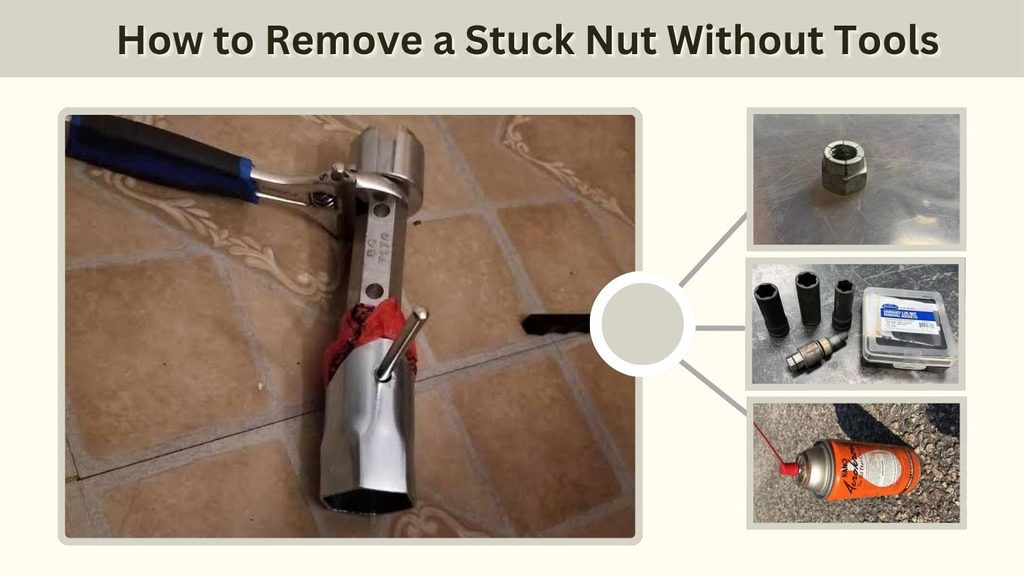
Field fixes for when you’re nowhere near a toolbox:
- Oil and rock. Use any oil on hand — motor oil, cooking oil, even WD-40 if it’s nearby — then tighten a fraction of a millimeter before unscrewing to break up microscopic rust bridges.
- The finger-lock technique. Wedge the bolt head against a hard edge, or wrap cloth or a belt around it and squeeze by hand while working the nut with your other hand.
Removing a Screw That Just Turns (Wood & Plastic)
In wood or plastic, a spinning screw usually means the material’s threads — the grooves the screw cut into it — are shredded, turning the hole into a smooth tunnel.
- The card trick. Slide a thin credit card, putty knife, or flat-head screwdriver under the screw head and apply upward pressure while unscrewing slowly, forcing the remaining threads to bite into fresh material.
- Pliers grip. If the head sits slightly proud of the surface, grip it with needle-nose pliers and pull while rotating counterclockwise.
- Rubber band hack. If the driver itself is slipping in a stripped screw head, lay a wide rubber band between the driver tip and the screw — it fills the gaps for grip.
Repairing the Stripped Hole
- Go up a size. A #10 screw will usually find fresh wood where a #8 stripped out.
- Toothpick/matchstick fill. Dip toothpicks or a matchstick in wood glue, jam them into the hole, snap flush, and let it dry — the original screw can then cut fresh threads.
Stubborn Nuts on Bikes and Cars
Vibration, road salt, and high torque make spinning bolts a common headache here.
Lug nuts: a spinning lug nut usually means the wheel stud has stripped its splines inside the hub. Wedge a pry bar between the wheel and nut, pushing the wheel outward to create tension while an impact wrench zips the nut off. Preventing it next time is as simple as anti-seize on the studs during reassembly.
Bicycle double-nut trick: bike bolts are often long and thin and prone to spinning. Thread a second nut onto the exposed end, jam it tight against the first, and turn a wrench on the inner nut to back the whole assembly out.
Safety Tips
- Wear gloves and goggles
- Secure the workpiece so it can’t wobble
- Don’t over-torque — snapped bolts create a worse problem
- Ventilate the area when using oils or heat
Choosing Your Strategy
| Scenario | Primary Cause | Best Tool/Method | Success Rate |
|---|---|---|---|
| Screw in wood | Stripped wood fibers | Pry bar + unscrew | High |
| Bolt in metal | Rusted/broken splines | Tension + impact gun | Medium |
| Nut on bike | Corrosion/round head | Double-nut method | High |
| Solenoid shaft | Smooth, unbraced shaft | Grip shaft directly, low torque | Medium |
| Bolt in wall | Broken/spinning anchor | Push-and-turn or cut flush | Medium |
| Plastic casing | Melted/stripped plastic | Heat + needle-nose pliers | Medium |
Pro Tips for Preventing “Spinning” Next Time
- Match the drive exactly. A slight Phillips-head mismatch (#1 vs #2 vs #3) is the number one cause of stripped heads.
- Hand-start every fastener. Turn nuts and screws by hand for the first 3–4 rotations before using a tool, so threads align before force is applied — this alone prevents most cross-threading.
- Don’t over-tighten. Over-torquing stretches the metal and sets up the “infinite spin” failure down the road.
- Anti-seize on reassembly, especially outdoors or near moisture.
FAQs
Nut won’t come off the bolt — what now? Oil it, hold the bolt steady, then bring in locking pliers if it’s still spinning.
Bolt stripped — how do I fix it? Weld on a new nut, or use an extractor kit if the bolt itself is rounded or snapped.
Is this safe for rusty car lug nuts? Yes — tighten slightly first to break the rust bond, then use locking pliers or an impact wrench.
Why double-nut a spinning bolt? It locks two nuts together to create a graspable “head” where none exists, giving you something to turn or brace against.
Heat or oil first? Oil first, always — heat is the escalation if oil alone doesn’t work. Give penetrating oil its full wait time before moving on.
Do cheap tools work? Locking pliers, yes. Avoid 12-point sockets on anything already showing wear — a 6-point grips better.
How do I prevent this next time? Anti-seize paste on the threads during reassembly.
Conclusion
You now know how to remove a nut from a spinning bolt — in a solenoid, in a wall, on a long carpentry screw, or on an ordinary rusty car bolt. Start with holding the bolt steady and applying oil. Escalate to locking pliers, the double-nut trick, heat, or destructive removal only as needed, and always gear up for safety first.

- Top 10 Best Helmet For Xtreme 125r 2026 - October 5, 2026
- Top 10 Best Helmet For Xpulse 200 2026 - October 5, 2026
- Top 10 Best Helmet For Xsr 155 2026 - October 5, 2026