Best Way to Remove a Spinning Bolt That Won’t Come Out (No Nut)

We have all been there. You are working on a weekend DIY project, fixing your car, or taking apart an old piece of furniture. Everything is going smoothly until you encounter that bolt. You put your wrench on it, give it a turn, and it moves! You feel a brief moment of victory, but as you keep turning, you realize something is terribly wrong. The bolt is spinning endlessly. It’s not loosening, it’s not tightening, and to make matters worse, there is no nut on the other side holding it in place. It is just spinning in its hole, mocking your efforts.
Dealing with a spinning bolt that refuses to back out can be one of the most frustrating experiences in any repair job. It defies logic at first glance—if there is no nut, why isn’t the thread backing out? The reality is that the threads inside the hole, or on the bolt itself, have stripped completely. The bolt is now trapped in a smooth, threadless cylinder of its own making, held in place by friction, rust, or sheer mechanical stubbornness. But don’t throw your wrench across the garage just yet. There is a way out.
In this comprehensive guide, we are going to walk through the exact steps, techniques, and tools you need to conquer this mechanical nightmare. We will cover everything from simple prying methods to advanced drilling and extraction, all explained in simple, human terms. Grab a cup of coffee, take a deep breath, and let’s get that stubborn bolt out.
Content Summary
- Why Your Bolt is Spinning: A deep dive into stripped threads, corrosion, and why bolts fail.
- Essential Tools for the Job: A breakdown of the best tools to keep in your arsenal, including top Amazon product recommendations.
- The Prying and Turning Method: How to use leverage to force the bolt out while turning.
- The Locking Pliers Pull Technique: Using brute grip strength to yank the bolt free.
- Drilling Out the Stubborn Bolt: Step-by-step instructions for safely destroying the bolt to save the project.
- Using a Screw Extractor Set: How to use specialized extraction tools effectively.
- Applying Heat to Break the Bond: The science of thermal expansion and rust breaking.
- Cutting the Bolt Head Off: When to resort to heavy machinery like grinders and rotary tools.
- Rethreading and Repairing the Hole: How to fix the damage once the bolt is finally out, ensuring your project goes back together perfectly.
Why Your Bolt is Spinning
Before you can effectively remove a spinning bolt, you have to understand the physics of why it is stuck in the first place. When you know your enemy, defeating it becomes a matter of applying the right strategy rather than just brute force.
The Anatomy of a Stripped Thread
Bolts work on the principle of an inclined plane wrapped around a cylinder—these are the threads. When you turn a bolt, the threads interlock with the internal threads of the hole, pulling the bolt downward or pushing it upward. When a bolt spins without moving, it means this mechanical interlocking has been destroyed. Either the sharp peaks of the bolt’s threads have been sheared off, or the internal threads of the hole have been smoothed out. Without that track to follow, turning the bolt just rotates it in place without translating that rotation into upward or downward movement.
Corrosion and Rust Factors
Rust is the silent killer of hardware. When moisture creeps into the microscopic gaps between a bolt and its threaded hole, oxidation occurs. Rust expands as it forms, effectively acting like a powerful glue that welds the bolt to the surrounding metal. Even if the threads strip, this rust can create a thick, gritty paste that holds the bolt captive inside the hole. Galvanic corrosion—which happens when two different types of metal react to each other in the presence of an electrolyte like water—can also fuse a bolt tightly into an aluminum or steel block, causing the threads to strip the moment you try to force it.
Cross-Threading Nightmares
Sometimes, the damage was done long before you ever touched the bolt. If the person who previously installed the bolt inserted it at a slight angle and forced it down, they “cross-threaded” it. Cross-threading cuts a new, mangled path through the metal, severely weakening the threads. Over time, vibration and stress wear these weakened threads away completely. By the time you try to remove it, the thread structure turns into metal dust, leaving the bolt spinning uselessly.
Common Scenarios and Applications
You might encounter this specific nightmare in several different contexts. Knowing where it happens helps you anticipate the problem.
- Automotive repairs: Heat shields, exhaust manifolds, and license plate brackets are notorious for spinning bolts due to extreme heat cycling and road salt.
- Lawn and garden equipment: Mower decks and weed trimmers are constantly exposed to moisture and grass sap, locking bolts in place.
- Home appliances: Washing machines and dishwashers use dissimilar metals in wet environments, leading to stripped and spinning hardware.
- Flat-pack furniture: Cheap pot-metal inserts easily strip out of particle board, leaving decorative bolts spinning eternally.
Essential Tools for the Job
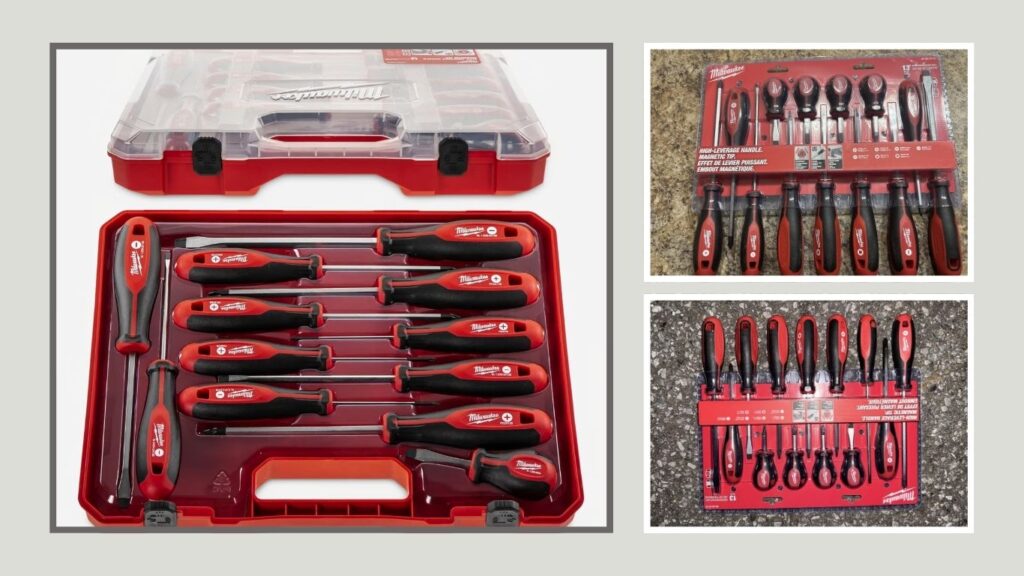
You cannot win a war without the right weapons. Having a well-stocked toolbox is the difference between a five-minute fix and a five-hour headache. Here are the tools you need, many of which can be conveniently sourced from Amazon.
Pry Bars and Flathead Screwdrivers
Your first line of defense is leverage. A sturdy, flat object wedged under the head of the bolt can provide the upward pressure needed for the remaining threads to catch. You do not want a cheap screwdriver that will bend or snap under pressure. Invest in a dedicated pry bar set or a heavy-duty demolition screwdriver. A good mechanic’s pry bar has a slightly angled tip that acts like a wedge, multiplying your force and pushing the bolt upward as you turn it.
Locking Pliers (Vise-Grips)
When standard wrenches and sockets fail, locking pliers are your best friend. The genuine IRWIN Vise-Grip Original Locking Pliers (available on Amazon) are an absolute must-have. Unlike standard pliers where your grip strength dictates the holding power, locking pliers use an over-center toggle mechanism to clamp down with immense force. You can lock them onto the head of a spinning bolt and pull backward with all your body weight while simultaneously twisting.
Penetrating Oils and Lubricants
WD-40 is great, but for a truly stuck and spinning bolt, you need something stronger. You need a dedicated penetrating fluid designed to eat through rust and creep into microscopic crevices.
- Kano Kroil Penetrating Oil: Widely considered liquid gold by mechanics, this product creeps into one-millionth inch spaces. (Highly recommended on Amazon).
- Liquid Wrench: A fantastic, budget-friendly alternative that foams up to break down heavy rust.
- PB B’laster: The classic, strong-smelling penetrant that uses a magnetic capillary action to climb upward into threads.
Advanced Extraction Kits
If manual prying and pulling do not work, you will need to escalate to specialized hardware. An extractor kit is designed to bite into stripped metal and force it out. When shopping on Amazon, look for:
- Left-handed drill bits: These drill into the bolt in the reverse direction, often snagging and backing the bolt out during the drilling process.
- Spiral flute screw extractors: Commonly known as “Easy-Outs,” these are reverse-threaded tapered bits that wedge deeper into the bolt the harder you turn.
- Bolt extractor sockets: These have spiraled inner teeth that grip the outside of a stripped bolt head, biting harder as you apply turning force.
- Nut splitters: While we don’t have a nut in this scenario, having a comprehensive extraction kit often includes tools for gripping heavily damaged circular heads.
The Prying and Turning Method
This is the most common, least destructive, and often most successful way to remove a spinning bolt. It relies on a simple concept: if the bolt is spinning freely because the threads are gone, applying upward tension might force the remaining, un-stripped threads (if any exist) to catch the lip of the hole.
Positioning Your Flathead or Pry Bar
The goal is to get the tip of your tool firmly underneath the flange or head of the spinning bolt. If the bolt is flush against a surface, you may need to use a very thin chisel or a razor blade to create an initial gap, tapping it gently with a hammer. Once a tiny gap is created, slide the flathead screwdriver or pry bar in. Be incredibly careful not to gouge the surface beneath the bolt, especially if it is painted metal, plastic, or finished wood.
Applying Upward Pressure Effectively
Once the pry tool is wedged under the bolt head, use the surface of your project as a fulcrum. Press down on the handle of your screwdriver so that the tip pushes upward against the underside of the bolt head. You want constant, steady pressure. Do not bounce or jerk the tool, as this can snap the head of the bolt off completely, leaving you with a flush piece of metal that is much harder to extract.
Turning the Bolt While Prying
This requires a bit of coordination, and possibly a third hand if you have a friend nearby. While maintaining that strong upward pressure with the pry bar, use your other hand to attach a socket, wrench, or drill to the bolt head. Begin turning the bolt counter-clockwise (loosening direction). The upward pressure forces the threads to rub against the sides of the hole. Often, one tiny piece of intact thread will find a groove and act like a ramp, slowly backing the bolt out as you turn.
Troubleshooting When It Slips
Sometimes the pry bar will keep slipping out, or the bolt head is too rounded to turn. If you run into issues, try these fixes:
- Place a small piece of rubber (like a piece of a bicycle inner tube) under the pry bar to protect the base surface and prevent slipping.
- Use two screwdrivers on opposite sides of the bolt head to apply even, balanced upward pressure.
- If the bolt head is stripped, use a bolt extractor socket on your wrench while you pry.
- Switch from a manual wrench to an impact driver; the rapid percussion can sometimes shock the threads into catching while under upward tension.
The Locking Pliers Pull Technique
When you can’t get a pry bar underneath the bolt head, or the bolt is recessed in a tight space, it’s time to rely on brute tensile strength. This method uses locking pliers to grab the bolt and literally pull it out while turning.
Selecting the Right Size Pliers
Locking pliers come in many shapes and sizes, from needle-nose to massive wide-jaw grips. For a standard spinning bolt, a 7-inch or 10-inch curved jaw locking plier is ideal. The curved jaw is designed to wrap around round objects (like a stripped bolt head) and bite into them at multiple points. If the bolt is in a recessed hole, you might need locking needle-nose pliers, though they won’t provide as much gripping force.
Clamping Down with Maximum Force
The trick to locking pliers is setting the tension correctly. Open the jaws, place them over the bolt head, and tighten the adjustment screw on the handle until the jaws are just touching the bolt. Then, open the pliers, tighten the screw another half-turn, and squeeze the handles together. It should require significant effort to snap the pliers locked. If it’s too easy, they will slip. If they are clamped on tight enough, the teeth of the pliers will actually dig into the metal of the bolt head, creating a temporary, unbreakable bond.
The Twist and Pull Motion
With the pliers locked onto the bolt head as tightly as humanly possible, grab the handles firmly. Pull straight back toward yourself (away from the hole) while simultaneously twisting the pliers counter-clockwise. You are acting as both the wrench and the pry bar in this scenario. The pulling force acts to engage any remaining threads, while the twisting motion backs it out. Wiggle it slightly back and forth if it feels bound up by rust.
Avoiding Damage to Surrounding Areas
Pulling on pliers with all your strength can be dangerous if the bolt suddenly gives way.
- Mind your knuckles: Always position your hands so that if the bolt pops out suddenly, you don’t smash your hand into a nearby hard surface.
- Protect the project surface: If you need to rest the jaw of the pliers against the base for leverage, slide a putty knife or a thick piece of cardboard underneath the tool to prevent deep scratches.
- Don’t bend the bolt: Try to pull perfectly straight back on the axis of the bolt. If you pull at a sharp angle, you risk snapping the bolt shaft in half, leaving the threaded portion permanently stuck in the hole.
- Use gloves: Heavy leather work gloves will protect your skin if the locking pliers slip off the metal unexpectedly.
Drilling Out the Stubborn Bolt
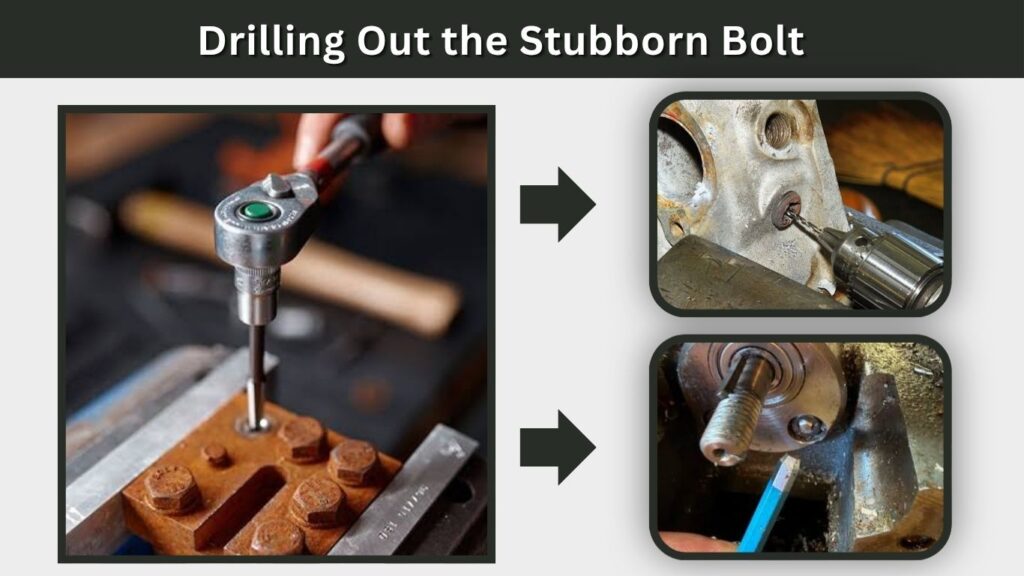
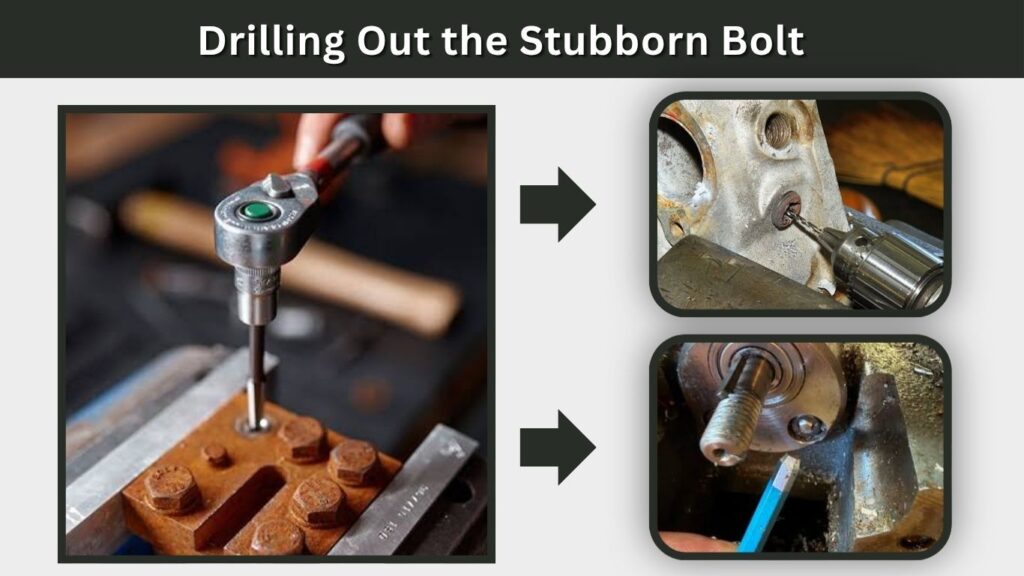
When prying and pulling fail, it is time to move to destructive methods. If the bolt is hopelessly seized and spinning because it’s fused to a spinning insert, you may have to destroy the bolt to save the project. Drilling it out sounds intimidating, but with patience, it is a highly effective, surgical method.
Choosing the Correct Drill Bit Size
You cannot just grab any drill bit. You need a bit made of Cobalt or Titanium, designed for drilling through hardened steel (often found on Amazon under “Cobalt drill bit sets for hard metal”). The size of the bit is crucial. You want a bit that is slightly larger than the shaft of the bolt, but smaller than the head. The goal here is to drill straight down through the center of the bolt head until the head detaches from the threaded shaft.
Creating a Center Divot for Accuracy
Drill bits love to “walk” or wander across smooth metal surfaces. If you just start drilling, the bit will slide off the bolt and chew into your project. To prevent this, you must use a center punch. Place the sharp tip of the center punch perfectly in the dead-center of the bolt head and strike it hard with a hammer. This creates a tiny crater. When you place your drill bit into this crater, it will stay perfectly centered as it begins to cut.
The Drilling Process Step-by-Step
Set your drill to a low speed. High speeds create excessive heat, which ruins drill bits instantly. Apply firm, steady pressure down into the bolt. Dip the tip of your drill bit into cutting fluid or 3-in-One oil every few seconds to keep it cool and lubricated. You should see curly metal shavings coming out of the hole; if you just see metal dust, you are spinning too fast or pushing too lightly. Keep drilling until you feel a sudden “pop”—this is the moment the head of the bolt detaches from the shaft.
Safety Precautions to Keep in Mind
Drilling metal is inherently hazardous. Never rush this step.
- Always wear high-quality, impact-resistant safety glasses; flying metal shards are incredibly sharp.
- Do not wear loose clothing or dangling jewelry that could get caught in the spinning drill chuck.
- Beware of the heat. The bolt and the drill bit will become hot enough to cause severe burns instantly. Do not touch them with bare hands.
- Clean up the metal shavings with a magnet or a shop vacuum, never brush them away with your bare hands, as they can cause deep, painful splinters.
Using a Screw Extractor Set
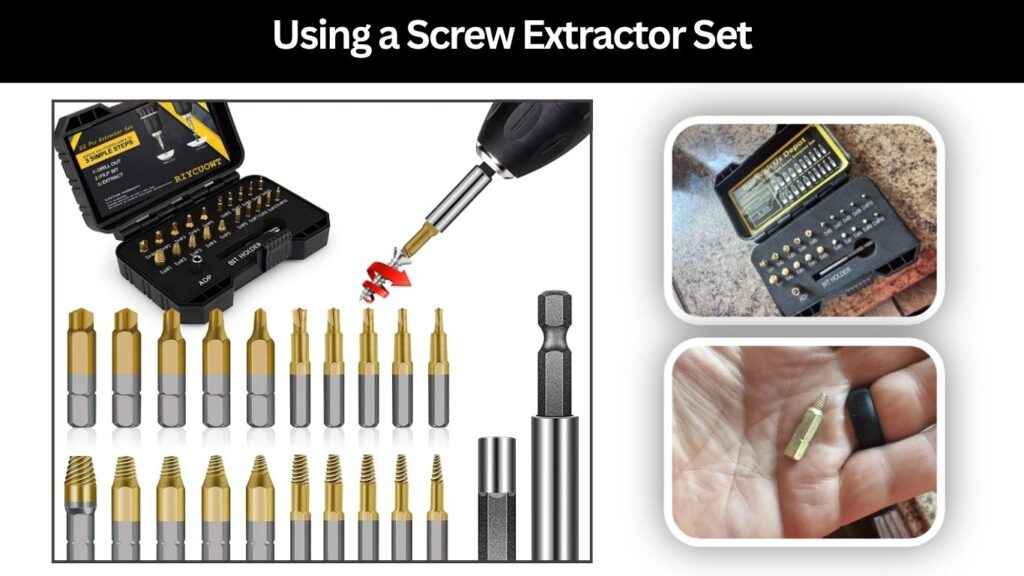
If you have drilled into the bolt, or the head has snapped off leaving a spinning shaft, a screw extractor (often called an Easy-Out) is your next best friend. These are specialized tools designed specifically for backing out broken or stripped fasteners.
What is a Screw Extractor?
A screw extractor looks like a drill bit with aggressive, reverse-threaded spirals. Because it is reverse-threaded, turning it to the left (counter-clockwise) drives it deeper into the metal. Once it wedges itself tightly into a pre-drilled hole in the center of your broken bolt, continuing to turn it to the left will force the bolt to turn and back out. It uses the bolt’s resistance against itself.
Prepping the Bolt for Extraction
To use an extractor, you must first have a perfectly centered hole in the bolt. Using the drilling techniques mentioned in the previous section, drill a pilot hole down into the center of the bolt shaft. Check the instructions on your extractor set; each size extractor requires a very specific size drill bit for the pilot hole. Drill down at least a quarter-inch to give the extractor plenty of surface area to bite into.
Inserting and Turning the Extractor
Tap the extractor firmly into the pilot hole with a hammer to set the teeth into the metal. Then, attach a tap wrench (a T-shaped handle) to the square end of the extractor. Do not use an electric drill for this step! You want slow, controlled manual torque. Slowly turn the handle counter-clockwise. You will feel the extractor bite down hard. Keep applying steady pressure. If the bolt is just spinning but not coming out, gently pull upward on the T-handle while turning to try and catch a thread.
Recommended Extractor Brands
Not all extractors are created equal. Cheap carbon steel extractors will snap off inside your bolt, turning a bad day into a catastrophic one. Look for these highly-rated options on Amazon:
- Irwin Tools Spiral Extractor Set: Reliable, durable, and the industry standard for mechanics.
- Alden Grabit Pro: Excellent for smaller, softer bolts, featuring a two-in-one drill and extract design.
- Neiko Multi-Spline Extractor Set: Better for higher-torque applications where traditional spiral extractors might slip.
- GearWrench Bolt Biter: Features tapered, fluted edges that grip rounded-off bolt heads securely.
Applying Heat to Break the Bond
Sometimes, a bolt spins because a thread insert (like a rivet nut or a threaded knurl in plastic/wood) has broken loose from the base material and is spinning with the bolt. The bolt is rust-welded to the insert. To separate them, you need to introduce the magical power of thermal expansion.
How Heat Expansion Works
When metal is heated, it expands. When it cools, it contracts. By applying intense heat to the bolt and the surrounding area, you force the metal to expand at different rates, which breaks the microscopic bonds of rust and galvanic corrosion. Heating the bolt causes it to swell, crushing the rust. When it cools and shrinks back down, the rust bond is shattered, often allowing you to pull or twist the bolt free from whatever is holding it.
Choosing Between Propane and Butane
For small jobs, a simple butane micro-torch (like the ones used for culinary tasks or soldering) is perfect. It provides a highly focused, precise flame. For heavy automotive or industrial bolts, you need a standard propane or MAP-Pro gas torch (available at any hardware store or Amazon). MAP-Pro burns much hotter than propane and will heat a thick steel bolt to a dull cherry red in a matter of seconds.
The Heating and Cooling Cycle
Ignite your torch and focus the tip of the blue flame directly on the bolt head. Keep it moving slightly so you don’t melt away smaller features. Heat it for 30 to 60 seconds (depending on the size of the bolt). Once it’s hot, you can let it air cool, or shock it by spraying it with penetrating oil. The rapid temperature change causes the metal to contract violently, sucking the oil down into the threads. Repeat this heating and cooling cycle two or three times before attempting to pry or pull the bolt out again.
Fire Safety and Material Warnings
Using a 3000-degree flame requires immense caution.
- Never heat near fuel lines: If you are working on a car, triple-check for nearby gas lines, brake fluid, or oil leaks.
- Beware of toxic fumes: Heating penetrating oils or zinc-plated bolts can release harmful, noxious gasses. Always work in a highly ventilated area and wear a respirator if necessary.
- Protect nearby plastics: If the bolt is embedded in plastic or wood, heat will melt or ignite the base material long before the bolt breaks free. Use a heat shield or stick to cold methods.
- Keep an extinguisher handy: Always keep a Class B/C fire extinguisher within arm’s reach when doing any kind of torch work.
Cutting the Bolt Head Off
When you have exhausted every elegant solution, prying fails, pliers slip, drill bits dull, and heat achieves nothing, it is time to go medieval. Cutting the head off the bolt will release the tension on the flange, allowing you to remove whatever part the bolt was holding down.
When to Resort to Cutting
You should only cut the bolt head off when the part it is securing is more important than the bolt hole itself, or when you plan to completely drill out and re-tap the hole anyway. If a spinning bolt is holding a metal bracket in place, and you just need the bracket off, slicing the head off will let you slide the bracket right over the remaining bolt shaft.
Using a Dremel or Angle Grinder
Your tool choice depends on the size of the bolt and the space you have. For tiny bolts in tight spaces, a rotary tool (like a Dremel, available on Amazon) with a fiberglass-reinforced cutoff wheel is perfect. For large, heavy-duty automotive bolts, a 4.5-inch angle grinder with a metal cutoff disc will slice through a steel bolt like butter. Hold the tool securely with both hands, let it get up to full speed, and slowly guide the spinning wheel into the shaft of the bolt, right beneath the head.
Removing the Remaining Shank
Once the head is cut off, remove the part you were trying to detach. You will now be left with a small, headless metal stud sticking out of the hole (the shank). Ironically, without the tension of the bolt head, this shank can often just be grabbed with locking pliers and unscrewed effortlessly. If it’s still stuck and spinning, you will now have direct access to drill it out completely without the bulky head in the way.
Post-Cut Cleanup Procedures
Cutting metal is a dirty, spark-filled job. Follow these cleanup rules:
- Check for fire hazards: Sparks can smolder in shop rags, dry leaves, or wood dust. Check your surroundings for 30 minutes after cutting to ensure nothing is smoldering.
- File down sharp edges: The cut shank will be razor-sharp. Use a metal hand file to flatten it out; this prevents cuts and creates a nice flat surface if you need to drill it later.
- Vacuum the abrasive dust: Angle grinders throw black abrasive dust and metal fragments everywhere. Vacuum it immediately to prevent rust stains on your floor or tools.
- Inspect the base metal: Ensure your cutoff wheel didn’t accidentally slice into the important base metal surrounding the bolt.
Rethreading and Repairing the Hole
Congratulations! Through sweat, tears, and a lot of swearing, the spinning bolt is finally out. But your job isn’t done. The reason the bolt was spinning in the first place is that the internal threads of the hole are destroyed. If you just shove a new bolt in there, it will spin too. You need to repair the hole.
Assessing the Damage to the Threads
Shine a bright flashlight down into the hole. If you see shiny, smooth walls with faint, flattened ridges, the threads are stripped. If the hole looks significantly larger than it originally was, the metal has been bored out. Take a small dental pick and drag it up the side of the hole. If it doesn’t catch on distinct, sharp ridges, the threads are completely gone and must be recreated.
Using a Tap and Die Set
If there is enough metal left in the hole, you can cut brand new threads into it. You will need a Tap and Die set (a great investment to buy on Amazon). To do this, you usually have to step up to the next bolt size. For example, if you removed a 6mm bolt, you will drill the hole out slightly larger, and use an 8mm Tap to cut new threads. Mount the tap in a T-handle, dip it in cutting fluid, and slowly turn it clockwise into the hole. Turn it half a rotation, then back it out a quarter turn to break the metal chips. Repeat until you hit the bottom of the hole.
Installing Helicoils or Thread Inserts
If you absolutely must use the original size bolt (for instance, if the bolt goes through a specific sized bracket), you cannot just tap a larger hole. You must use a Helicoil or a threaded insert. A Helicoil kit involves drilling the hole out, tapping it with a special oversized tap provided in the kit, and then threading in a stainless-steel coiled wire. This coil acts as a brand-new set of internal threads perfectly sized for your original bolt. They are incredibly strong and often better than the original tapped aluminum or cast iron.
Steps to Prevent Future Stripping
Once the repair is done and you are ready to reassemble, make sure you never have to read this guide again by following these best practices:
- Always hand-thread first: Never start a bolt with a power tool. Turn it by hand for the first few threads to ensure it isn’t cross-threading.
- Use anti-seize compound: A tiny dab of copper or nickel anti-seize on the threads will prevent galvanic corrosion and rust from welding the bolt in the future.
- Respect torque specs: Over-tightening is the number one cause of stripped threads. Use a torque wrench and look up the proper tightness for your specific fastener.
- Clean dirty holes: Before putting a bolt into an old hole, blow it out with compressed air and spray some WD-40 in it to clear out grit and rust dust.
Conclusion
Dealing with a spinning bolt that won’t come out is a rite of passage for anyone who works with their hands. It tests your patience, your creativity, and your toolkit. But by understanding the mechanics of a stripped thread and methodically working through these techniques—from simple prying with a flathead, to clamping down with locking pliers, to applying targeted heat or executing a perfect drill-out—you can overcome any stuck fastener. Remember to invest in quality tools from Amazon, wear your safety gear, and always take the time to repair the damaged threads properly once the battle is won. You’ve got this. Now get back out to the garage and conquer that bolt!

- Top 10 Best Battery For F150 2026 - October 22, 2026
- Top 10 Best Battery For Car Audio System 2026 - October 22, 2026
- Top 10 Best Battery For A Boat 2026 - October 22, 2026





One Comment