Homemade Bug Remover for Autos: Complete DIY Guide

Nothing ruins the look of a freshly washed car quite like bug splatter on the hood, bumper, windshield, and mirrors. Besides being unsightly, bug residue contains acidic compounds that can damage your vehicle’s paint and clear coat if left untreated for too long. While many commercial bug removers are available, you can often achieve excellent results using simple household ingredients.
Homemade bug removers are affordable, easy to make, and generally safe when used correctly. Common ingredients such as white vinegar, dish soap, baking soda, and warm water can help loosen stubborn bug remains without requiring expensive specialty products. Whether you’re dealing with fresh insect splatter after a short drive or dried-on residue from a long road trip, the right DIY solution can make cleaning easier and help protect your vehicle’s finish.
In this guide, you’ll learn the best homemade bug remover recipes for autos, how to apply them safely, and practical tips to keep your car looking clean and protected year-round.
What Is the Best Homemade Bug Remover for Autos?
The best homemade bug remover for autos is a mixture of equal parts white vinegar and water sprayed directly onto bug splatter. Let the solution sit for 3–5 minutes, then wipe it away with a microfiber cloth. For stubborn residue, add a few drops of dish soap or use a baking soda paste for extra cleaning power.
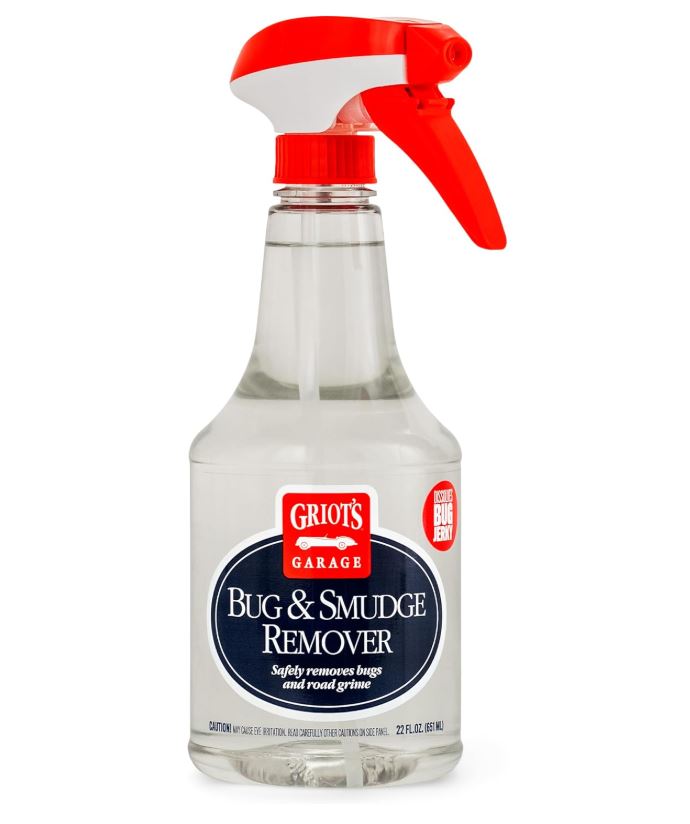
Finding the right car cleaning spray can make routine vehicle maintenance faster and safer. Griot’s Garage Smudge Remover is a professional-grade exterior cleaner designed to remove stubborn road grime, oil, bug residue, rubber marks, and surface smudges before washing. Its pre-wash formula loosens contaminants, helping reduce the risk of scratches and swirl marks during hand washing. Safe for paint, glass, wheels, chrome, and plastic trim, this versatile cleaner works on nearly every exterior surface. Whether you’re a weekend car enthusiast or a professional detailer, Griot’s Garage Smudge Remover offers an easy and effective way to keep your vehicle looking spotless.
| Pros | Cons |
|---|---|
| Removes heavy grime quickly | Premium price |
| Safe on paint, glass, trim, and wheels | Not intended for interior use |
| Helps reduce wash scratches | May require agitation on stubborn stains |
| Easy spray-and-wipe application | Bottle may run out with frequent use |
| Effective on bugs, oil, and rubber marks | Best used before a full wash |
Why You Should Remove Bugs from Your Car Quickly
Many drivers view bug splatter as a cosmetic issue, but it can actually cause lasting damage to your vehicle if ignored. Insects contain acidic compounds that can eat into paint, stain clear coats, and reduce visibility through the windshield. The longer bug residue remains on your car, especially during hot weather, the harder it becomes to remove.
Regularly cleaning bug splatter helps preserve your vehicle’s appearance, protects the paintwork, and prevents costly detailing or repair work in the future.
How Bug Residue Damages Paint
When insects hit your vehicle at highway speeds, their remains stick firmly to the surface. Bug guts contain proteins, enzymes, and acids that can bond to automotive paint.
During hot summer days, sunlight bakes this residue into the clear coat, making it more difficult to remove. Over time, bug stains can leave permanent marks or etchings on painted surfaces.
Common paint damage caused by bug residue includes:
- Clear coat discoloration
- Permanent staining
- Paint oxidation
- Surface etching
- Loss of gloss and shine
Effects on Windshields and Visibility
Bug splatter doesn’t just affect paint. It can also create visibility problems for drivers.
Large amounts of insect residue on the windshield can:
- Obstruct your view of the road
- Cause glare from sunlight or headlights
- Reduce windshield wiper effectiveness
- Create smearing during rainy conditions
Keeping the windshield clean improves driving safety and ensures better visibility in all weather conditions.
Long-Term Risks of Leaving Bugs on the Surface
Many vehicle owners postpone bug removal until their next car wash. Unfortunately, this can allow the residue to harden and bond with the surface.
Potential long-term consequences include:
- Expensive paint correction services
- Increased risk of clear-coat damage
- Permanent paint blemishes
- Reduced vehicle resale value
- More difficult cleaning in the future
Prompt removal is always easier and safer than dealing with baked-on bug stains weeks later.
Benefits of Regular Cleaning
Removing bugs regularly provides several advantages beyond appearance.
Benefits include:
- Better paint protection
- Improved vehicle appearance
- Easier maintenance
- Enhanced windshield visibility
- Longer-lasting wax and sealant protection
A few minutes of cleaning after a road trip can save hours of detailing work later.
Ingredients Commonly Used in Homemade Bug Removers
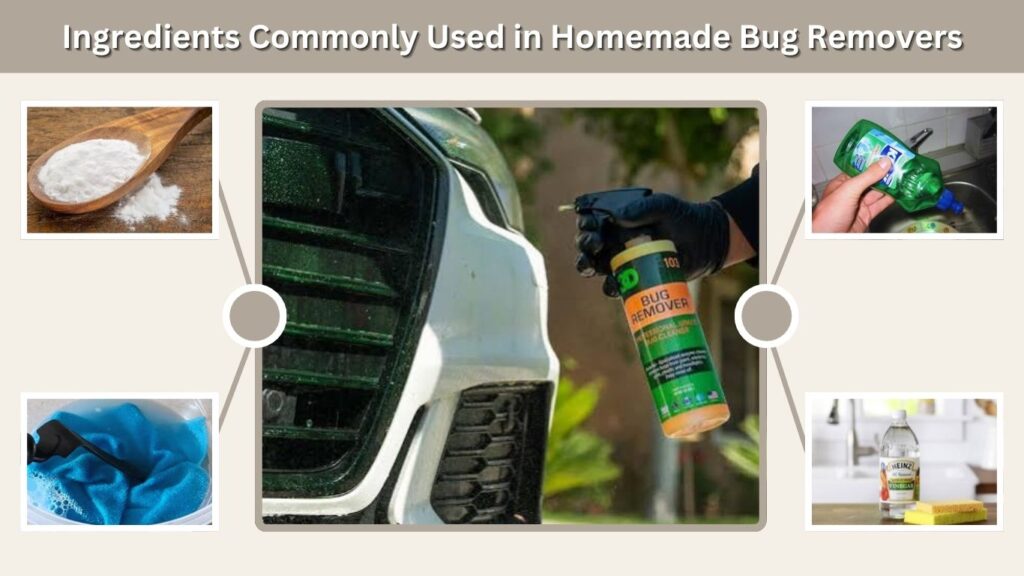
One reason homemade bug removers are so popular is that most ingredients are already available in the average household. These simple products can soften bug residue, break down organic matter, and make cleanup easier without requiring expensive automotive cleaners.
Before using any homemade solution, always test it on a small, inconspicuous area and avoid using abrasive tools that could scratch the paint.
White Vinegar
White vinegar is one of the most widely recommended DIY cleaning ingredients. Its mild acidity helps dissolve bug residue and loosen dried contaminants from vehicle surfaces.
Benefits of white vinegar include:
- Inexpensive and readily available
- Effective on dried bug splatter
- Easy to mix with water
- Safe when properly diluted
For most applications, a 50/50 mixture of vinegar and water works well.
Dish Soap
Dish soap is designed to cut through grease and organic materials, making it useful for bug removal.
Advantages include:
- Breaks down insect remains
- Easy to apply
- Works well with warm water
- Effective on fresh bug splatter
However, frequent use may strip protective wax coatings, so it should be used sparingly.
Baking Soda
Baking soda provides gentle cleaning power and can help loosen stubborn bug stains when mixed into a paste.
Benefits include:
- Mild abrasive properties
- Helps remove tough residue
- Affordable household ingredient
- Easy to mix and apply
Always use light pressure when cleaning painted surfaces with baking soda.
Warm Water and Microfiber Cloths
Sometimes the simplest tools are the most effective. Warm water softens dried bug remains, while microfiber cloths safely lift residue from paint and glass.
A quality microfiber towel helps:
- Prevent scratches
- Absorb loosened debris
- Improve cleaning efficiency
- Protect delicate paint finishes
Using microfiber instead of paper towels reduces the risk of swirl marks and paint damage.
Homemade Bug Remover Recipe #1: Vinegar and Water Solution
Th
e vinegar and water method is one of the easiest and most effective homemade bug removers for autos. It requires only two ingredients, takes minutes to prepare, and works well on fresh and moderately dried bug splatter.
Ingredients Needed
To make this DIY bug remover, gather:
- 1 cup white vinegar
- 1 cup warm water
- Spray bottle
- Microfiber cloth
- Clean rinse water
These simple ingredients are enough to treat most bug-covered areas on a vehicle.
Step-by-Step Mixing Instructions
Preparing the solution is straightforward:
- Pour equal parts white vinegar and warm water into a spray bottle.
- Secure the lid and shake gently.
- Test the mixture on a small area first.
- Apply to affected surfaces as needed.
The warm water helps soften residue while the vinegar works to loosen stubborn insect remains.
How to Apply Safely on Car Surfaces
Using the vinegar and water solution correctly is important for preventing damage and achieving the best results.
Follow these steps:
- Park the vehicle in a shaded area and allow the surface to cool.
- Spray the solution directly onto bug splatter.
- Let it soak for 3–5 minutes.
- Gently wipe the area using a clean microfiber cloth.
- Rinse thoroughly with clean water.
- Dry the surface with a soft towel.
Avoid allowing the solution to dry on the paint, especially during hot weather.
Pros and Cons of This Method
Pros
- Low-cost and easy to make
- Effective on fresh and dried bugs
- Requires only common household ingredients
- Safe for most painted surfaces when diluted
Cons
- May require multiple applications on heavy buildup
- Strong vinegar smell
- Should not be left on paint for extended periods
Homemade Bug Remover Recipe #2: Dish Soap and Warm Water
Dish soap is another popular DIY bug-removal solution. It works by breaking down the oils, proteins, and organic material found in insect remains.
This method is especially useful for freshly splattered bugs that haven’t had time to harden onto the vehicle’s surface.
Why Dish Soap Works on Bug Residue
Insects leave behind sticky organic matter that bonds to paint and glass. Dish soap is formulated to dissolve grease and stubborn residues, making bug cleanup easier.
It can help:
- Loosen insect remains
- Remove road grime
- Cut through oily residue
- Improve cleaning efficiency
For best results, use only a small amount of soap to avoid excessive stripping of protective wax layers.
Preparation Instructions
Creating this solution takes only a few minutes.
You’ll need:
- 1 gallon of warm water
- 1–2 tablespoons of mild dish soap
- Bucket
- Microfiber wash mitt
Mix the soap into the warm water until evenly distributed.
Best Application Techniques
To remove bug splatter effectively:
- Rinse the affected area with water.
- Dip a microfiber mitt into the solution.
- Gently wash the bug-covered sections.
- Allow the solution to sit briefly on stubborn spots.
- Wipe away loosened residue.
- Rinse thoroughly and dry.
Never scrub aggressively, as doing so can create scratches and swirl marks.
Precautions to Protect Wax Coatings
Although dish soap is effective, excessive use can reduce the lifespan of wax and paint sealants.
To minimize risk:
- Use dish soap only when necessary.
- Reapply wax after deep cleaning.
- Avoid concentrated soap mixtures.
- Rinse thoroughly after washing.
A protective wax layer helps prevent future bug buildup and makes cleaning easier.
Homemade Bug Remover Recipe #3: Baking Soda Cleaning Paste
For bug residue that refuses to come off with liquid cleaners, a baking soda paste can provide extra cleaning power.
This method works best on stubborn spots that have been baked onto the vehicle by heat and sunlight.
Ingredients and Measurements
You’ll need:
- 3 tablespoons baking soda
- 1 tablespoon water
- Small bowl
- Soft microfiber cloth
Mix the ingredients until a smooth paste forms.
How Baking Soda Loosens Stubborn Debris
Baking soda acts as a mild abrasive while also helping break down dried organic material.
Benefits include:
- Softens hardened bug remains
- Helps lift stubborn stains
- Easy to apply
- Safe when used gently
The paste works particularly well on front bumpers, grilles, and lower body panels where bug accumulation is common.
Proper Scrubbing Methods
When using baking soda, technique matters.
For safe cleaning:
- Apply a thin layer of paste to the affected area.
- Allow it to sit for several minutes.
- Use a damp microfiber cloth to gently wipe.
- Avoid circular scrubbing motions.
- Rinse thoroughly with clean water.
- Dry completely.
Gentle pressure is usually sufficient to remove most bug residue.
Surfaces Where It Should Not Be Used
Although baking soda is relatively mild, it is not ideal for every automotive surface.
Avoid using baking soda on:
- Delicate high-gloss finishes
- Freshly painted surfaces
- Sensitive plastic trim
- Unprotected black exterior moldings
Always test a small area first before applying to larger sections.
Homemade Bug Remover Recipe #4: Dryer Sheet Method
The dryer sheet method has become a popular DIY trick among car owners. Many people find that a damp dryer sheet can help loosen stubborn bug residue that traditional washing leaves behind.
While this technique can be effective, it should be used carefully to avoid damaging the vehicle’s finish.
Why Dryer Sheets Help Remove Bugs
Dryer sheets contain softening agents that help break down dried insect remains.
Advantages include:
- Easy to find at home
- Quick application
- Effective on tough bug splatter
- Useful for emergency roadside cleaning
However, the chemicals contained in dryer sheets may affect wax coatings if used frequently.
How to Remove Bug Splatter from Different Parts of Your Vehicle
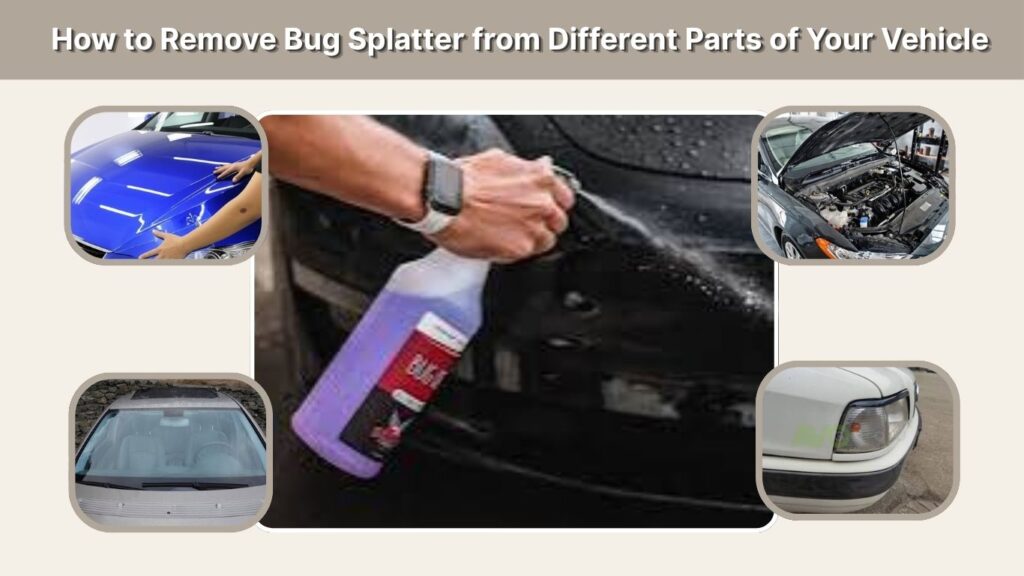
Bug splatter doesn’t affect every part of your car the same way. Some areas, like the front bumper and hood, take the brunt of high-speed impacts, while others, such as glass and plastic trim, require more delicate handling. Using the right cleaning approach for each surface helps you remove bugs effectively without damaging paint, plastic, or glass finishes.
Car Paint and Hood
The hood and front paint panels are the most common areas for bug buildup, especially after highway driving.
Best method:
- Start with a vinegar-water spray or mild dish soap solution
- Allow the solution to soak for a few minutes to soften residue
- Use a clean microfiber cloth to gently wipe the surface
- Rinse thoroughly with clean water afterward
- Repeat if any stubborn spots remain
Avoid dry wiping, as it can drag debris across the paint and create swirl marks.
Windshield and Glass Surfaces
Glass surfaces are more durable than paint, but bug residue can still reduce visibility and create glare while driving.
Best method:
- Spray homemade cleaner directly onto the windshield
- Let it sit for 2–3 minutes to break down dried splatter
- Wipe using a microfiber cloth or glass-safe towel
- Finish with a clean water rinse for streak-free clarity
For best visibility, always clean both the inside and outside of the windshield if needed.
Headlights and Plastic Trim
Headlights and exterior plastic trim require extra care because they can become cloudy or scratched more easily than glass or paint.
Best method:
- Use a diluted dish soap and warm water solution
- Apply gently with a microfiber cloth
- Avoid abrasive scrubbing or baking soda paste on these surfaces
- Rinse thoroughly to prevent residue buildup
- Dry immediately to avoid streaking or haze
Gentle cleaning helps maintain clarity and prevents long-term dullness.
Front Bumper and Grille
The front bumper and grille collect the heaviest concentration of bugs due to direct airflow impact.
Best method:
- Pre-soak the area with vinegar-water or soap solution
- Allow extra dwell time (5–10 minutes if needed)
- Use a soft detailing brush for tight grille spaces
- Wipe loosened residue with a microfiber cloth
- Repeat the process for stubborn buildup
- Rinse thoroughly to flush out debris
For heavily soiled grilles, patience and repeated soaking are more effective than forceful scrubbing.
Frequently Asked Questions
1. What is the best homemade bug remover for cars?
A vinegar and water solution is one of the most effective homemade bug removers. It helps soften dried bug residue, making it easier to wipe away without excessive scrubbing.
2. Does vinegar damage car paint?
When diluted properly and used for short periods, white vinegar is generally safe for automotive paint. Always rinse the area thoroughly after cleaning and avoid leaving vinegar on the surface for extended periods.
3. Can dish soap remove bug splatter?
Yes. Dish soap helps break down the proteins and oils found in bug remains. Mixing a small amount with warm water creates an effective cleaner for fresh and moderately dried bug stains.
4. How do I remove dried bugs from my windshield?
Spray a homemade bug remover solution onto the glass, allow it to soak for several minutes, and wipe with a microfiber cloth or sponge. Repeat if necessary for heavily dried residue.
5. Is baking soda safe for car paint?
Baking soda can be effective when mixed into a gentle paste, but it should be used carefully and with light pressure. Avoid aggressive scrubbing that could scratch the paint.
6. How often should I clean bugs off my car?
Ideally, remove bug splatter within a few days of driving. The longer bugs remain on the vehicle, the greater the chance of paint staining and clear-coat damage.
7. Can homemade bug removers replace commercial products?
For most everyday cleaning tasks, homemade bug removers work very well. However, heavily baked-on residue or professional detailing situations may benefit from specialized automotive bug-removal products.
Conclusion
Homemade bug removers offer a simple, affordable, and effective way to keep your vehicle clean while protecting its paint and finish. Whether you choose a vinegar-and-water spray, a dish soap solution, or a baking soda paste, these DIY methods can help loosen stubborn bug residue without the cost of commercial cleaners.
The key to successful bug removal is acting quickly, using gentle cleaning techniques, and avoiding harsh scrubbing that could damage the paint. Regular washing, protective wax coatings, and prompt cleanup after road trips can significantly reduce the buildup of bug splatter and make future cleaning easier.
By following the methods and tips in this guide, you can safely remove bugs from your car, maintain a polished appearance, and help preserve your vehicle’s value for years to come.

- Best Bug And Bird Poop Remover For Cars 2026 - September 15, 2026
- Can Vaseline Work As Wd-40? - September 15, 2026
- Best Bug Remover For Bumper 2026 - September 15, 2026