How to Drive Downhill With an Automatic Transmission: Complete Guide

You’re heading down a mountain pass in Colorado, a winding canyon road in California, or a long bridge ramp in Pittsburgh and suddenly you realize your brakes are working harder than they should. The car is picking up speed. Your foot is pressed firmer and firmer on the brake pedal. A faint burning smell starts to drift into the cabin.
This is brake fade. And it happens to thousands of American drivers every year who don’t know the single most important rule of downhill driving with an automatic transmission: your brakes are not designed to slow you down on long descents by themselves. Your engine is.
Whether you’re driving a sedan on a mountain highway, an SUV through a national park, or a pickup truck down a steep rural road, this guide teaches you everything you need to know about driving downhill safely with an automatic transmission — the right gears to use, when to brake, what RPM range to target, and the specific techniques for short hills, long grades, and slippery conditions.
ETENWOLF VORTEX S6 Tire Inflator
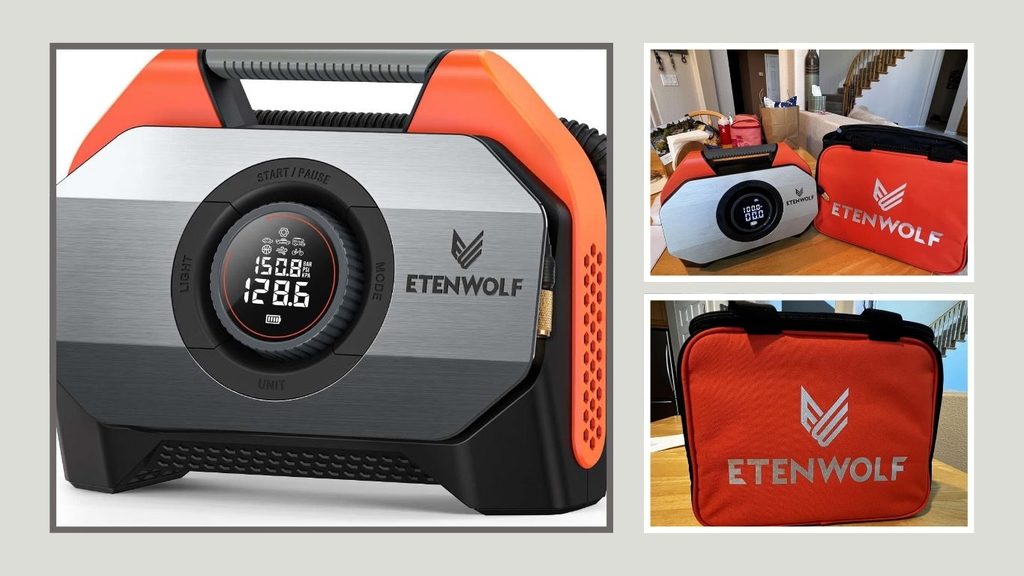
The ETENWOLF VORTEX S6 is a cordless air compressor built for cars, trucks, pickups, SUVs, bikes, and inflatables. Its large 19,200mAh battery, dual-cylinder design, and 100% duty cycle support fast and continuous tire inflation. The auto-stop function also makes inflation easier and safer.
| Key Feature | Specification |
|---|---|
| Battery | 19,200mAh |
| Max Pressure | 160 PSI |
| Airflow | 42 L/min |
| Inflation Speed | 31-inch tire in about 1 minute |
| Duty Cycle | 100% |
| Cylinders | Dual cylinder |
| Pressure Accuracy | ±1 PSI |
| Charging | 45W USB-C |
| LED Light | 1,000 lumens |
| Best For | Cars, trucks, SUVs, bikes |
Why Downhill Driving Is Different And Why It Matters
On flat roads, your brakes are doing a straightforward job: converting kinetic energy (motion) into heat, and slowing the car. On a short, gentle slope, this is still manageable. But on long or steep descents, gravity is continuously adding energy to the system. Every second you’re rolling downhill, the car is building momentum.
If you try to fight that continuous energy input with your brakes alone, one thing happens with certainty: your brakes overheat.
Brake fade is what occurs when your brake pads and rotors get so hot that they lose friction. At mild temperatures, your brakes feel normal. As temperatures rise, you need to press harder to get the same stopping force. At extreme temperatures, the brakes can become nearly non-responsive — right when you need them most.
Brake fade has contributed to serious accidents on mountain roads across the United States. It’s not a rare edge case. It’s a predictable, preventable outcome of riding the brakes on a long descent.
The solution has been understood by professional drivers, truckers, and driving instructors for decades: use engine braking to manage your speed, and use your friction brakes only for additional speed control.
Your automatic transmission is designed to help you do this. Most American drivers just don’t know how.
What Is Engine Braking — And How Does It Work in an Automatic?
Engine braking is the natural slowing effect that occurs when your engine is connected to the wheels but you’re not pressing the accelerator. When you lift off the gas, the engine acts as a resistance against the wheels, slowing the car.
In a manual car, drivers use engine braking instinctively — they downshift as they slow down, keeping the engine in the power band to provide resistance. In an automatic car, many people assume this all happens automatically in Drive (D). It doesn’t — at least not effectively.
When your automatic is in Drive (D) on a downhill slope, the transmission logic is designed to maximize fuel efficiency and smooth acceleration not to maximize engine resistance. The transmission will often upshift into higher gears to reduce engine speed, which is exactly the opposite of what you want when you need engine braking.
To use engine braking in an automatic, you need to manually select a lower gear — telling the transmission to stay in that gear rather than upshifting. When the transmission is locked into a lower gear, the engine spins faster relative to your road speed, creating more resistance and slowing the car without touching the brakes.
This is the core technique of safe downhill driving in an automatic. Everything else builds from here.
Which Gear Should You Use Going Downhill in an Automatic?
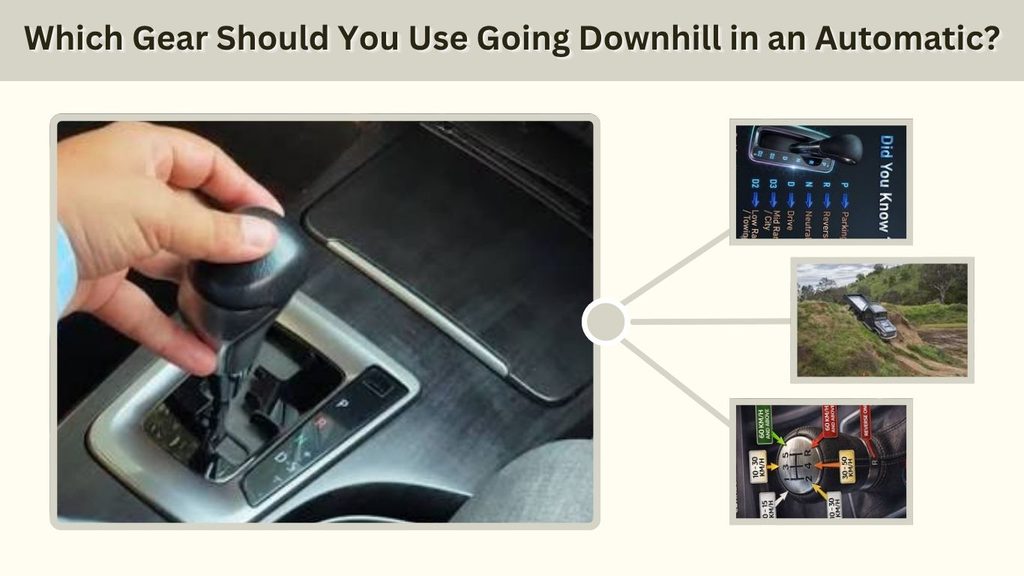
This is the most-searched question about downhill driving, and the answer depends on the steepness of the hill, the length of the descent, and how your specific transmission is configured. Here’s a practical breakdown:
Drive (D) — Short, Gentle Slopes Only
On a gentle grade that lasts only a few hundred feet, leaving the car in Drive is fine. Your brakes can easily manage the light speed increase without overheating. No gear change is needed.
3rd Gear — Moderate Hills and Light Grades
Most automatic gear selectors in the US have a “3” position, which locks the transmission from shifting above 3rd gear. This is a good starting point for moderate hills — it provides meaningful engine braking without revving the engine too aggressively. On long highway descents where the grade is noticeable but not extreme, 3rd gear is often the right choice.
2nd Gear — Steep Grades and Winding Roads
The “2” position locks the transmission into 2nd gear. This provides strong engine braking and is the appropriate choice for steep descents, mountain switchbacks, and winding canyon roads where you need sustained speed control over a long distance. Most drivers in the western US who regularly drive mountain roads use 2nd gear on serious descents.
Low (L) — Very Steep or Off-Road Descents
“L” (Low) locks the transmission in 1st gear. This provides maximum engine braking and is appropriate for extremely steep off-road terrain, unpaved mountain roads, or very steep grades where even 2nd gear doesn’t provide enough resistance. Note that in L, your engine RPM will climb quickly — watch your tachometer and be aware of your vehicle’s redline.
Sport Mode (S) or Manual/Paddle Shifters
Many modern vehicles in the US offer a Sport mode, a manual shift gate (moving the shifter through + and – positions), or steering-wheel-mounted paddle shifters. These give you the most precise control over which gear you’re in during a descent. With paddle shifters, you can downshift one gear at a time and respond dynamically to changing grades. This is the most sophisticated approach and provides excellent control.
A Simple Rule of Thumb
Use the same gear to go down a hill that you would use to drive up it. If you needed 2nd gear to climb a steep hill without the engine lugging, you need 2nd gear to descend it safely. This is one of the simplest and most practical guidelines American driving instructors give for mountain driving.
When to Shift to a Lower Gear: Timing Is Everything
One of the most common mistakes drivers make is waiting until they’re already going too fast to downshift. By then, the car has built momentum, the brakes have been working hard, and the situation is already less controlled than it should be.
The right time to shift to a lower gear is before the descent begins — not partway down.
Here’s the proper sequence:
- Identify the descent ahead. Road signs, your GPS, or simple visual assessment should tell you a long or steep hill is coming.
- Reduce your speed before the top of the hill. Use light braking to bring your speed down to a safe, controlled level before the grade begins.
- Shift to the appropriate lower gear at the top of the hill — before gravity starts accelerating you.
- Begin the descent slowly. Let the engine braking maintain your speed rather than fighting it with the brakes.
- Use brakes only for brief, firm speed adjustments — not continuous pressure.
This proactive approach keeps you in control from the very beginning of the descent. Reactive downshifting — shifting after you’ve already picked up too much speed — is less effective and can be rough on the transmission if done at high speeds.
ETENWOLF T300 Digital Tire Pressure Gauge
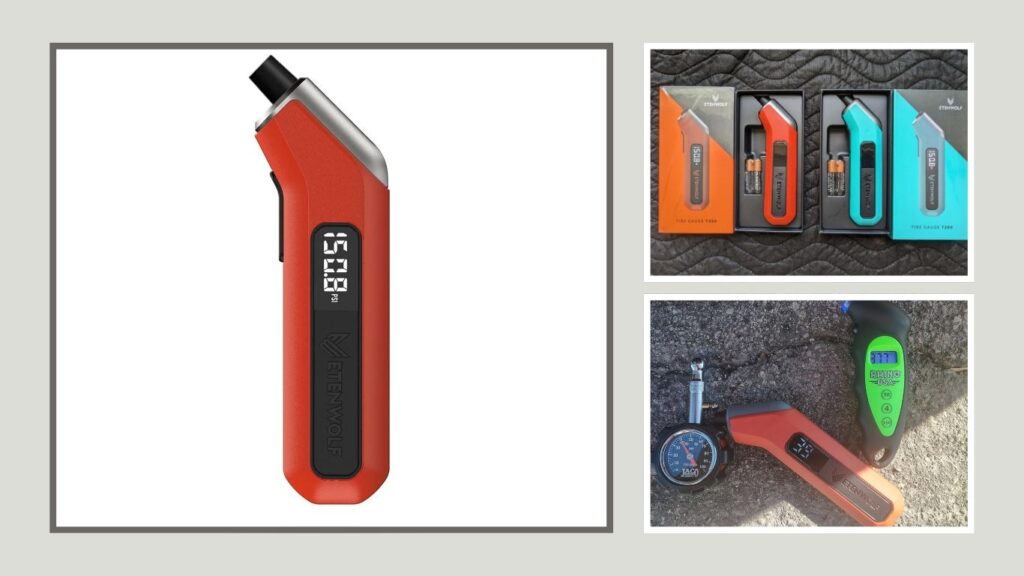
The ETENWOLF T300 is a compact digital tire pressure gauge designed for cars, trucks, RVs, and bikes. It offers a 3 to 200 PSI measurement range and ANSI B40.7 Grade 2A calibration for reliable readings. Replaceable AAA batteries and a built-in LED light make it practical for regular tire checks, including in low-light conditions.
| Key Feature | Specification |
|---|---|
| Pressure Range | 3 to 200 PSI |
| Accuracy | ±0.5% |
| Calibration | ANSI B40.7 Grade 2A |
| Battery | Replaceable AAA |
| Operating Temperature | -4°F to 130°F |
| Display Light | Built-in LED |
| Weight | 2.86 oz |
| Best For | Cars, trucks, RVs, bikes |
Key Features
- Measures tire pressure from 3 to 200 PSI
- High accuracy across low and high pressure ranges
- Thermal compensation for hot and cold conditions
- Replaceable AAA batteries for longer service life
- LED light for easier readings at night
- Durable design for heavy-duty use
- Suitable for cars, pickups, RVs, trucks, and bikes
- Presta valve adapter is not included
At What RPM Should You Downshift?
The RPM question is one of the most technically precise questions American drivers ask about downhill driving, and it deserves a direct answer.
As a general guideline, keep your engine RPM between 2,000 and 4,000 RPM during a controlled downhill descent in a lower gear. This range provides meaningful engine braking without overrevving.
More specifically:
- Below 2,000 RPM in a lower gear: The engine isn’t providing much resistance — you’re essentially coasting. If you’re in 2nd gear and your RPM is this low, you’re going slowly enough that the gear is appropriate, but you may want to check whether the transmission is actually staying in that gear.
- 2,000–3,500 RPM: This is the ideal engine braking zone for most passenger vehicles. The engine is creating useful resistance, managing speed, and operating comfortably within its designed range.
- 3,500–4,500 RPM: Acceptable for short bursts on steep grades, especially in 1st or 2nd gear. Sustained operation in this range is fine for most engines but produces more noise and uses more fuel.
- Above 4,500–5,000 RPM (approaching redline): This is where you should take action — shift up one gear, or apply light braking to reduce speed. You don’t want to sustain high RPM on a descent as it puts unnecessary stress on the engine and transmission.
Watch your tachometer. Most drivers never look at it. On a downhill descent in a lower gear, it’s one of the most useful instruments on your dashboard.
If your RPM is climbing toward the red zone, use brief, firm braking to reduce speed, let the RPM drop back into range, then release the brakes and let the engine braking resume.
How to Brake Correctly Going Downhill: The Interval Method
Even with perfect gear selection and engine braking, you will still need your friction brakes during most significant descents. The key is how you use them.
Wrong technique: Holding steady pressure on the brake pedal for the entire descent. This continuously heats the pads and rotors until fade occurs. If you’ve ever smelled burnt brakes on a mountain road or felt your brake pedal go soft, this is what caused it.
Right technique: Firm, Intermittent Braking — also called Threshold Braking or Interval Braking
Here’s how it works:
- Let the car’s speed build slightly above your target speed.
- Apply firm, confident pressure to the brake pedal — enough to scrub 5–10 mph — then completely release the pedal.
- Allow the brakes to cool for several seconds while the engine braking manages speed.
- Repeat as needed.
This interval approach allows heat to dissipate between brake applications. Your brakes can handle significant thermal load as long as they have cooling periods between applications. Constant pressure gives them no recovery time.
A practical target for long mountain descents: brake firmly every 30–60 seconds rather than holding constant pressure. Between brake applications, the engine in a lower gear should be managing most of the speed control.
Downhill Driving Techniques for Specific Situations
Short Hills: Just Use Your Brakes
A descent of a few hundred feet on a moderate grade poses no brake overheating risk. There’s simply not enough time or distance to generate dangerous heat. Standard braking is completely appropriate. No gear change required unless the hill is steep enough that you’d otherwise be going much faster than you want.
Long, Steep Highway Grades: 2nd or 3rd Gear Plus Interval Braking
This is the most common challenging scenario for American drivers — think mountain highways like I-70 through the Rockies, US-50 over the Sierra Nevada, or the Blue Ridge Parkway. For these descents:
- Shift to 3rd gear at the top of the grade.
- If speed continues to climb above your comfort zone, drop to 2nd.
- Use firm interval braking every 30–60 seconds.
- Keep your speed at or below the posted speed limit for the descent.
- If you see runaway truck ramps, take them seriously — they exist because brake fade is a real, documented danger on these roads.
Winding Mountain Roads with Switchbacks: 2nd Gear Continuous
On roads like those through Great Smoky Mountains National Park, Rocky Mountain National Park, or Sequoia — where tight switchbacks demand slow, controlled cornering — 2nd gear is typically the right call for the entire descent. The engine braking keeps you from building excessive speed between corners, reducing your reliance on the brakes in corners where you need steering control more than braking force.
Steep Off-Road Descents: Low (L) Gear, Let the Engine Do the Work
On unpaved off-road trails — popular in states like Utah, Colorado, Arizona, and throughout the Pacific Northwest — extremely steep descents require maximum engine braking. Use L (1st gear), keep your foot off the brakes as much as possible, and let the drivetrain’s resistance manage your descent speed. In modern trucks and SUVs, many vehicles offer a Hill Descent Control (HDC) feature that automates this — it modulates the brakes electronically to maintain a steady, slow descent speed without driver input.
Slippery or Wet Conditions: 2nd or 3rd Gear, Extremely Gentle Inputs
On wet pavement, ice, or snow, the rules of downhill driving are the same but the margins for error are dramatically smaller. Use 2nd or 3rd gear for engine braking. Brake extremely gently — hard braking on a slippery downhill is the fastest way to lose control. If your vehicle has traction control and stability control, make sure they are engaged (they typically are by default). In snowy conditions, some modern vehicles offer a Snow mode that can help manage wheel slip during descents.
People Also Ask: Your Downhill Driving Questions Answered
How do you drive an automatic car on a slope going down?
Shift to a lower gear (3, 2, or L depending on steepness) before starting the descent, reduce your speed at the top of the hill, and let the engine braking manage your speed during the descent. Use firm, intermittent braking rather than continuous pressure. Keep your RPM between 2,000 and 4,000. Begin slowly and maintain a safe following distance.
When going downhill in a vehicle with an automatic transmission, you should…?
You should shift to a lower gear before the descent begins, not after you’ve already gained speed. You should use engine braking as your primary speed control, and friction brakes only for brief adjustments. You should never ride the brake pedal continuously on a long descent, as this causes brake fade.
Which gear for downhill in an automatic?
Use 3rd gear for moderate descents, 2nd gear for steep or long grades, and L (1st gear) for extreme off-road or very steep descents. Sport mode or paddle shifters (where available) give the most precise control. Use the same gear you would need to climb that hill — it’s a reliable rule of thumb.
How do you drive an automatic car down a steep hill?
Shift to 2nd gear (or L for extreme grades) before the descent. Reduce speed at the top. Let the engine braking maintain speed during the descent. Use short, firm brake applications — not sustained pressure — when you need to scrub additional speed. Watch your tachometer and keep RPM between 2,000 and 4,000. On very steep grades, consider Hill Descent Control if your vehicle has it.
What destroys automatic transmissions?
The most common causes of automatic transmission damage include: overheating (from towing beyond the rated capacity or repeated hard acceleration), neglected fluid changes (degraded fluid loses its lubricating and hydraulic properties), towing while not in the correct tow/haul mode, shifting between Drive and Reverse while the car is still moving, excessive downshifting at very high speeds, and water contamination from driving through deep floods. For downhill driving specifically, forcing a downshift at high speed can stress the transmission — always reduce speed before downshifting to a lower gear.
How to park an automatic car going downhill?
When parking on a downhill slope, brake to a stop, shift to Park, and then — importantly — engage the parking brake before releasing the foot brake. This prevents the full weight of the car from resting on the transmission’s parking pawl (the pin that locks the transmission in Park). Turn your front wheels toward the curb so if the car does roll, it stops against it. On steep grades, always use the parking brake as your primary hold, not just the transmission Park position.
How to properly drive downhill?
The complete proper sequence: identify the descent ahead, reduce speed before the top of the hill, shift to an appropriate lower gear (3, 2, or L), begin the descent at a slow, controlled speed, use engine braking as your primary speed management tool, apply firm braking briefly when needed, never ride the brakes continuously, watch your RPM (keep it between 2,000–4,000), and maintain a safe following distance from the vehicle ahead.
What Destroys Automatic Transmissions: The Downhill Edition
Downhill driving, done incorrectly, can stress your transmission. Here’s what to avoid:
Downshifting at High Speed Forcing the transmission from Drive directly into 2nd gear at 55 mph is rough on the transmission. The drivetrain must rapidly absorb the speed differential, which creates significant mechanical stress. Always reduce speed first — ideally below 30–40 mph — before shifting to 2nd, and below 20 mph before using L.
Riding the Brakes and Overheating the Transmission Paradoxically, if you’re in Drive and riding the brakes instead of using engine braking, the transmission is still spinning at road speed while the engine is at idle. This isn’t optimal for the transmission’s cooling efficiency. Engine braking — using the drivetrain to slow the car — actually distributes the thermal load across the drivetrain rather than concentrating it all in the brakes.
Ignoring Transmission Fluid Temperature In trucks and SUVs doing sustained mountain driving (especially while towing), watch for a transmission temperature warning light or high reading on a transmission temp gauge if your vehicle has one. Modern transmissions have a protection mode that will limit gear selection or apply brakes if overheating is detected. If you see this warning, find a safe place to stop and let the transmission cool before continuing.
Using Neutral to Coast Downhill This is a common misconception — that shifting to Neutral on a downhill saves gas or reduces wear. In fact, coasting in Neutral is dangerous and illegal in many US states. You lose engine braking entirely, making the car harder to control and placing all speed management on the friction brakes. Additionally, modern fuel-injected engines cut fuel delivery when engine braking anyway, so there’s no real fuel savings. Never coast downhill in Neutral.
Hill Descent Control (HDC): How Modern Technology Helps
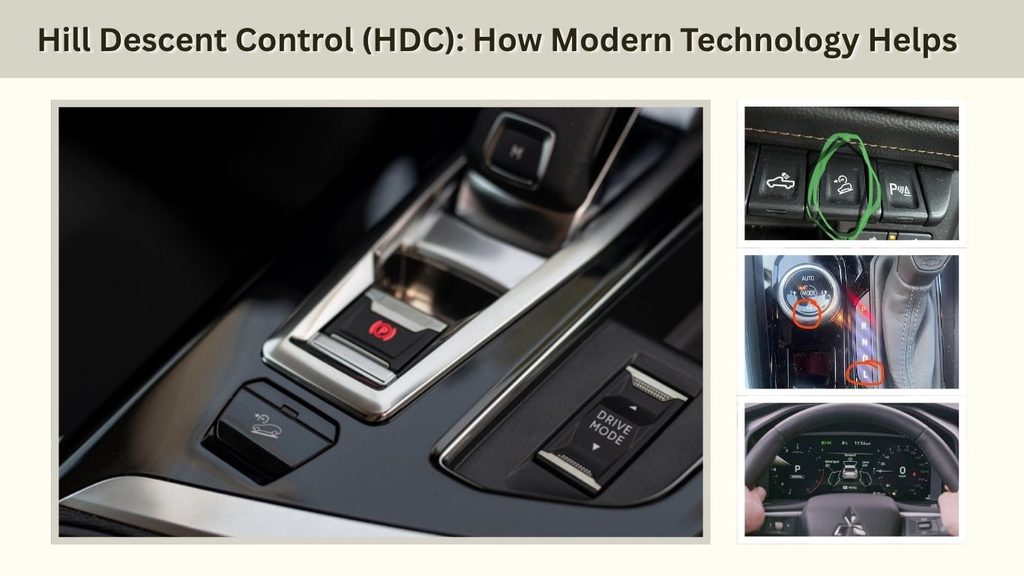
Many modern trucks, SUVs, and crossovers sold in the US now include Hill Descent Control — a feature that was once found only on luxury off-road vehicles but is now increasingly common across mainstream brands including Ford, Toyota, Subaru, Jeep, and Land Rover.
Hill Descent Control works by automatically modulating the brakes on each wheel individually to maintain a preset slow speed on steep descents — typically somewhere between 2–8 mph depending on the system. The driver steers while the system handles speed control. It uses the same hardware as the ABS and traction control systems.
To use HDC:
- Engage the feature using the dedicated button (usually labeled HDC or shows a car on a slope icon).
- Select 4-Low or Low range on vehicles with a transfer case, or a lower gear on 2WD vehicles.
- Begin the descent. The system will automatically apply brakes to individual wheels to maintain a steady speed.
- Steer normally.
HDC is particularly useful on unpaved off-road descents where the surface is uneven, loose, or slippery. It allows the driver to focus entirely on steering through obstacles without managing speed simultaneously.
If your vehicle has this feature and you drive in mountainous terrain, it’s worth understanding how to activate it before you need it — not while you’re already on a steep descent.
Automatic vs. Manual: Downhill Control Compared
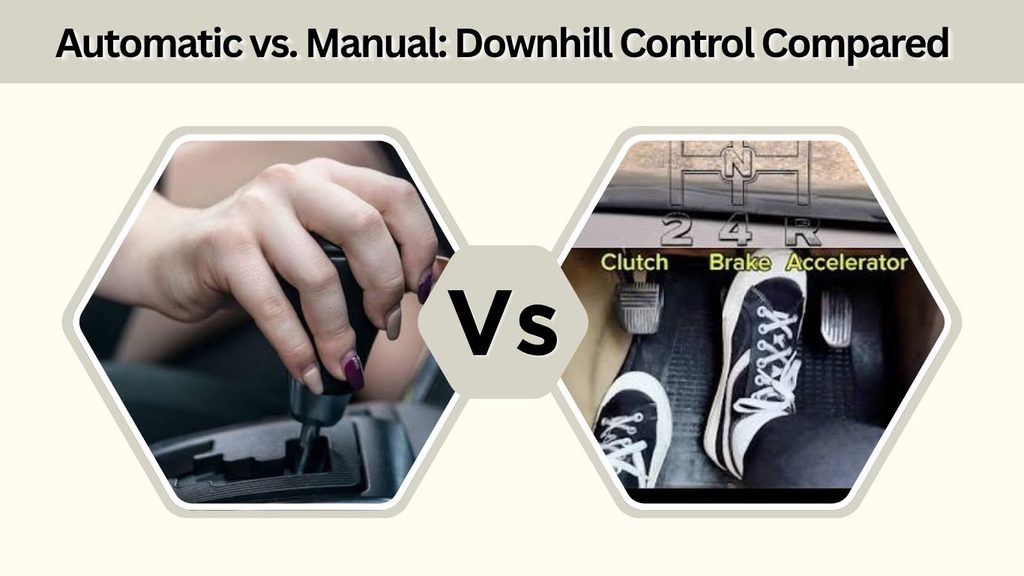
Drivers who have experience with manual transmissions sometimes feel more confident on steep descents because the control is more tactile and direct. In a manual, you feel the compression braking through the drivetrain, you can select exactly which gear you want, and you have very precise feedback.
In an automatic, you have less direct feedback, and the transmission’s logic may sometimes work against your intentions if you leave it in Drive. However, the gap between manual and automatic control on downhill grades has narrowed significantly in the past decade.
Modern automatics with Sport modes, manual shift gates, and paddle shifters now offer very close to manual-level control on descents. The driver can select a specific gear and hold it, just like a manual driver. The transmission will not upshift out of a selected gear, and it will automatically rev-match when downshifting in manual mode on many vehicles.
The practical takeaway for US drivers: use the manual shifting features your automatic already has. Most people don’t. They leave the car in Drive and fight the descent with their brakes alone. Switching to a lower gear manually takes seconds and dramatically changes your control and safety on any significant downhill.
Safety Checklist: Before Every Mountain or Steep Downhill Drive
Before heading into mountainous terrain or preparing for a significant descent:
Check your brakes. Brake pads with less than 3mm of material and rotors with heavy scoring or warping will fade faster and provide less stopping power. If your car pulls to one side when braking, or if you feel pulsation through the pedal, have brakes inspected before tackling mountain roads.
Check your transmission fluid. Low or degraded fluid reduces the effectiveness of engine braking and increases the risk of transmission overheating. The fluid should be at the correct level and should be red or light brown — not dark or burnt.
Know your vehicle. Does it have Sport mode? Paddle shifters? Hill Descent Control? Low range? Spend five minutes in your driveway before a mountain trip understanding how to select a lower gear manually.
Plan your descent. If you’re driving through areas like the Rocky Mountain corridor on I-70 (one of the most incident-prone mountain highways in the US), the Sierra Nevada, or the Cascades, study the grade profiles in advance. Know where the long descents are and prepare your gear selection before you reach the top.
Keep a safe following distance. On downhill grades, stopping distances are significantly longer than on flat roads. The standard two-second following distance is insufficient. Use at least three to four seconds on any significant downhill.
Quick-Reference Summary: Downhill Driving With an Automatic
Core rule: Engine braking first, friction brakes second.
Gear selection: 3rd for moderate hills, 2nd for steep/long grades, L for extreme or off-road descents, Sport/Paddles for most precise control.
When to shift: Before the descent begins — not halfway down.
Braking technique: Firm, intermittent applications with cooling periods between them. Never ride the brakes continuously.
Target RPM: 2,000–4,000 RPM during descent. If approaching redline, apply brief braking to reduce speed.
Never do: Coast in Neutral, downshift at high speed, ride brakes on long grades, shift to Park while moving.
Technology: Use Hill Descent Control if available for steep off-road descents.
Parking on a slope: Brake, engage parking brake, then shift to Park. Turn wheels toward curb.
Final Thoughts
Driving downhill with an automatic transmission is not complicated once you understand two core principles: gravity continuously adds energy to your vehicle, and your brakes alone are not designed to absorb all of it on a long descent.
Shifting to a lower gear before you begin any significant downhill and using engine braking as your primary speed control is the same technique professional drivers, truck drivers, and driving instructors have used for generations. Modern automatic transmissions have made this easier than ever, with Sport modes, paddle shifters, and Hill Descent Control at your disposal.
The next time you’re at the top of a long grade in Colorado, Tennessee, Oregon, or anywhere else in this beautifully mountainous country, take an extra five seconds to select the right gear before you go over the edge. Your brakes and your passengers will thank you.

- Top 10 Best Helmet For Xtreme 125r 2026 - October 5, 2026
- Top 10 Best Helmet For Xpulse 200 2026 - October 5, 2026
- Top 10 Best Helmet For Xsr 155 2026 - October 5, 2026