How to Remove a Bolt That Spins But Won’t Come Out

A bolt that spins freely but refuses to come out is one of the most maddening problems in any repair job.
You turn it counterclockwise, it rotates endlessly, but nothing moves the bolt stays exactly where it is. If you’re searching for how to remove a bolt that spins but won’t come out, you’ve landed in the right place.
This problem almost always comes down to one of three situations: the nut on the back is spinning with the bolt, the threads are stripped and the bolt has no grip to pull itself free, or corrosion is locking the bolt in place. Each scenario has a specific fix.
This complete guide covers every cause, every proven removal method, and a clear step-by-step process so you can get that stubborn bolt out without destroying the surrounding material.
When a Bolt Spins But Won’t Come Out?
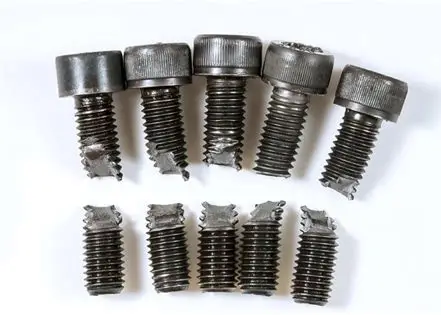
When a bolt spins but won’t come out, it means the bolt is rotating freely without generating the thread-driven movement needed to back itself out.
Under normal conditions, a bolt’s threads engage with matching threads in a nut or tapped hole and as you turn it counterclockwise, the thread helix drives the bolt outward. When that thread engagement is broken or the nut is moving with the bolt, that outward travel never happens.
This is different from a bolt that is simply stuck or seized where the bolt won’t rotate at all. A spinning-but-stuck bolt is rotating just fine, but it has lost its mechanical anchor.
Think of it like a screw in a hole that’s become too large: the screw spins but never bites. Recognizing this distinction immediately points you toward the right set of tools and techniques.
The problem shows up most often in automotive repair (especially under-car work, door panels, and exhaust systems), furniture assembly, appliance repair, and anywhere that flat sheet metal or thin panels are involved.
In all of these situations, the fix is always about restoring the mechanical relationship between the bolt and its anchor point whether that means stopping the nut from moving, re-engaging the threads, or forcing the bolt out through an alternative method.
TrickShot 3-in-1 Penetrating Lubricant Oil: Rust Removal & Protection
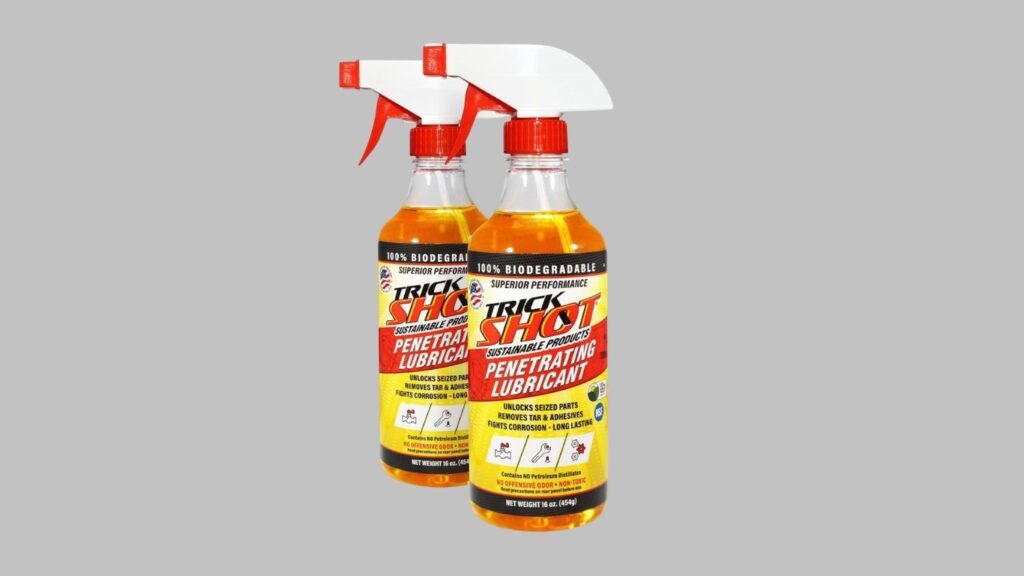
The TrickShot 3-in-1 Penetrating Lubricant Oil is a soy-based formula that loosens stuck parts, removes rust, lubricates, and protects metal. It is 96% biobased, non-flammable, and NSF H1 registered, making it useful for tools, bolts, hinges, machinery, and general maintenance.
| Feature | Details |
|---|---|
| Brand | TrickShot |
| Formula | Soy-based, 96% biobased |
| Size | 16 oz × 2 |
| Main Uses | Penetrates, lubricates, cleans & protects |
Why Does a Bolt Spin But Not Come Out?
Pinpointing the exact cause before you start pulling out tools is the single most important step. Here are the four main reasons this happens:
Co-Rotating Nut (Most Common Cause)
A co-rotating nut is one of the most common reasons a bolt won’t come out, especially in automotive panels and flat-surface assemblies. In this situation, the nut behind the panel or bracket isn’t secured anymore it spins together with the bolt.
So when you turn the bolt counterclockwise, the nut moves in perfect sync, preventing any loosening. This often happens with loose cage nuts, broken weld nuts, or plastic-embedded nuts that have come free from their housing.
Stripped Threads
Stripped threads eliminate the grip between the bolt and the threaded hole. Instead of unthreading, the bolt simply spins freely inside the bore because there’s nothing left to hold it. This issue usually occurs due to overtightening, incorrect thread pitch, heavy use of impact tools, or corrosion that has worn down the threads.
Corrosion and Rust Bonding
In some cases, rust and corrosion effectively “lock” the bolt in place. Even if the threads are damaged or gone, the shank of the bolt can seize inside the hole due to corrosion buildup. As a result, the threaded portion may spin, but the bolt itself won’t move in or out because the shank is physically stuck.
Deformed or Rounded Bolt Head
A damaged or rounded bolt head can cause tools to slip instead of gripping properly. Here, the bolt may not actually be turning—the tool is just spinning around it. However, it appears as though the bolt is spinning in place. This typically happens when the wrong size socket is used or excessive force rounds off the bolt head.
Why a Bolt Spins but Won’t Come Out
Co-Rotating Nut (Most Common Cause)
A co-rotating nut is one of the most frequent reasons a bolt won’t loosen, especially in automotive panels and flat-surface applications. In this case, the nut behind the panel or bracket is no longer secured in place and spins along with the bolt. When you turn the bolt counterclockwise, the nut rotates at the same time, preventing the threads from disengaging. This issue commonly occurs with loose cage nuts, broken weld nuts, or plastic-embedded nuts that have detached from their housing.
Stripped Threads on Bolt or Hole
Stripped threads remove the connection between the bolt and the threaded hole, causing the bolt to spin freely instead of unthreading. With no thread engagement, the bolt has nothing to grip, making removal impossible through normal turning. This problem is often caused by overtightening, using the wrong thread pitch, excessive impact tool use, or corrosion that wears down the threads.
Corrosion and Rust Locking the Bolt
Corrosion and rust can effectively bond a bolt to the surrounding material, especially along the shank. Even if the threads are damaged or no longer functional, the bolt may remain stuck because rust has seized it inside the hole. In this situation, the threaded section may spin, but the bolt won’t move forward or backward due to the physical lock created by corrosion buildup.
Rounded or Damaged Bolt Head
A deformed or rounded bolt head can prevent tools from gripping properly, leading to slippage. In this case, the bolt itself may not be turning—the tool is simply spinning around the head. However, it often appears as though the bolt is spinning in place. This typically happens when the wrong size socket is used or excessive force strips the bolt head.
What Are the Best Methods to Remove a Bolt
There is no single universal solution the right method depends on your specific situation. Here are the seven most effective approaches, from least invasive to most aggressive.
Method 1 — Stop the Nut from Spinning
If a backing nut is the problem, the entire solution is preventing it from rotating. Access the back side of the panel and hold the nut stationary with a wrench, pliers, locking pliers (Vice-Grips), or a second socket while you turn the bolt head. Even holding a flathead screwdriver firmly against the side of the nut to wedge it against the panel wall is often enough. With the nut fixed in place, the bolt will immediately begin backing out as normal. This method is free, takes under two minutes, and works 100% of the time when a spinning nut is the cause.
For hidden cage nuts in automotive applications — such as those found in door jambs or under dashboard panels — you may need to partially disassemble the surrounding trim to gain access to the nut. It takes longer but remains far simpler than any thread-repair approach.
Method 2 — Use Locking Pliers (Vice-Grips) on the Bolt Head
If the bolt head is stripped or rounded and your socket is slipping, clamp locking pliers directly onto the flats of the bolt head and use maximum grip force while turning counterclockwise. The serrated jaws of Vice-Grips can bite into a deformed bolt head and provide enough torque to back the bolt out. This works best on bolts with some exposed shank above the surface. Position the pliers as low as possible on the shank for maximum mechanical advantage.
Method 3 — Apply Penetrating Oil and Wait
When corrosion is bonding the bolt shank to the hole, penetrating oil is your best first move before anything mechanical. Apply PB Blaster, Kroil, or a similar penetrating lubricant generously around the bolt head and any exposed threads. Let it soak for a minimum of 30 minutes — ideally several hours or overnight for heavily corroded fasteners. The oil wicks into the rust layer through capillary action, breaking the rust bond and freeing the bolt shank to move.
After soaking, try tapping the bolt head lightly with a hammer to create micro-vibrations that help the oil penetrate further. Then attempt removal using your wrench or pliers. Repeat the oil application if needed — patience here pays off significantly.
Method 4 — Cut a New Slot and Use a Flathead Screwdriver
When the bolt head is so damaged that no socket or pliers can grip it, use an angle grinder or rotary tool with a cutting disc to cut a straight slot across the bolt head. This creates a new flathead drive that a large flathead screwdriver can engage. Apply firm downward pressure to keep the screwdriver seated in the slot and turn counterclockwise. This method is surprisingly effective on bolts with minor thread engagement remaining. It works best on softer metals like aluminum and on bolts that are already slightly loose.
Method 5 — Weld a Nut to the Bolt Head
For recessed or severely damaged bolt heads, welding a new nut directly onto the old bolt head provides a clean surface for your wrench to engage. The heat from welding also expands and contracts the metal around the bolt, which often breaks the corrosion bond simultaneously — making this doubly effective on seized bolts. After welding, allow 60 seconds for the weld to cool enough to handle safely, then use a wrench on the newly welded nut to back the bolt out. This is a professional-grade technique that works extremely well in automotive exhaust, suspension, and engine applications where rust is severe.
Method 6 — Use a Bolt Extractor / Screw Extractor Set
A bolt extractor (also called an easy-out) is a hardened reverse-threaded tool designed specifically for this situation. Drill a small pilot hole into the center of the bolt head using a left-hand drill bit (drilling counterclockwise simultaneously backs the bolt out if any thread engagement remains). Then drive the extractor into the pilot hole with a tap and socket. As you turn the extractor counterclockwise, its reverse threads bite deeper into the bolt while simultaneously unscrewing it.
This method requires precision — drilling off-center can weaken the extractor and risk snapping it inside the bolt, which creates a far worse problem. Use a center punch to mark the exact center of the bolt before drilling. Go slow with the drill and use cutting fluid to keep heat down.
Method 7 — Drill Out the Bolt Entirely
When every other method has failed and the bolt is beyond saving, drilling it out is the final option. Select a drill bit slightly smaller than the bolt’s minor thread diameter and drill straight down through the bolt center. The goal is to destroy the bolt shank completely while leaving the surrounding threads intact (if the hole has usable threads). Work up through progressively larger drill bit sizes until the bolt material collapses inward and can be picked out with a pick tool or dental pick. Any remaining thread material can be cleaned up with a thread chaser or tap.
This method is destructive to the bolt but preserves the surrounding material when done carefully. Take your time, keep the drill perfectly straight, and use cutting fluid throughout.
Step-by-Step Guide: Removing a Spinning Bolt
- Stop turning immediately. Do not continue spinning the bolt. More rotation causes more damage to threads and surrounding material.
- Diagnose the cause. Use the four-step diagnostic process above to determine whether you’re dealing with a co-rotating nut, stripped threads, corrosion bonding, or a damaged bolt head.
- Apply penetrating oil. Regardless of the cause, apply penetrating oil around the bolt head and shank perimeter. Let it soak while you gather your tools.
- Attempt the simplest fix first. If a spinning nut is the cause, go directly to Method 1. If the bolt head is intact but the threads are stripped, go to Method 6. If the head is damaged, try Method 2 or Method 4.
- Tap the bolt with a hammer. Light hammer taps on the bolt head break corrosion bonds and drive the penetrating oil deeper. Three to five firm taps before each removal attempt improves your odds significantly.
- Apply counterclockwise torque firmly and steadily. Avoid jerky, rapid movements. Smooth, sustained torque with the correct tool gives threads (if any remain) the best chance to engage and pull the bolt out.
- Try alternating directions. Turn clockwise slightly (tightening direction), then counterclockwise. This rocking motion helps break rust bonds and works stripped partial threads free.
- Escalate to the next method if needed. Work through Methods 1 through 7 in sequence based on your situation. Avoid jumping straight to drilling — it’s irreversible.
- Clean the hole after removal. Once the bolt is out, clean the threads with a wire brush, thread chaser, or tap before installing a new fastener. Installing into a dirty, damaged hole leads to the same problem recurring.
- Install new hardware correctly. Use the correct bolt size and thread pitch. Hand-thread first, then torque to specification with a torque wrench. Never overtighten.
Tips to Get Better Results
- Use left-hand drill bits when drilling for an extractor. The counterclockwise rotation of the drill itself often backs the bolt out before you even need the extractor.
- Heat the area with a propane or MAP gas torch on steel components before attempting removal. Thermal expansion breaks rust bonds that penetrating oil alone cannot.
- Never use heat near fuel lines, brake lines, plastic, or painted surfaces. Always clear the work area of flammables first.
- A center punch is non-negotiable before drilling. Without it, your drill bit will walk and you’ll drill off-center — destroying your extractor and possibly the surrounding threads.
- Keep drill bits sharp. A dull bit generates heat that hardens the surrounding steel and makes drilling exponentially harder.
- Use cutting fluid when drilling into hardened steel. WD-40 works in a pinch, but proper cutting oil protects the bit and the surrounding metal.
- Consider a nut splitter for accessible nuts that are spinning and can’t be held. A nut splitter cracks the nut apart without damaging the bolt or surrounding threads.
- Replace weld nuts and cage nuts after repair. Once a weld nut has broken free or a cage nut has spun loose, it will do the same thing to the next bolt. Fix the anchor point, not just the fastener.
Common Mistakes to Avoid
Continuing to turn the bolt once you realize it’s spinning freely. This single mistake causes more damage than anything else. Stop turning the moment you feel that characteristic free-spin — every additional rotation destroys more thread material.
Skipping penetrating oil. Many people go straight to drills and extractors without giving penetrating oil a chance. For corroded fasteners, a proper soak overnight with Kroil or PB Blaster solves the problem 40–50% of the time without any other intervention.
Drilling off-center. This is the most common extractor failure. A misaligned drill hole makes the extractor snap off inside the bolt, leaving you with a hardened steel fragment inside a hardened steel bore — one of the hardest problems in mechanical repair to solve.
Using the wrong extractor size. Extractors must fit the pilot hole precisely. An extractor that’s too small spins in the hole without biting. One that’s too large splits the remaining bolt material. Follow the extractor kit’s sizing chart exactly.
Using heat on aluminum components without care. Aluminum conducts heat fast and can warp or crack if overheated. Keep heat application brief, targeted, and away from thin sections.
Reusing the damaged bolt. Once a bolt has been drilled, extracted, or stripped, discard it. Reusing compromised hardware creates an immediate risk of failure — particularly dangerous in structural and automotive applications.
Ignoring why the bolt failed in the first place. If a weld nut broke loose or a cage nut spun free, simply installing a new bolt into the same situation guarantees the problem repeats. Fix the root cause before fastening anything.
FAQs
How do you remove a bolt that spins freely without a nut on the back?
If there’s no nut involved and the bolt is spinning freely, the threads in the tapped hole are stripped. The bolt has no anchor to pull itself out against. Your best approach is to try a screw extractor — drill a center pilot hole, insert the extractor, and apply counterclockwise torque. If the threads are completely gone and the extractor has nothing to work against either, drill the bolt out entirely and repair the hole with a Helicoil thread insert or a larger replacement bolt.
What is the best penetrating oil for a stuck spinning bolt?
Kroil is widely regarded as the most effective penetrating oil for deeply corroded fasteners, followed closely by PB Blaster. Both outperform standard WD-40 in penetration tests on rust-bonded fasteners. For best results, apply generously, let soak for several hours or overnight, then tap the bolt head lightly with a hammer to drive the oil deeper before attempting removal. Reapply if the first soak doesn’t produce movement.
Can I remove a spinning bolt without drilling?
Yes, in many cases. If the problem is a co-rotating nut, no drilling is needed at all — simply hold the nut and the bolt backs right out. If the bolt head is intact and the threads have partial engagement, locking pliers, a bolt extractor driven into the existing head recess, or a welded-on nut can remove the bolt without drilling. Drilling is only necessary when all other methods fail or when the bolt must be destroyed to free the joint.
Why does a bolt spin but not come out in car door panels?
Car door panels almost always use cage nuts or clip nuts embedded in the metal door frame. These nuts are designed to stay fixed while the bolt threads in, but they can break free from their retaining cage over time — especially on older vehicles. When the cage nut spins, every turn of the bolt turns the nut too and nothing unthreads. The fix is to access the back of the panel (often by removing inner door trim) and hold the nut stationary while turning the bolt.
What is a bolt extractor and how does it work?
A bolt extractor (or easy-out) is a hardened tool with reverse-spiral flutes. You drill a pilot hole into the center of the damaged bolt, insert the extractor, and turn it counterclockwise with a socket or tap wrench. As you apply torque, the reverse flutes dig deeper into the bolt material — the more torque you apply, the tighter the extractor grips. Simultaneously, the counterclockwise rotation unscrews the bolt from its hole. Extractors work best when the bolt still has some thread engagement and the pilot hole is perfectly centered.
Is it safe to use a torch on a spinning bolt to loosen it?
Yes, when used correctly on steel components in a safe environment. Heat causes the metal around the bolt to expand slightly, which breaks the rust or corrosion bond between the bolt shank and the hole. Use a propane or MAP gas torch and heat the area around the bolt head — not the bolt head itself — for 20 to 30 seconds. Then attempt removal quickly while the metal is still warm. Never use heat near fuel lines, rubber hoses, electrical wiring, brake components, or painted surfaces.
Conclusion
A bolt that spins but won’t come out is a solvable problem every time. The key is diagnosing the cause correctly before you start and choosing the right method for your specific situation.
Start with the least invasive approach: hold the nut, soak with penetrating oil, use locking pliers. Escalate to extractors or drilling only when simpler methods don’t apply.
And always stop the moment you realize a bolt is freewheeling early intervention is what separates a 10-minute fix from a two-hour ordeal.
With the methods in this guide, you have everything you need to remove that bolt cleanly, protect the surrounding material, and make sure it never spins again.

- Top 10 Best Helmet For A Running Back 2026 - September 16, 2026
- Best Bug Remover For Car Wash 2026 - September 16, 2026
- Best Bug And Bird Poop Remover For Cars 2026 - September 15, 2026


3 Comments