Can’t Get Crusty Screw Out Of Battery Car: 3 Ways To Remove

A crusty battery-terminal screw usually comes loose after you remove the corrosion around the screw head and clamp. Brush away the buildup, apply corrosion neutralizer, use a small amount of penetrating oil on the threads, and loosen the screw with steady pressure. Do not keep forcing it if the head starts to strip.
Corrosion and clamping force can trap the screw tightly. Disconnect the cable, clean the hardware, and reconnect it only after the post and clamp have bright metal contact surfaces. Expect the job to take 15 to 45 minutes, depending on how badly the screw is seized.
Key Takeaways
- Stop before stripping the screw. A damaged screw head can leave you replacing the terminal stud or cable clamp.
- Use color as a clue. White-gray buildup can indicate sulfation associated with undercharging; blue-green buildup points to copper sulfate from copper corrosion.
- Disconnect correctly. Remove the negative cable first, then the positive, to reduce short-circuit risk.
- Clean the contact surfaces. Brush away dry crust, wipe off residue, and reinstall the clamp clean and tight.
- Neutralize and protect. Use a corrosion neutralizer as directed, then apply terminal protection grease after tightening.
- Check for battery or charging problems. Corrosion that returns quickly can point to an alternator, regulator, battery, or connection issue.
Can’t Get a Crusty Screw Out of a Car Battery Terminal
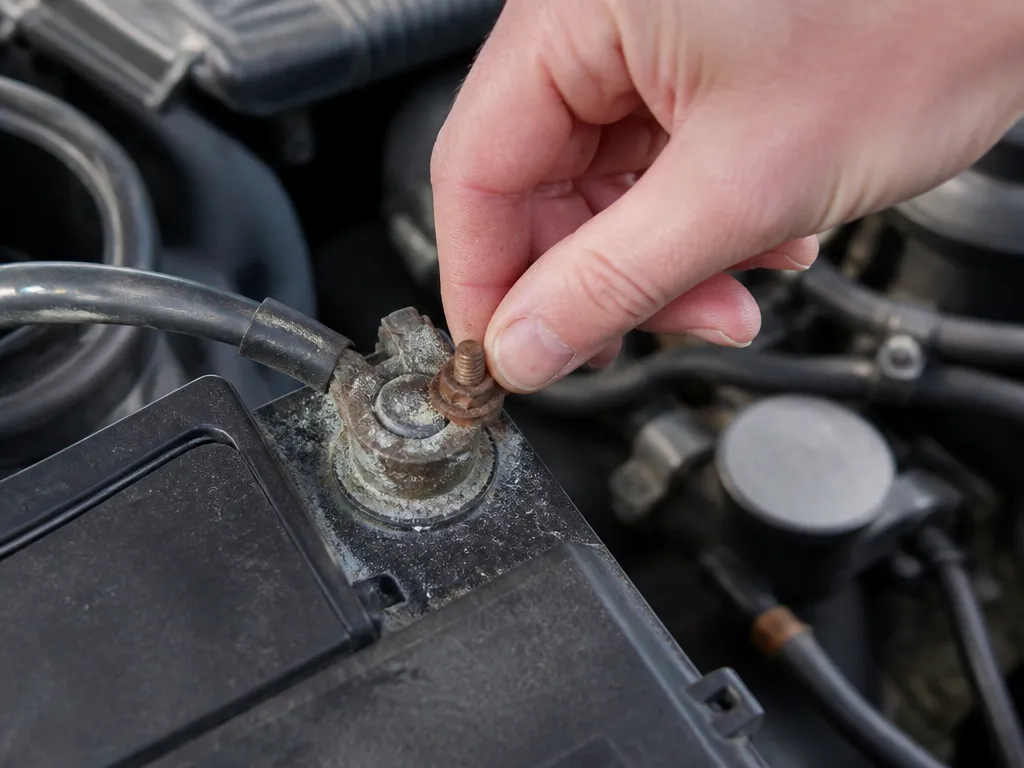
A crusty screw often refuses to turn because corrosion creates a hard salt buildup that grips the threads and bonds the cable clamp to the battery post. The clamp may also be under pressure, making the screw feel welded in place.
Your goal is to loosen the cable clamp without damaging the stud, then clean both contact surfaces down to bright metal. Continued force can strip the screw, twist the cable, or break a brittle lead-on battery component.
If the screw turns but does not loosen, the threads may be intact while corrosion holds the clamp ring against the terminal. Cleaning the clamp face and screw recess can remove that interference and let the screw work normally.
Make room before you start. Remove covers, reposition tools, and make sure the wrench or socket sits squarely on the screw. Off-angle pressure rounds screw heads and can leave you needing a replacement clamp.
What Causes Car Battery Corrosion and Buildup
Car battery corrosion comes from a chemical reaction involving battery vapors, moisture, and the metal around the terminals. Lead-acid batteries release a small amount of gas during normal operation. When those gases mix with air and moisture, they can form deposits around the posts and clamps.
These deposits insulate the connection, increase resistance, and can contribute to hard starts, dim lights, and faster battery drain.
Humidity and battery age make the problem worse. Road salt and salty coastal air can accelerate corrosion around the battery area. As a battery ages, its terminal seals can weaken, allowing more vapor and moisture to reach the surrounding metal.
Overcharging can also increase corrosion. An alternator producing excessive voltage or a failing regulator can cause the battery to vent more aggressively, leaving more corrosive residue around the terminals.
Loose connections create resistance and heat. If a clamp was not tightened properly, vibration can loosen it while corrosion grows in the gap.
How to Identify Corrosion, Loose Terminals, and Risk
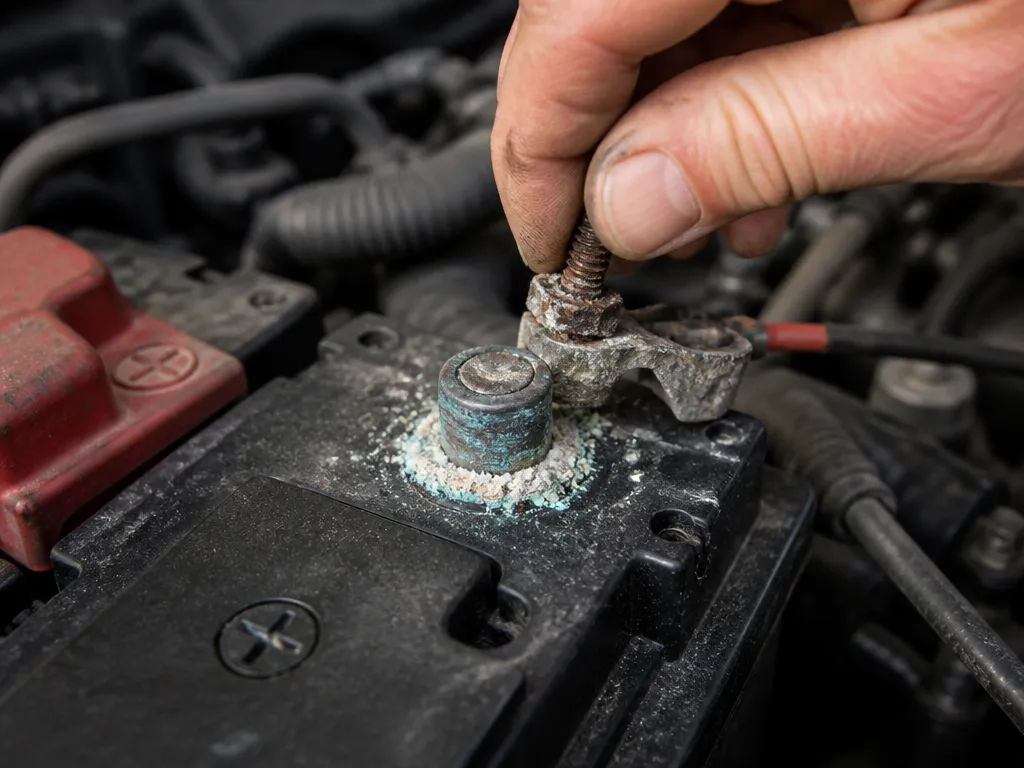
Texture and location provide useful clues about the buildup. The condition of the deposit and the area where it forms can help show whether the problem is active or longstanding.
Chalky powder around the clamp means an insulating layer may be separating the cable from the battery post. Wet or expanding crust suggests an active chemical reaction rather than an old surface stain.
Check for a loose terminal with the car turned off. Hold the cable near the clamp and move it gently. Any wobble means the connection needs cleaning and tightening before you rely on it.
Wear eye protection and chemical-resistant gloves before touching the buildup. Battery residue can irritate skin and eyes, and battery vapors can be unpleasant when you work close to the top of the case.
Your Essential Toolkit for Safe Battery Cleaning
Basic tools are enough for most stuck screws, but the right equipment helps you avoid slipping, spreading corrosion, or damaging the battery.
- Safety gear. Safety goggles and chemical-resistant gloves.
- Hand tools. The correct-size wrench or socket for the clamp hardware, plus a screwdriver if the clamp uses a separate screw.
- Brushes. A battery-terminal wire brush or small brass/steel brush, plus a toothbrush for tight corners.
- Cleaning solution. A battery-terminal corrosion neutralizer or a carefully used baking soda solution, along with clean rags or paper towels.
- Penetration support. Penetrating oil for seized screw threads. Use it sparingly, keep it off plastic when possible, and do not soak the battery.
- Protection. Terminal protection grease or an anti-corrosion coating for reassembly.
- Optional heat. A warm environment, not an open flame, can help loosen crust on older clamps.
Choose tools that let you apply steady torque without slipping. If corrosion covers the screw head, clear the buildup first so the tool can seat fully.
If you cannot tell whether the screw or clamp is seized, clean the visible corrosion around the screw head and clamp face before trying again. That quick step often reveals whether the problem is a damaged screw or a clamp bonded to the post.
Step-by-Step for Removing Corrosion and Stuck Hardware
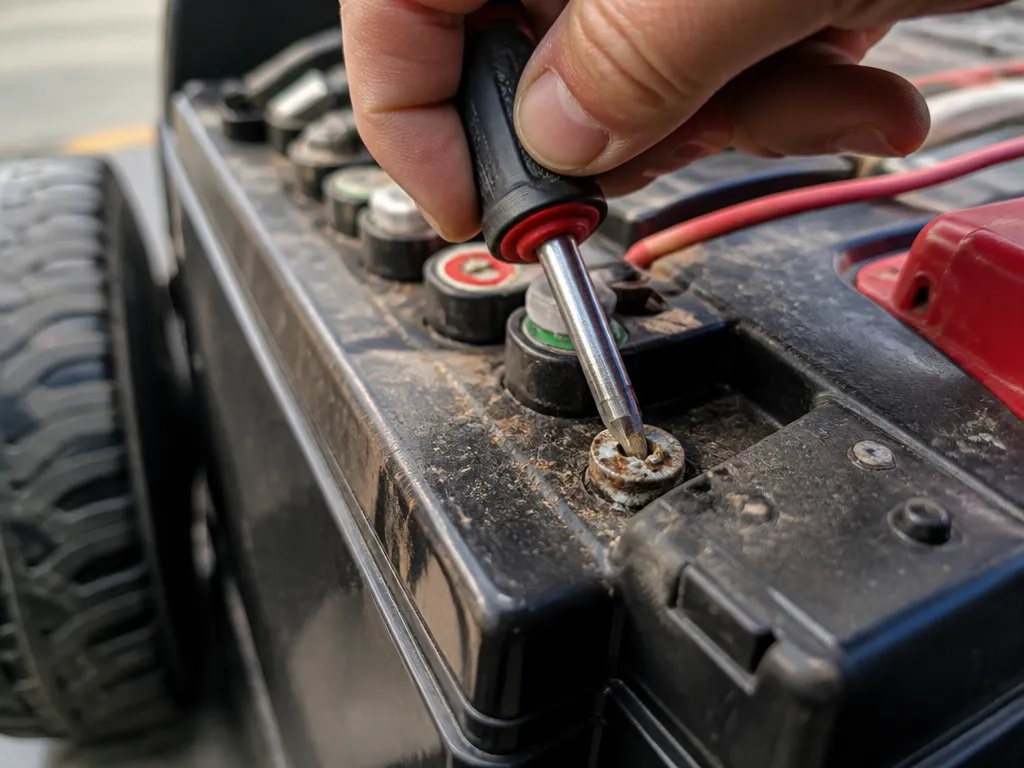
Follow this order to avoid stripping the screw or twisting the cable end.
- Park safely and turn everything off. Shut off the engine, remove the keys, and open the hood. Let the battery area cool if the car was recently running.
- Put on safety gear. Wear gloves and eye protection before touching corrosion or cleaning products.
- Remove the negative cable first. Loosen and remove the negative clamp, then remove the positive clamp. This reduces short-circuit risk.
- Clear corrosion around the screw head. Brush away loose crust so the wrench can grip and the neutralizer can reach the seam.
- Apply neutralizer and wait briefly. Use a corrosion-neutralizing cleaner according to its label directions, or follow a gentle baking soda neutralization method carefully. Give it time to work, then wipe away the residue.
- Loosen the clamp hardware slowly. Use the correct-size socket or wrench. If the screw still will not move, clean it again and apply a small amount of penetrating oil to the threads.
- Use controlled warmth if needed. Warm the clamp area gently without using a flame, then try loosening the screw again. Never heat the battery directly or use an open flame around it.
- Keep the cable from twisting. Stop if the cable end begins to rotate. The clamp should loosen; the cable should not take the torque.
- Remove the cable and clean the contact surfaces. Brush the battery post and the inside of the clamp until you see clean metal.
- Wipe and dry everything. Remove crust, cleaner film, and moisture from the areas where the metal must make direct contact.
- Reinstall and tighten firmly. Place the cable back on the clean post, align the contact surfaces, and tighten the clamp hardware securely.
- Apply terminal protection. Add terminal protection grease or gel after tightening to reduce future corrosion.
Treat a seized screw as a corrosion problem before treating it as a torque problem. Removing crust from the screw recess and clamp face can reduce the force needed to turn it. Gradual loosening is safer than a sudden hard pull.
Stop if the stud or clamp threads look damaged. A stripped or twisted stud may not hold the cable securely, leaving you with unreliable starting and recurring corrosion.
How to Prevent Corrosion From Returning
Clean metal, a tight connection, and a healthy charging system do most of the prevention work. Battery vapors and moisture react with exposed metal, while loose clamps add resistance and heat that speed the process.
After cleaning the terminal and clamp, tighten the connection until the clamp cannot move with gentle pressure. Do not leave it loose, but avoid damaging the hardware by overtightening.
Apply terminal protection grease or an anti-corrosion coating after the connection is tight. The coating helps limit contact with moisture and reactive battery vapors.
Keep the battery area dry and clean. If you wash the engine bay, avoid directing high-pressure water at the battery. A damp area around the terminals can speed up new corrosion.
Battery age matters too. As seals weaken near the end of the battery’s life, corrosion can worsen even when the terminals are cleaned correctly.
How to Clean Corroded Car Battery Terminals
Cleaning works best when you treat the job as both a chemistry problem and a contact problem. The deposits insulate the connection, so scraping away only the loose powder is not enough.
Disconnect the battery negative first, then positive. Brush off loose powder carefully so it does not reach your eyes or clothing. Apply a corrosion neutralizer according to the product directions and wipe the area until the residue clears.
Scrub the battery post and the inside of the cable clamp with a wire brush. Continue until you see clean metal rather than simply less buildup. If the clamp interior is deeply pitted or badly corroded, cleaning may not restore a dependable connection; replace the clamp or cable end when necessary.
Wipe away all residue with clean rags and let the parts dry completely. Reattach the cable, tighten it securely, and apply terminal protection to limit future moisture and chemical exposure.
Stop and inspect the battery if you find heavy corrosion or leaking around the case. A leaking battery may have an internal failure, and cleaning the terminals will usually provide only a temporary fix.
FAQ
Can a stuck battery-terminal screw be saved, or do I need a new clamp?
You can often save it by cleaning corrosion from the screw head and clamp face, neutralizing the deposits, and loosening the screw with steady torque. Replace the cable clamp or entire cable end if the stud threads are stripped, the clamp is cracked, or the screw no longer grips.
How long should cleaning corroded terminals take?
For most cars, plan for 15 to 45 minutes. That is usually enough time to disconnect the battery, brush off corrosion, neutralize the deposits, scrub to bright metal, and reinstall the clamp with proper tightening and terminal protection.
Is it safe to use penetrating oil on a crusty screw?
Use penetrating oil sparingly on the screw threads after brushing away visible crust. Avoid soaking the battery area, keep the oil off plastic parts when possible, and disconnect the battery before applying it.
What is the fastest way to tell if corrosion means a charging problem?
A charging-system test is the quickest check. Measure charging voltage with a multimeter or have the battery and alternator output tested against the vehicle manufacturer’s specifications.
What common mistake causes corrosion to come back quickly?
The usual causes are reinstalling the cable without cleaning to bright metal or leaving the clamp loose. Poor electrical contact increases resistance and heat, giving corrosion more opportunity to grow.

- Top 10 Best Helmet For Xtreme 125r 2026 - October 5, 2026
- Top 10 Best Helmet For Xpulse 200 2026 - October 5, 2026
- Top 10 Best Helmet For Xsr 155 2026 - October 5, 2026